Active Directory Certificate Services (ADCS) is the Server Role that allows you to build a public key infrastructure (PKI) and provide public key cryptography, digital certificates, and digital signature capabilities for your organization. Basically, what this means is rather than going to a third-party Certificate Authority (CA) to get PKI certificates and using their hosted services, you can handle this in-house.
In this blog I will be setting up a single ADCS server on my domain and configuring group policy to auto enroll my servers. For an enterprise environment you will deploy subordinate CA’s and shut down your root CA for security.
Benefits to Using ADCS
- Pull from Active Directory – You can use the existing endpoint identity information that exists in AD to register for certificates (to avoid re-registering).
- Leverage Existing Group Policy – You can configure AD Group Policies to dictate which users and machines are allowed which types of certificates.
- Automate Certificate Provisioning and Lifecycle Management – Once an endpoint comes online for the first time, a request is sent to AD to check which certificate types (called templates) the endpoint has access based on the Group Policy. Based on the results of that request, the endpoint requests the appropriate certificates, which are then sent back to the endpoint and installed. Certificates can be set to automatically renew, eliminating the worry over unexpected expiration and gaps in coverage.
- Silent Installation – As hinted above, the installation process is automatic and doesn’t require any end user (or IT) intervention.
Installing the ADCS Server Role:
The first step in configuring the environment is to identify a computer to be the Certificate Authority server for the Active Directory forest. This computer must be connected to a network with a server that has Windows Server 2008 (or later) Domain Name Service installed, and it must be joined to the Active Directory domain. In most cases, the computer designated to be the CA should not be a domain controller in a live production environment. To configure the computer as a Certificate Authority, you must install Microsoft Internet Information Services (IIS) and Certificate Services.
Open Server Manager and click Manage -> Add Roles and Features

Click Next:
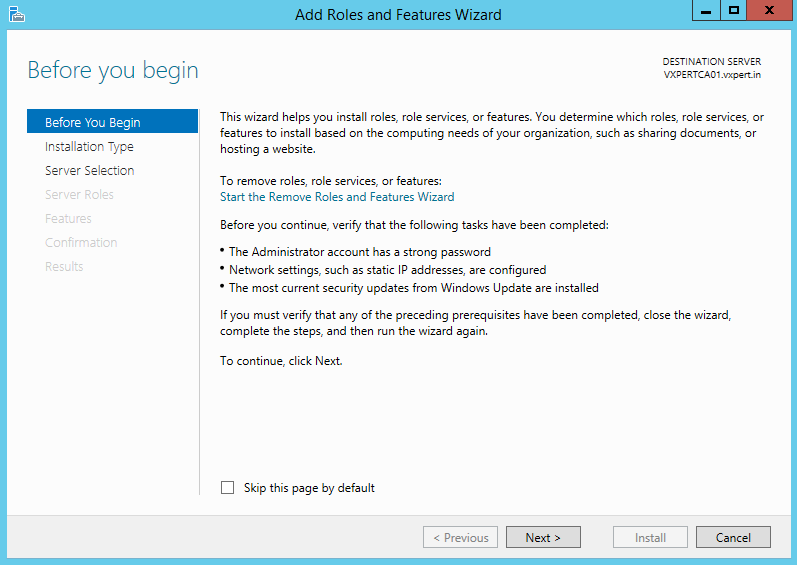
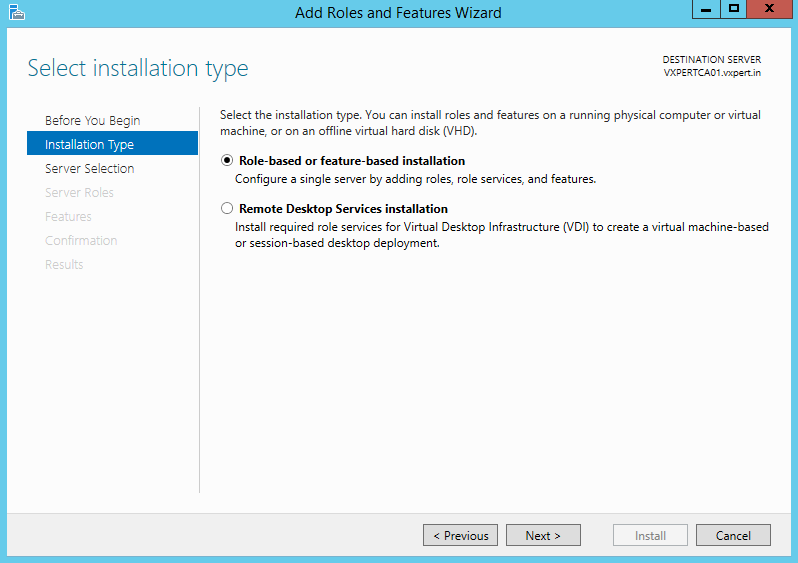
Select Role-based or feature-based installation and then click Next:
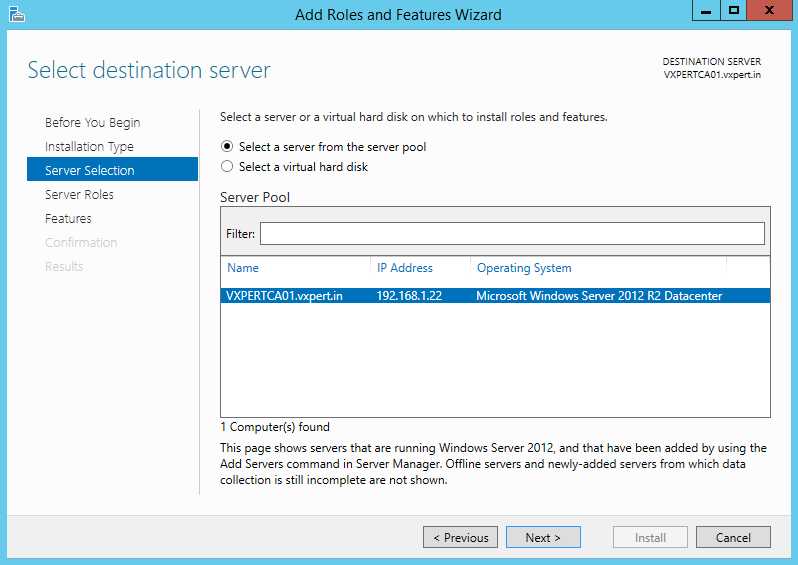
Select the server you want to install this role then click Next:
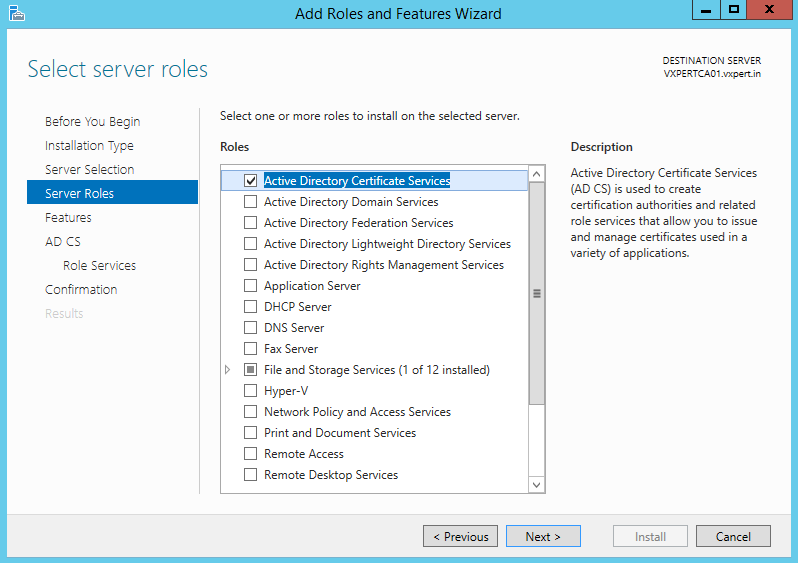
Select Active Directory Certificate Services then click Next:
On the pop-up window click the box Include management tools then Add Features:
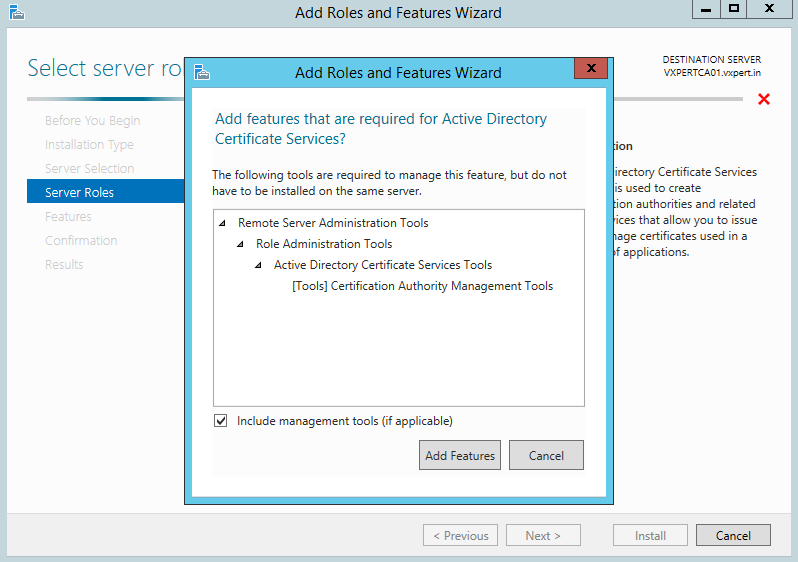
No additional Features are needed. Click Next:
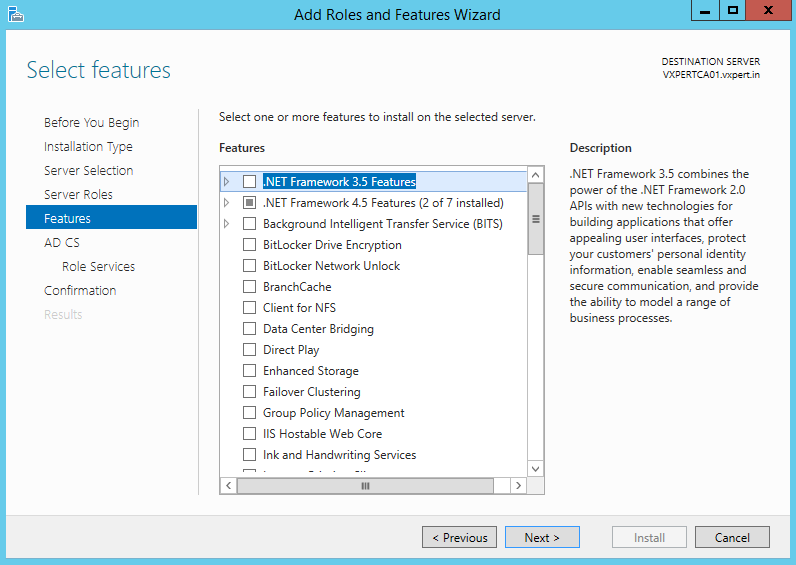
Click Next:
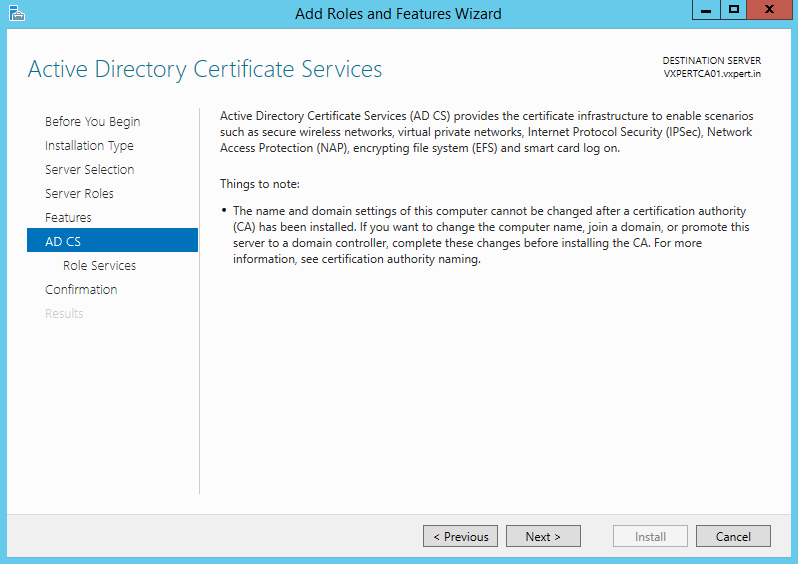
Select the services you want to enable. At a minimum enable Certificate Authority. Click Next:
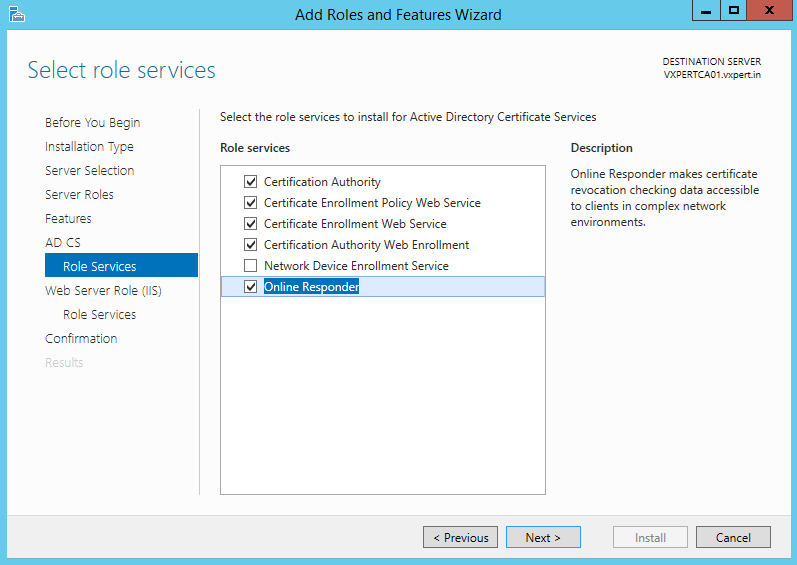
Click Next:
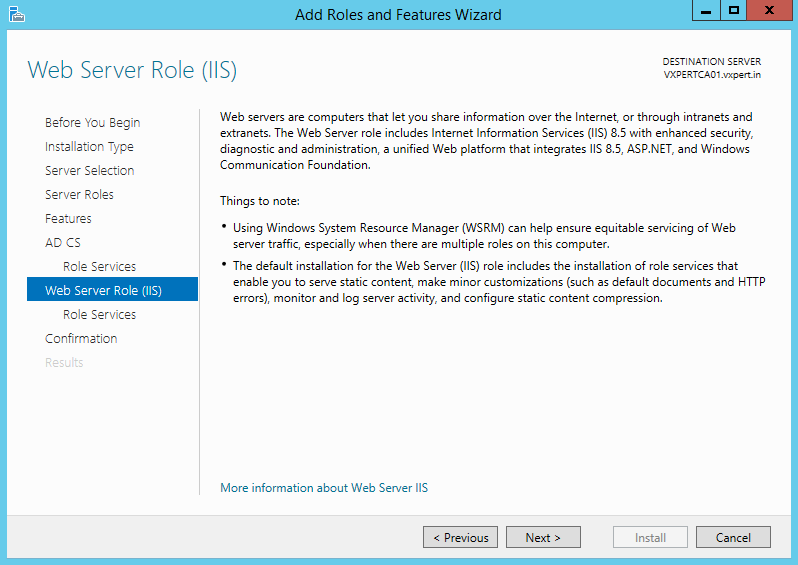
Continue with default values to install Web services and click Next
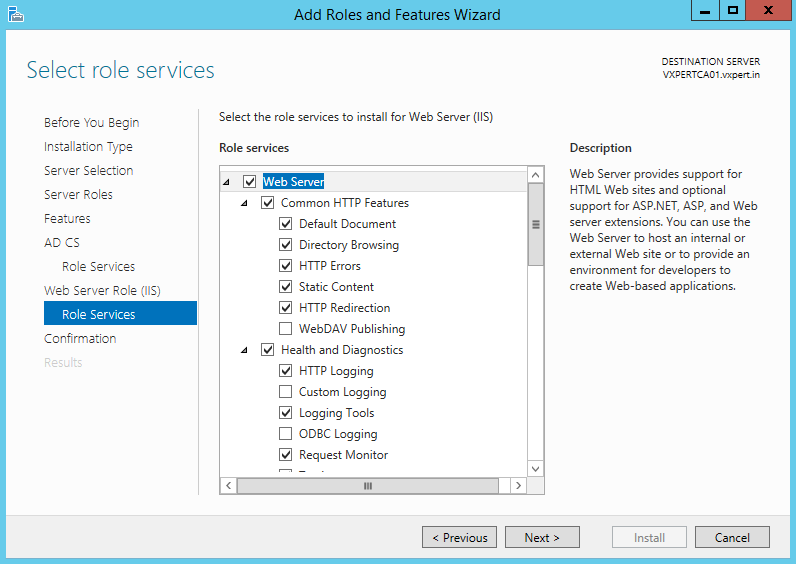
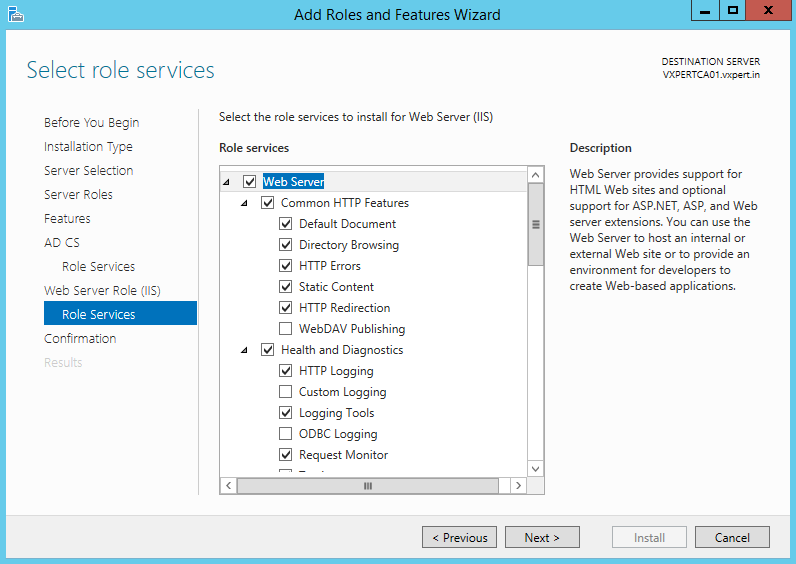
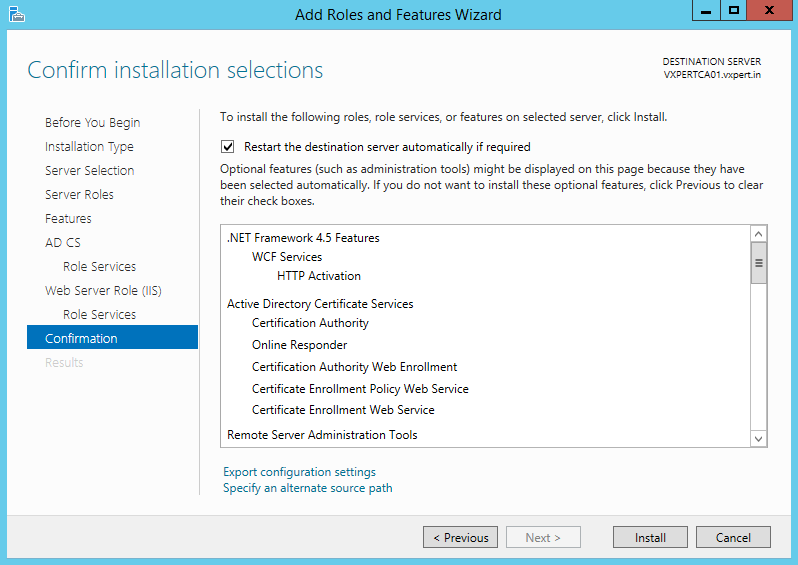
Select Restart destination server automatically if required and click Install
Installation will kick-in, and you can see the status
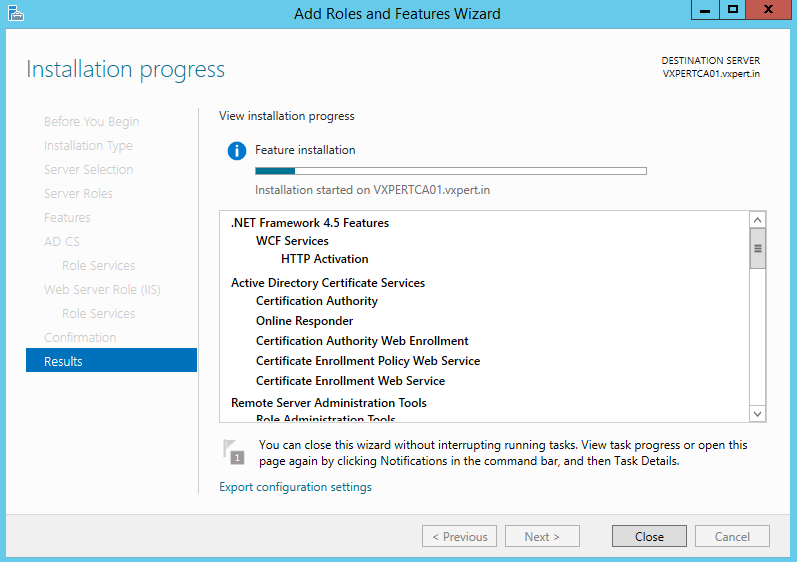
Once the installation is complete click Close:
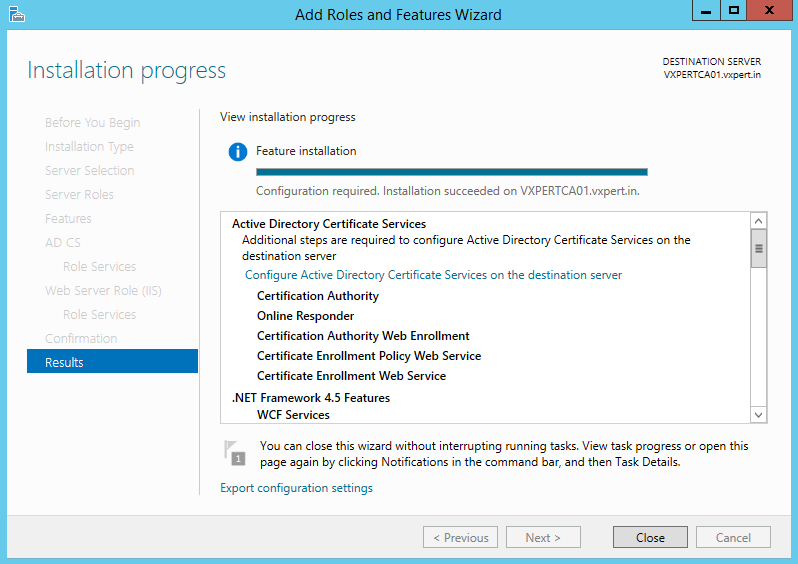
ADCS Post-Deployment Configuration
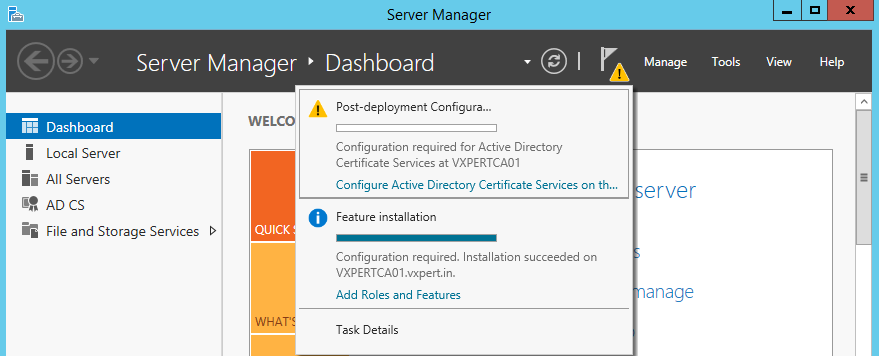
Back on Server Manager under Notifications click the message Configure the Active Directory Certificate Services on this server
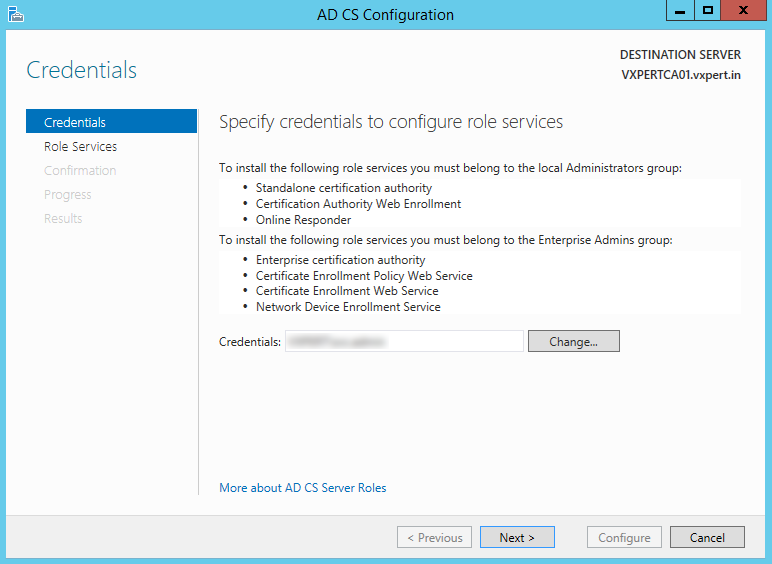
Select a user account that has the permissions depending on the role services you selected above. Click Next
Configure Certification Authority first and then we can proceed with other roles. Click Next:
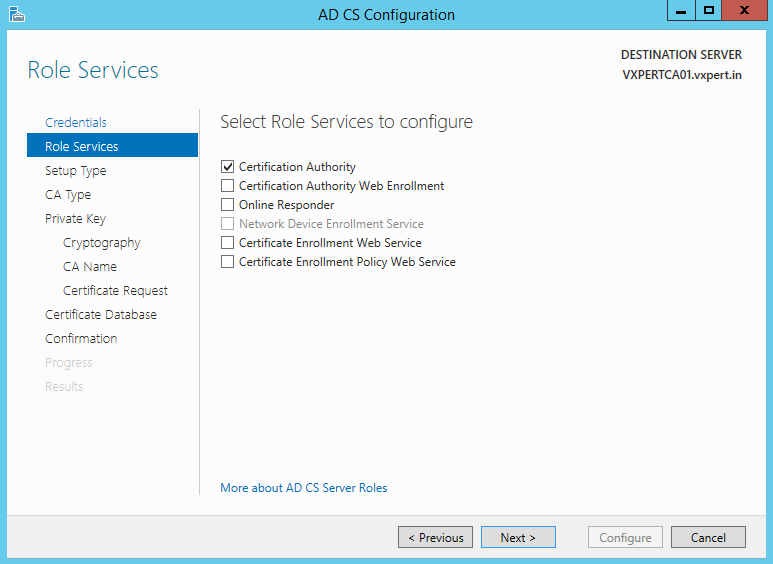
Since my CA server is joined in domain, I will select Enterprise CA. Click Next:
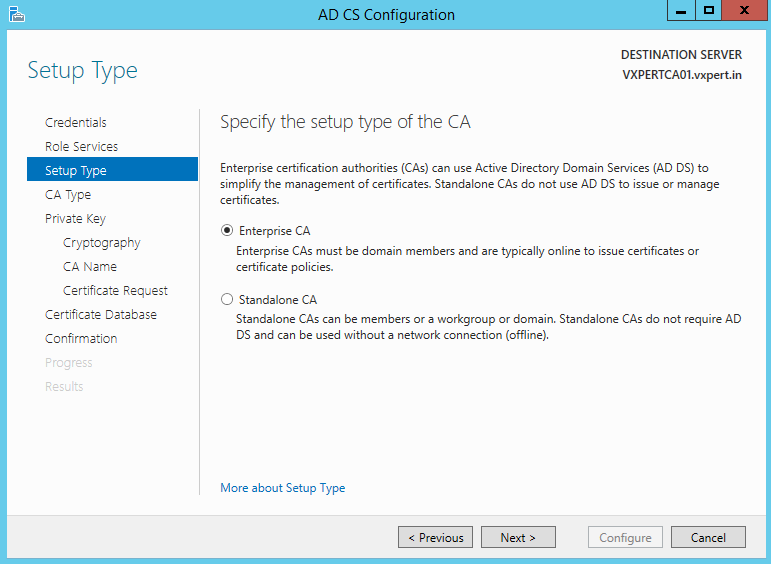
Since this is my first PKI server, I selected Root CA. Click Next:
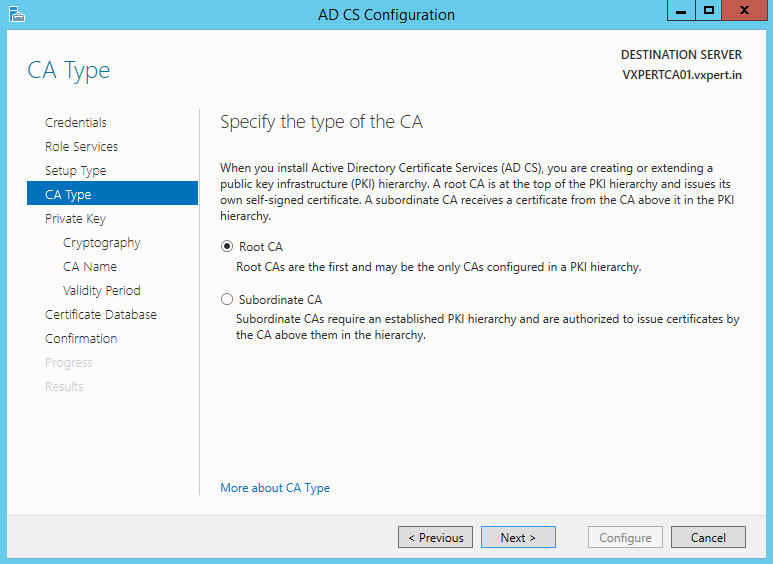
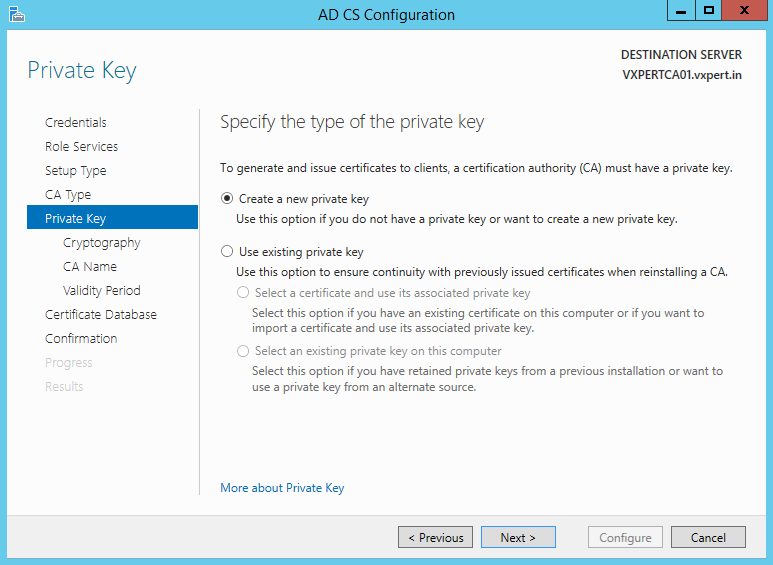
Create a new private key then click Next:
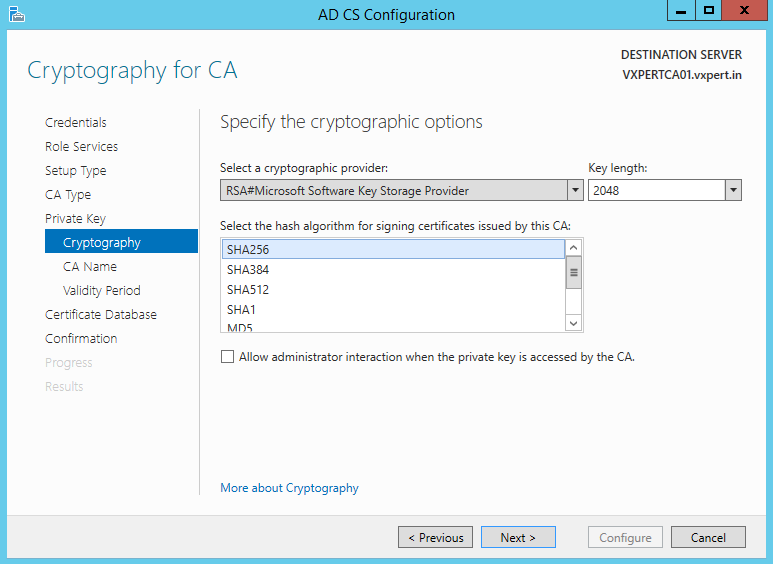
Enter your cryptographic options then click Next:
Note: Do not select SHA1 as it is being deprecated by all browsers and Microsoft Server Authentication; use SHA256 instead and key length as 2048.
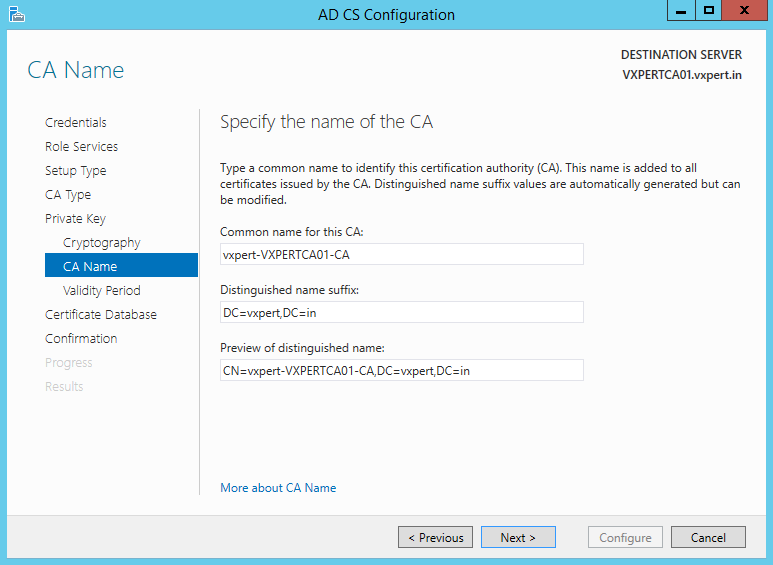
The fields should be pre-populated, but you can change the Common name if you wish. Click Next:
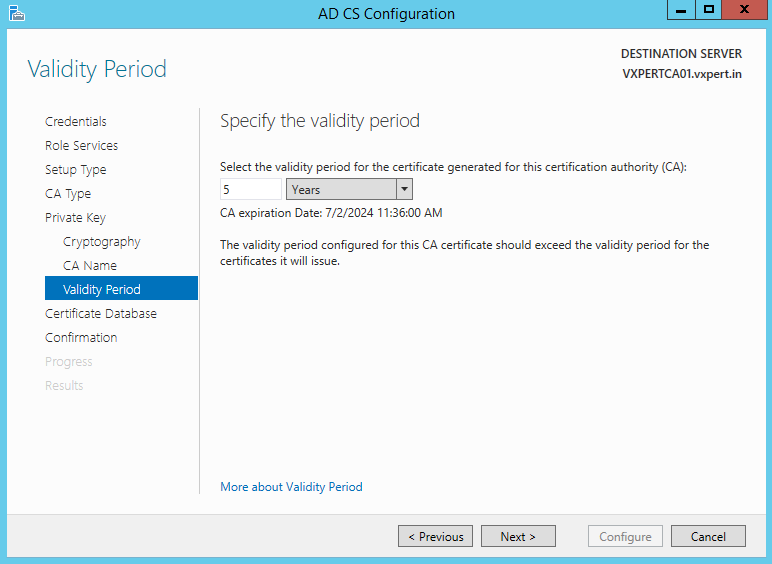
Enter a validity period. This is how often the CA certificate will expire and will need to be renew on subordinate CA (if applicable).
Take note of the message: The validity period configured for the CA certificate should exceed the validity period for certificates it will issue.
Click Next:
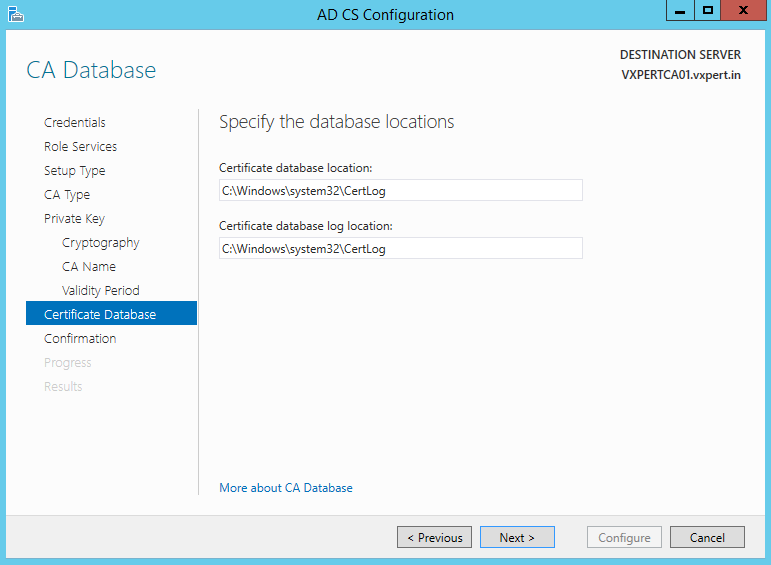
Suggest leaving these as defaults. Click Next:
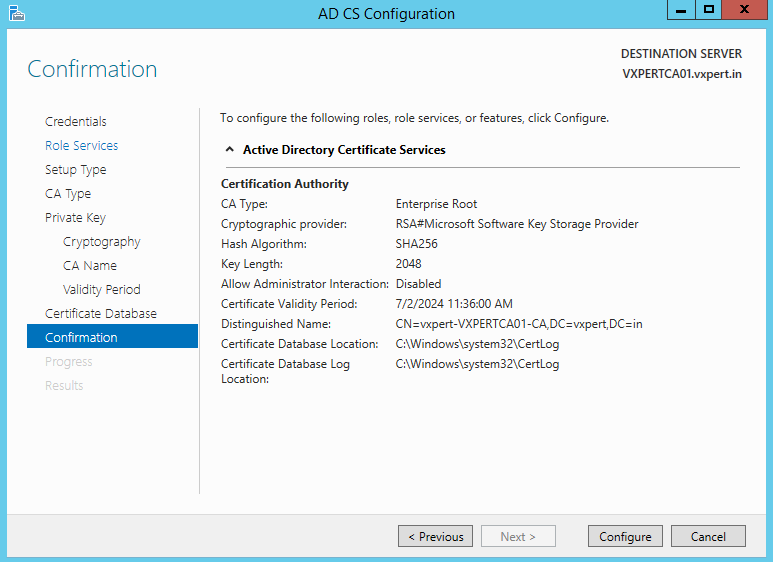
Review and ensure the summary is correct then click Configure:
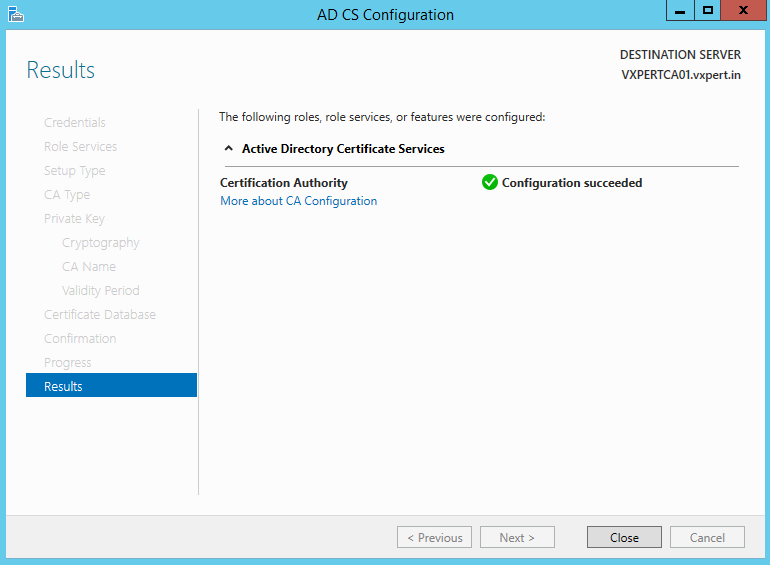
Finished! Click Close:
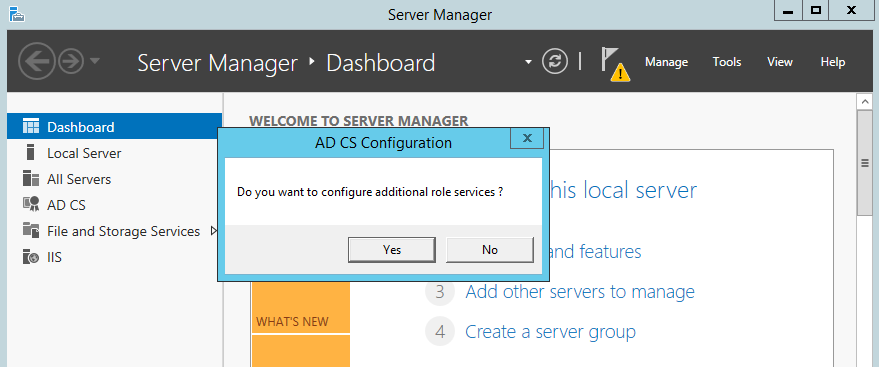
Now will get a pop-up like below to configure other role services, Click Yes
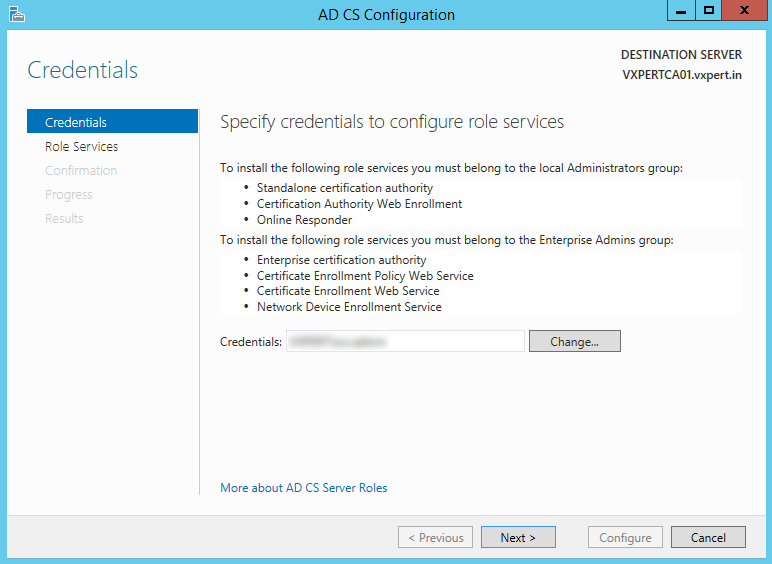
Select the same account which you configured for Certificate Authority and click Next
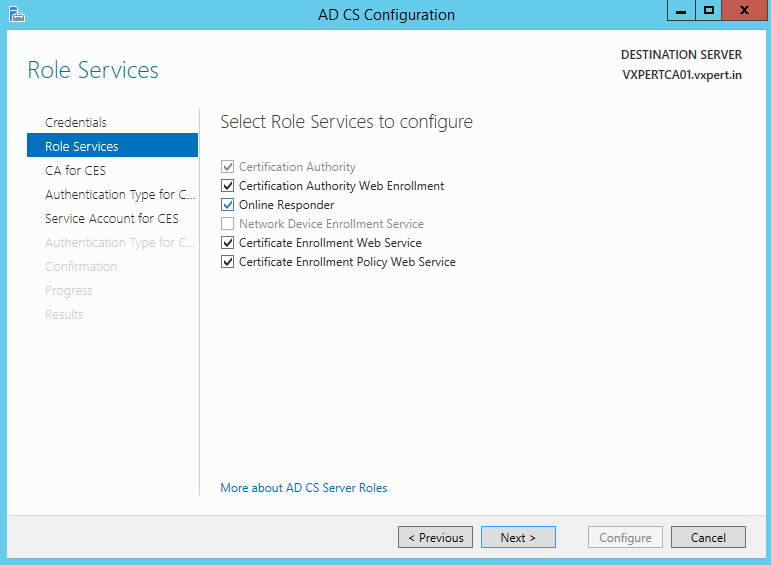
Select other four role services to configure and click Next
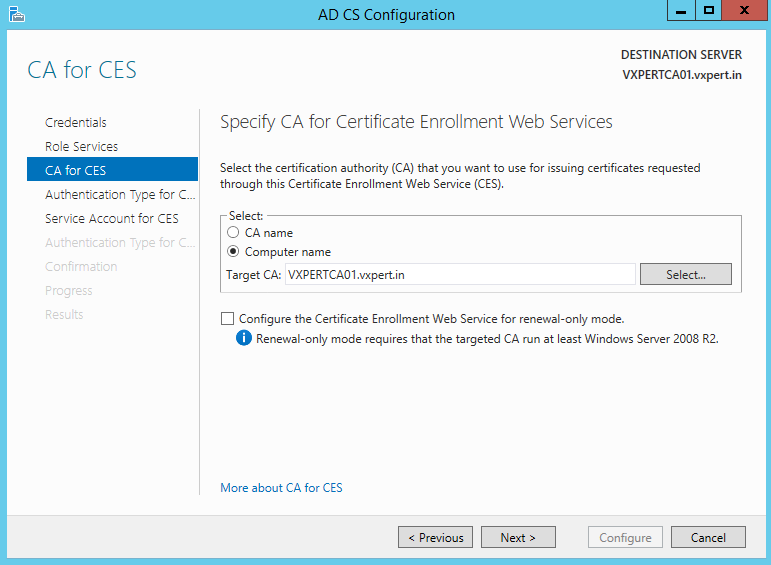
Specify your Certificate Authority server name for Web Enrolment and click Next
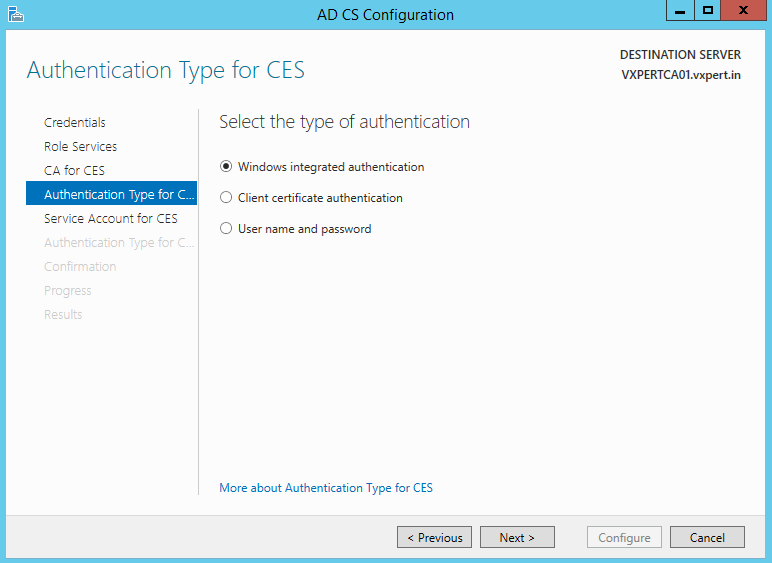
Select the authentication method for Certificate Enrollment Service and click Next
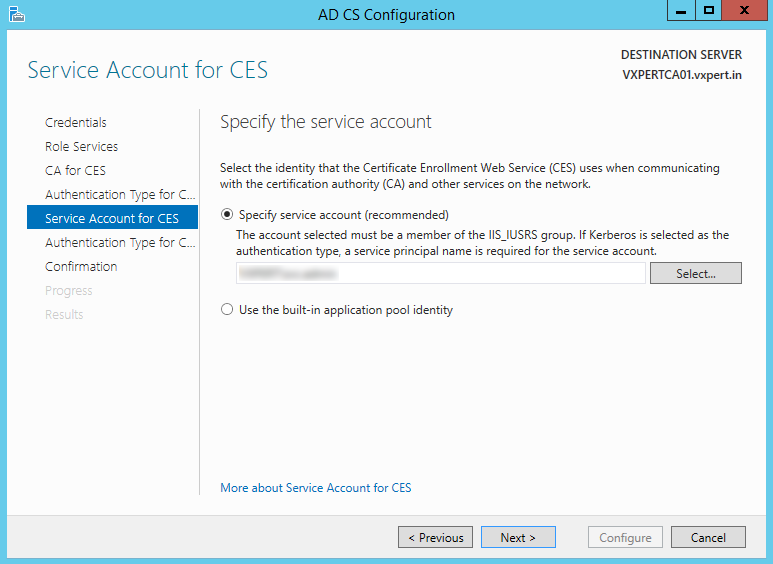
Select the identity that Certificate Enrollment Web Service(CES) uses to communicate with Certificate Authority(CA)
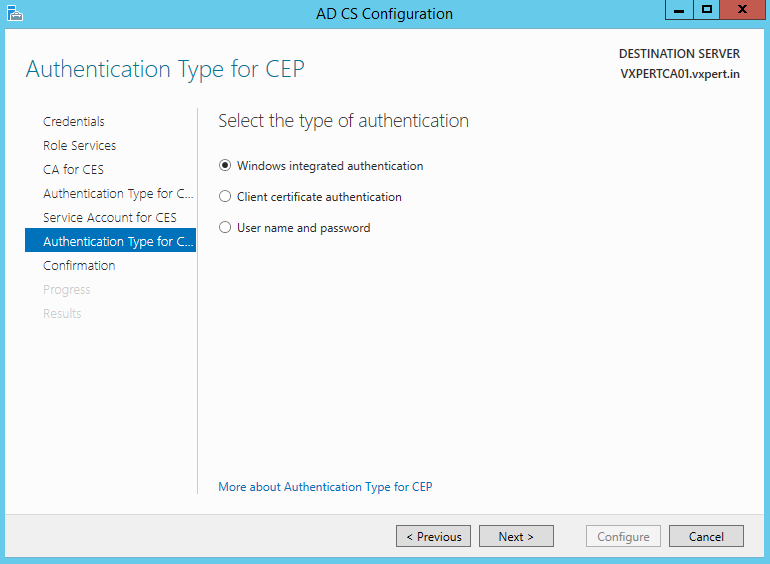
Select the authentication type for Certificate Enrollment Policy Web Service
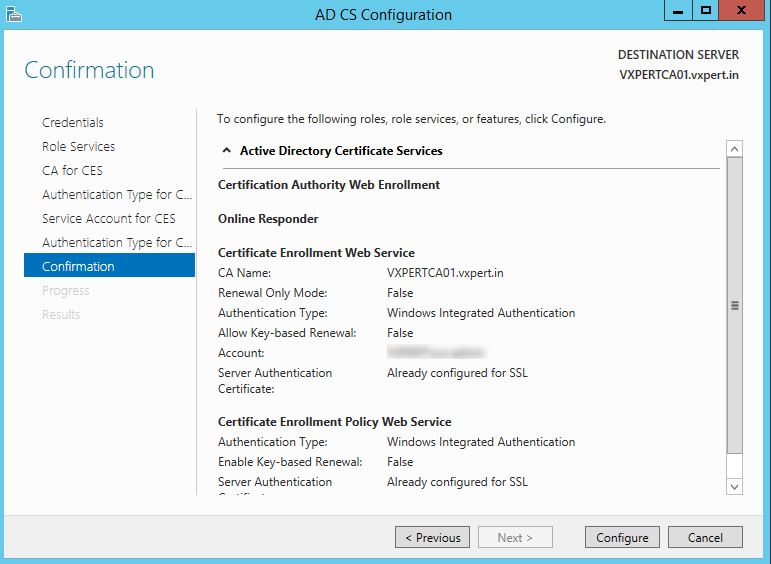
Review and confirm the values you have provided for configuration
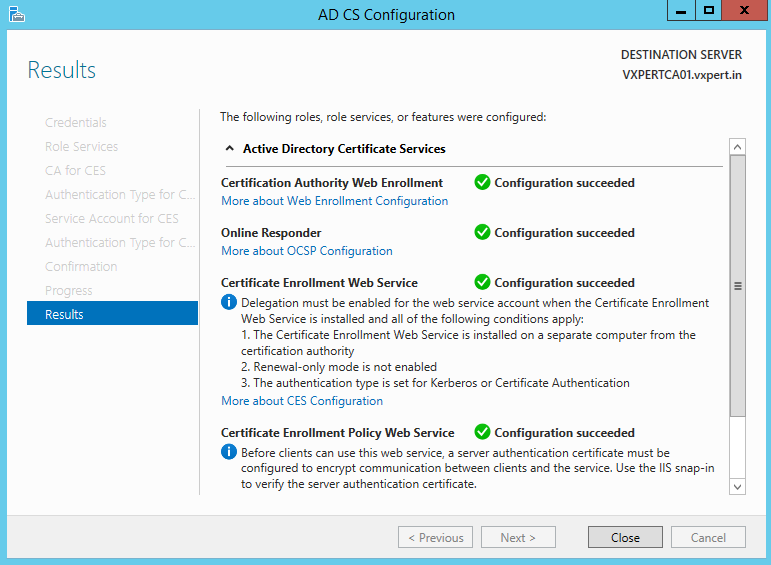
Now we have finished with all configuration of CA server, reboot the server once successful.
Create Certificate Template for Workstation & Client Authentication
This step is to create a certificate template that will enable your domain computers to request certificates from your PKI server.
Open Control Panel then go to Administrative Tools -> Certification Authority:

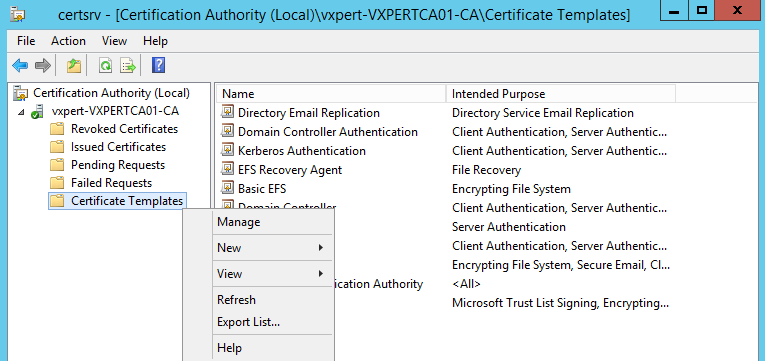
Right click Certificate Templates then Manage:
Scroll down to Workstation Authentication, right click then select Duplicate Template:

On the General Tab enter a template display name then select a validity period. Click the two boxed options:
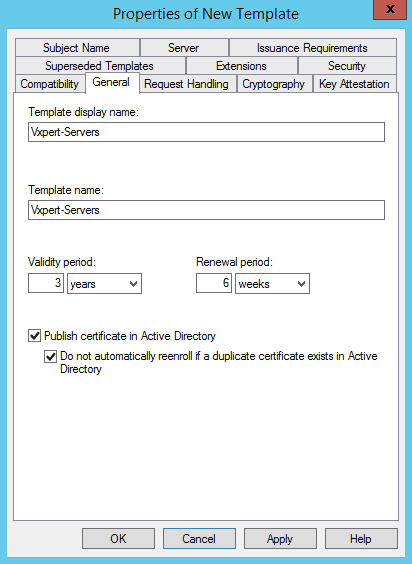
On the Security tab add Domain Computers as this will give permission to your Domain Computers. Check the boxes for Read and Autoenroll:
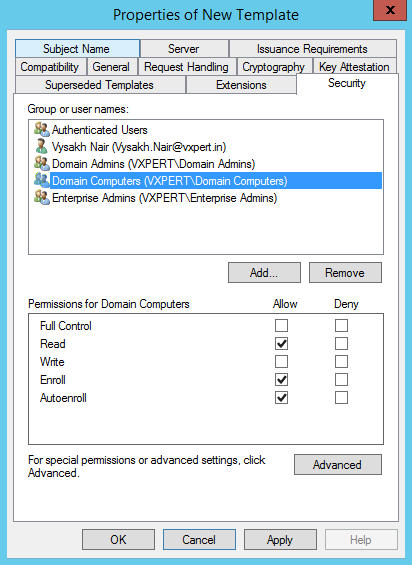
On the Extensions tab click Application Policies then Edit:
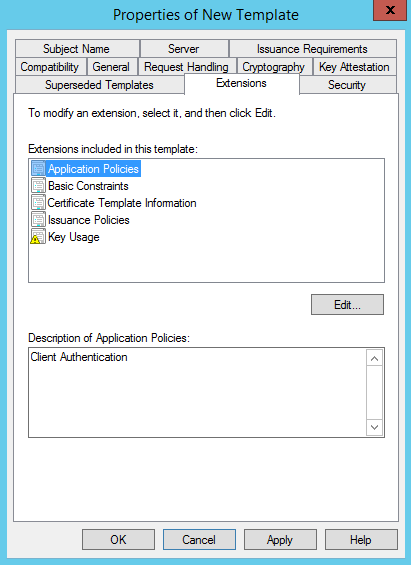
Click Add -> Server Authentication then Ok:
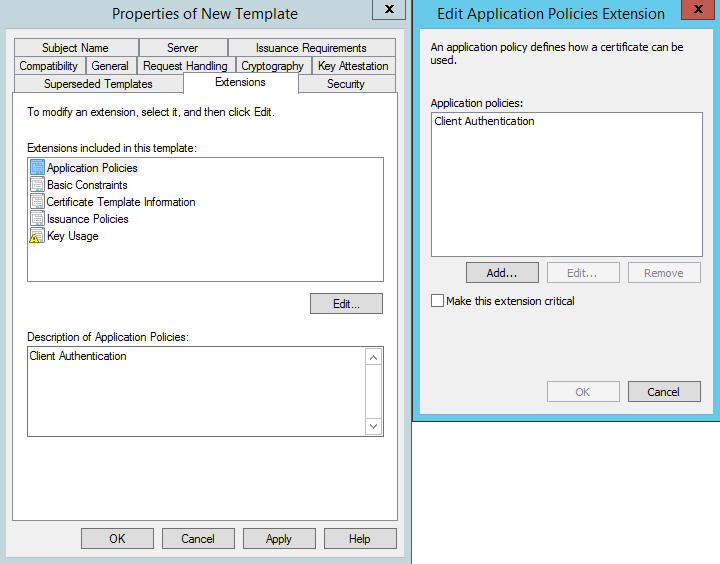
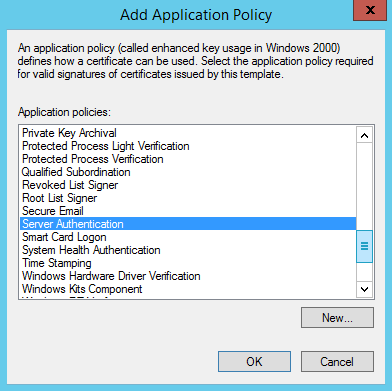
Ensure Server Authentication is selected then click Ok:
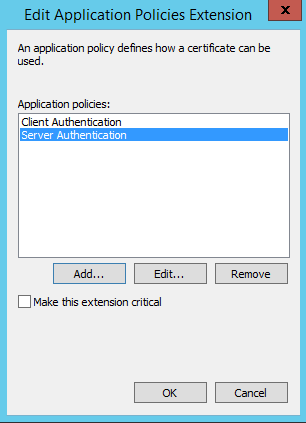
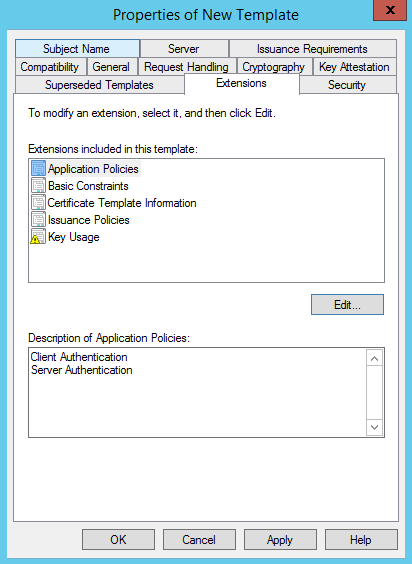
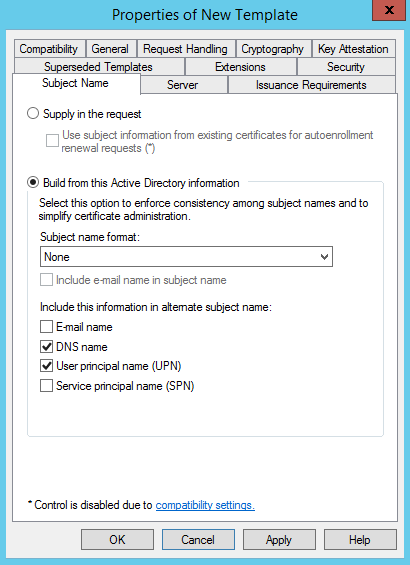
On the Subject Name tab click the DNS name box to add the DNS name to the SAN of the certificate. Click Apply and Ok:
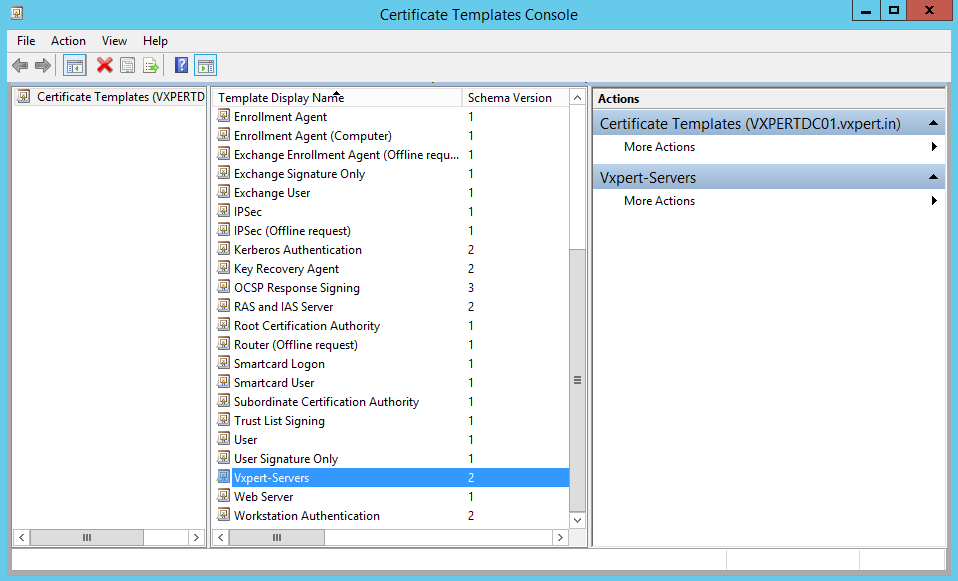
You will now have a new template with the intended purposes of Client Authentication, Server Authentication. You can now close the Certificate Templates Console window
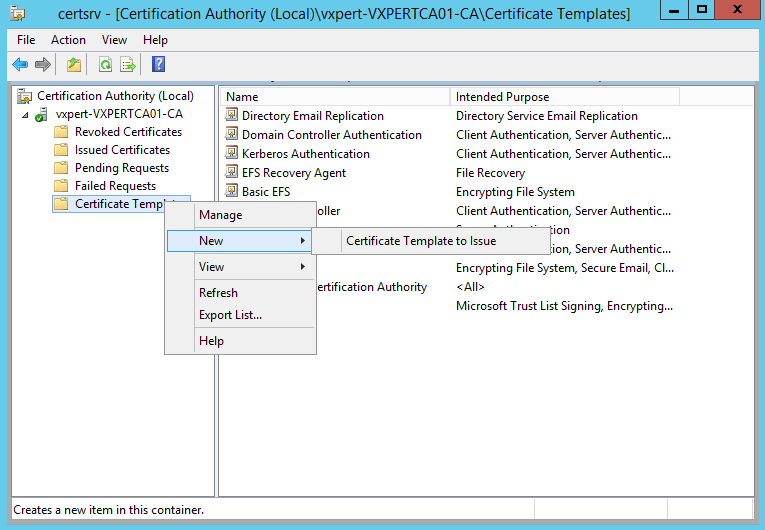
Back on the Certification Authority window, right click Certification Template -> New -> Certificate Template to Issue:
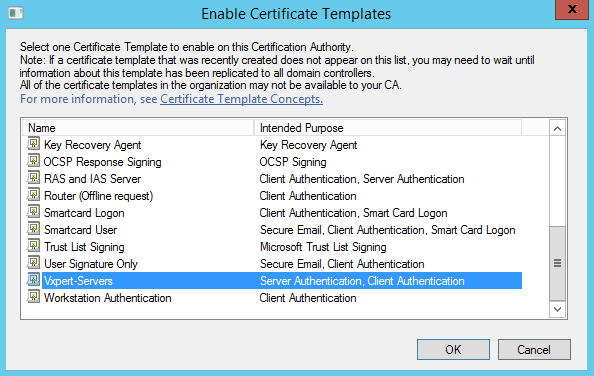
Select the Certificate Template we created then click Ok. The custom template should now show under Certificate Templates.
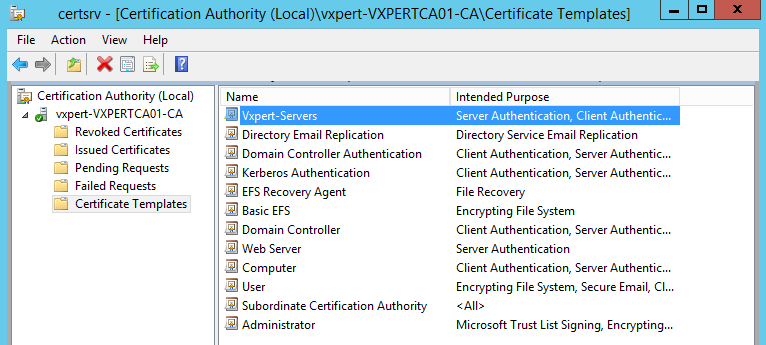
The new certificate will be visible on main console now
Configure Group Policy for Automatic Certificate Enrollment:
This step is to create the group policy so computer will request a certificate from your PKI server.
On your Domain Controller open Control Panel then Administrative Tools -> Group Policy Management

You can edit the Default Domain Policy so all computers are configured to request a certificate from your PKI, or you can create a policy in a specific OU. I opted to create a new policy for my Windows Servers OU.
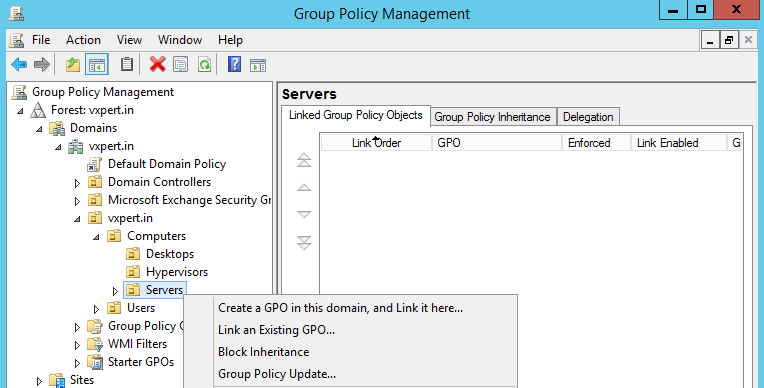
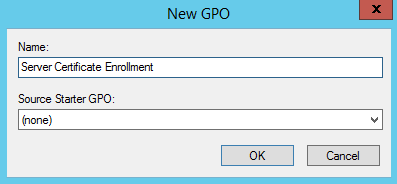
Enter a name and click Ok:
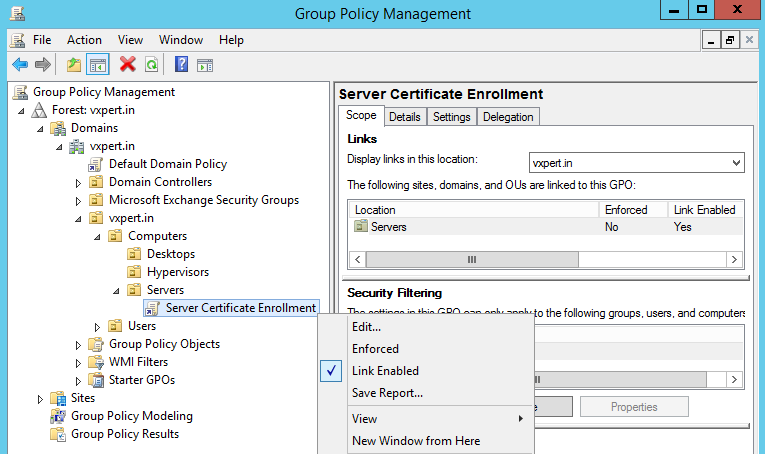
Now right click the new policy then click Edit:
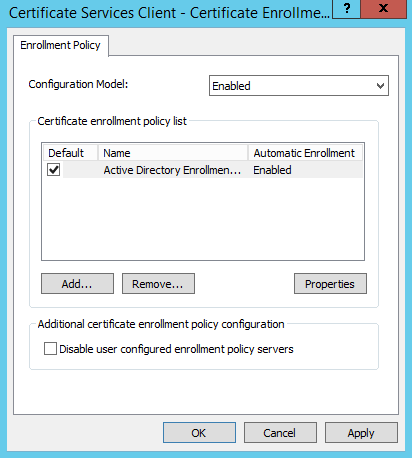
Drill down to Public Key Policies. In the right pane right click Certificate Services Client – Certificate Enrollment Policy then Properties:
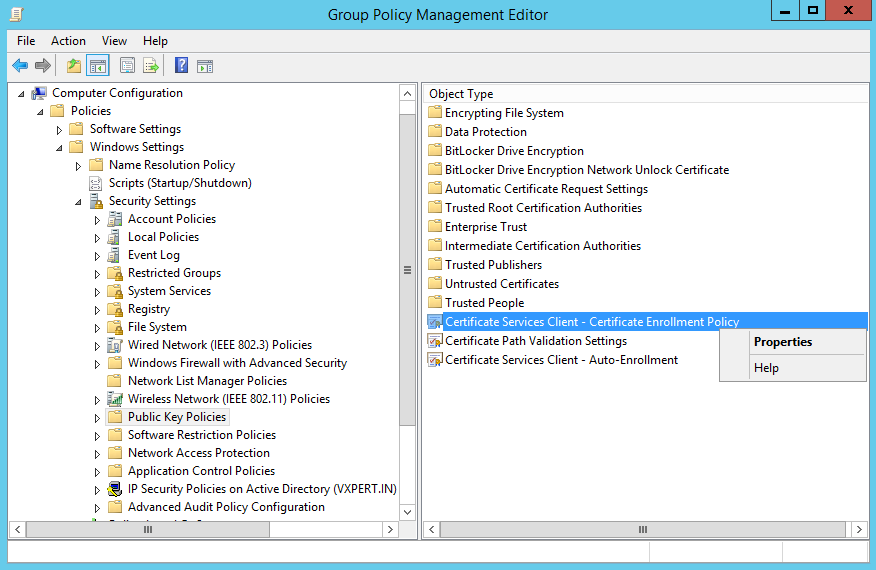
Change the drop-down menu to Enabled then click Apply -> Ok:
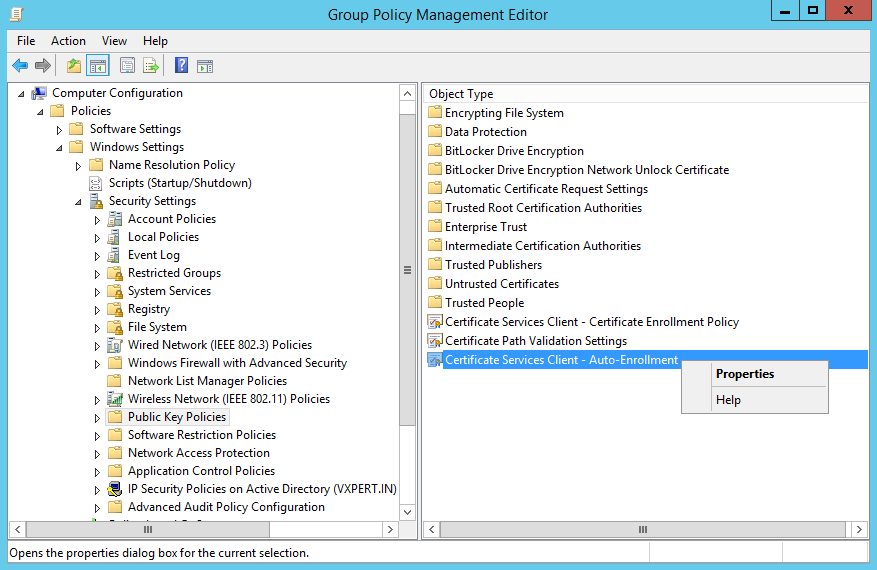
Now right click Certificate Services Client – Auto-Enrollment then Properties:
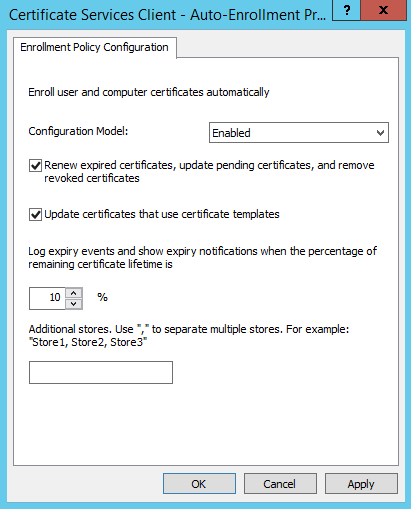
Change the drop-down menu to Enabled and check the two boxes. Click Apply then Ok. You can now exit the Group Policy Management Editor:
Right click your Policy then click Enforced to enable the policy:
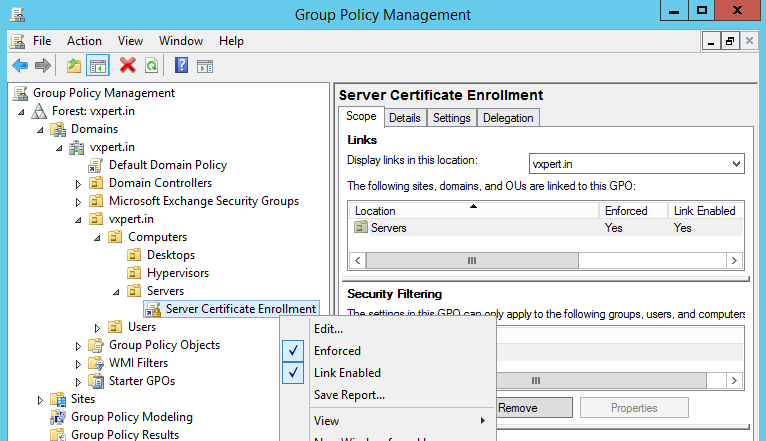
Also right click the OU and click Group Policy Update to accelerate getting the policy pushed out.
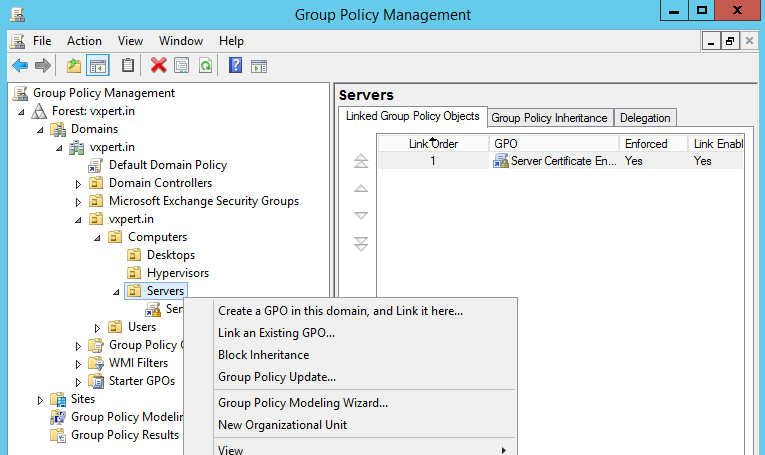
Click Yes to push the Group Policy Updates
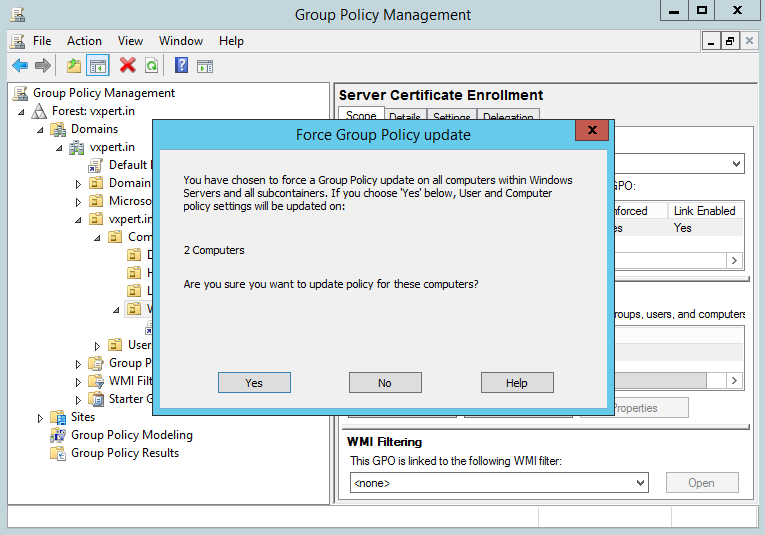
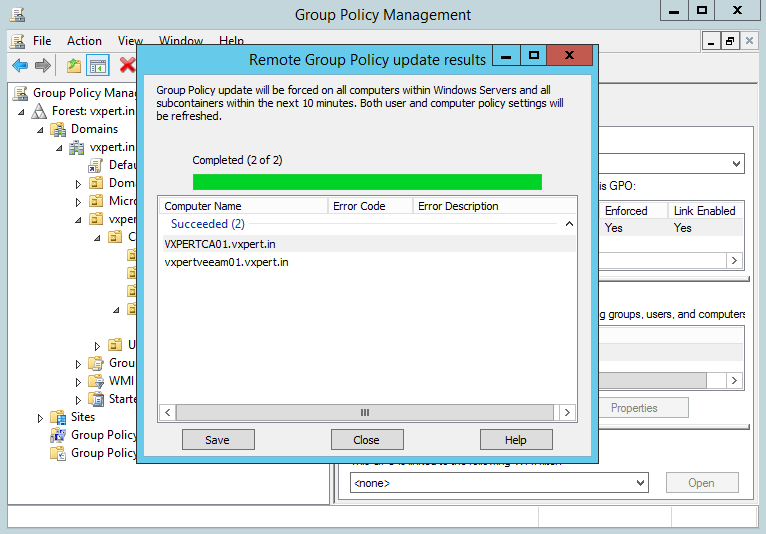
Back on your PKI server if you open Certification Authority and go to Issued Certificates you will start seeing your computers have requested and obtained a certificate. If you don’t see anything yet give it some time and refresh later.

And that’s it. You are now ready to go ahead with certificates for your lab servers
Thanks,
If you have any comments, please drop me a line.
I hope this article was informative, and don’t forget to buy me a coffee if you found this worth reading.


Leave a Reply