Kemp’s main product, the LoadMaster, is a load balancer built on its own proprietary software platform called LMOS, that enables it to run on almost any platform: As a Kemp LoadMaster appliance, a Virtual LoadMaster (VLM) deployed on Hyper-V, VMware, on bare metal or in the public cloud. KEMP is available in Azure, where it is in the top 15 deployed applications as well as in AWS and VMware vCloud Air.
Features
KEMP LoadMaster has many features which other load balancer products offers and below are some of them, for more feature details please refer this Link
- Layer4/7 Load Balancing, offering uncapped Throughput
- Uncapped SSL Transactions Per Second (TPS)
- Content Switching
- Caching, compression engine
- TMG Replacement (SSO, Pre-Authentication, Security Logging)
- WAF –Web Application Firewall
- GSLB Multi-Site Load Balancing
- Deployment Guides for easy installation
- MS Exchange 2010/2013 Optimized
- Pre-configured virtual service templates
- IPS Engine
- RESTful API
Licensing
LoadMaster may be licensed in a variety of ways to meet the differing usage models that an organization may have for application delivery. Load Master supports below licensing models and for more details please use this Link
- Perpetual Licensing
- Subscription Licensing
- Pay as you go (PAYG) Licensing
- Metered Licensing
- Pooled Licensing
- Service Provider Licensing (SPLA)
Prerequisites
In this blog we will be deploying a KEMP LoadMaster appliance on Hyper-V. You can download your 30 days Free Trial here. You will be creating your KEMP ID during this process and you need to use this ID to activate your product. Also use this Link to decide your sizing and licensing.
The VLM has been tested with Windows Server 2008 R2, Windows Server 2012, Windows Server 2012 R2, Windows 8 and Hyper-V 2016. The Microsoft Hyper-V virtual machine guest environment for the VLM, at minimum, must include:
- 2 x virtual processors
- 2 GB RAM
- 16 GB virtual hard disk capacity
- At least one Network Interface Card (NIC)
Deploy KEMP Load Master
The downloaded KEMP image has Hyper-V VHD disk and you can use same to create virtual machine or you can convert this to VHDX like below.
Convert-VHD “LoadMaster-VLM-7.2.50.0.18765.RELEASE-Microsoft-HyperV-FREE.vhd” “dxbvxpertlb01.vhdx”

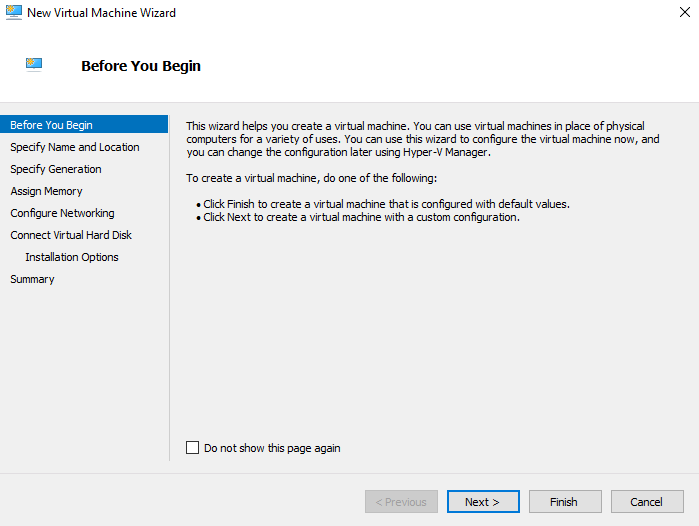
Once convert you can proceed with VM deployment. To start the deployment open Hyper-V Manager and create a new virtual machine
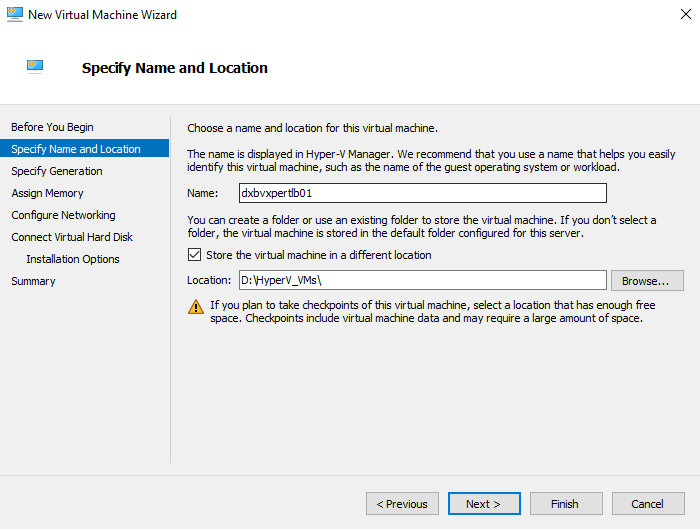
Provide the Virtual Machine name and location to store the files and click Next
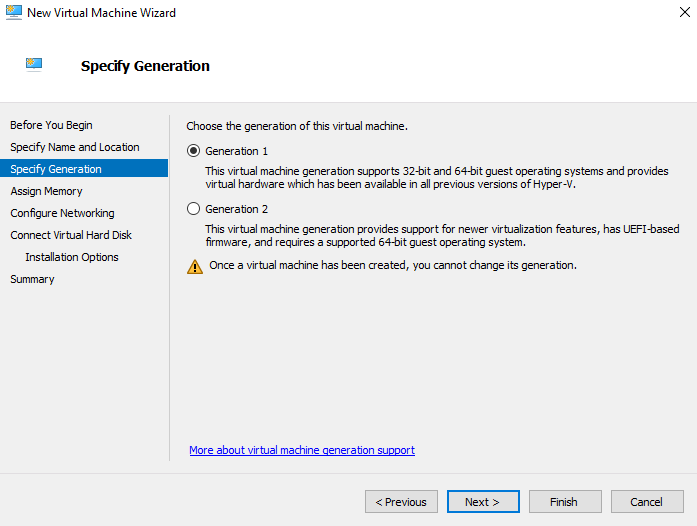
Select the Virtual Machine generation as Generation-1 and click Next
Note: – The LoadMaster Operating System (LMOS) does not support the use of Generation 2 configured virtual machines.
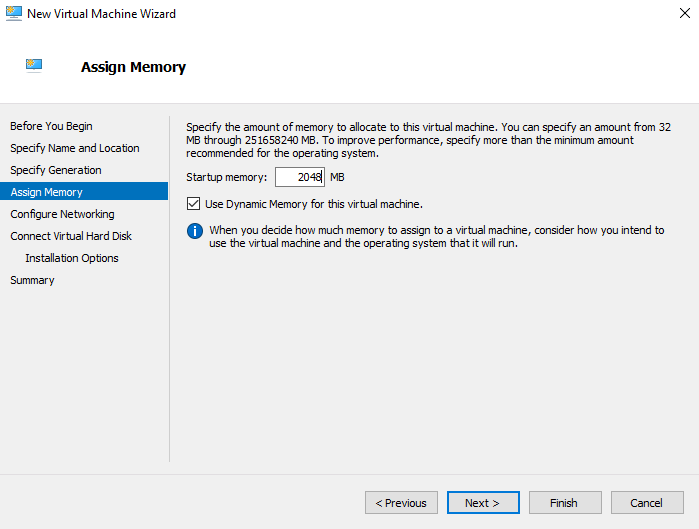
Provide 2GB memory and click Next
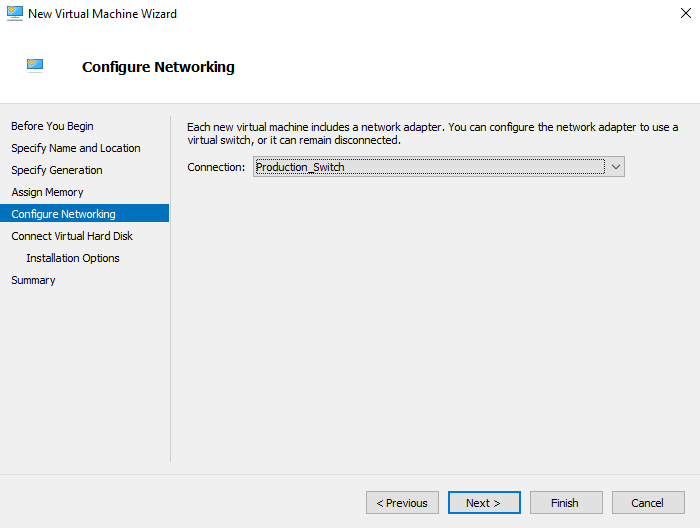
Select the physical network for the management network for this router and click Next
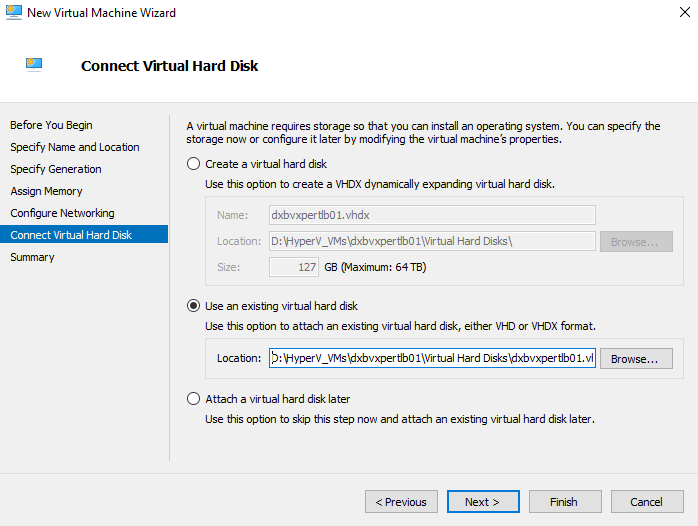
Browse and select the VHD/VHD downloaded disk by using Use and existing Disk option and click Next
Review and click Finish to create the VM
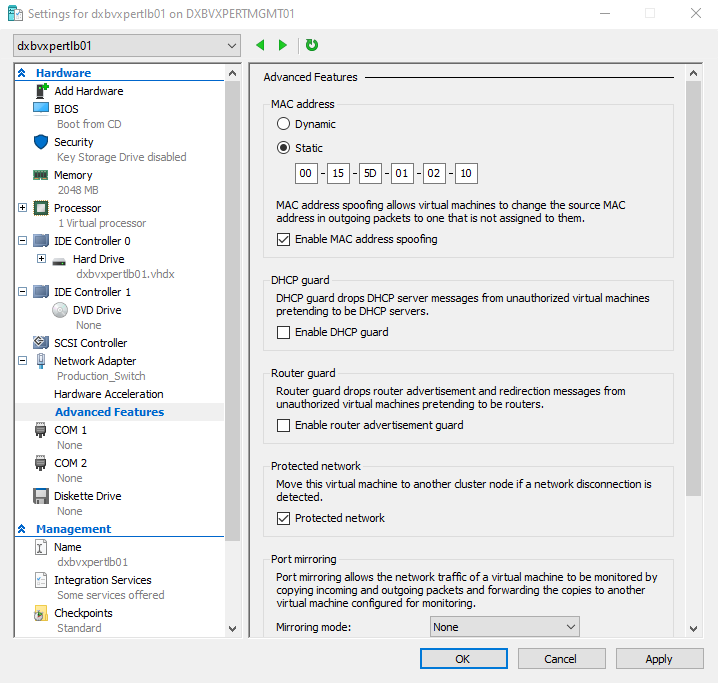
Once the VM is create make sure to configure static MAC address and this will help In case you move a VLM system to a different Virtual Machine, ensure that the MAC addresses of the Virtual Machine’s NICs stay the same. Static MAC addresses must be configured for all NICs within Virtual Machines.
Edit the virtual machine settings to configure static MAC address
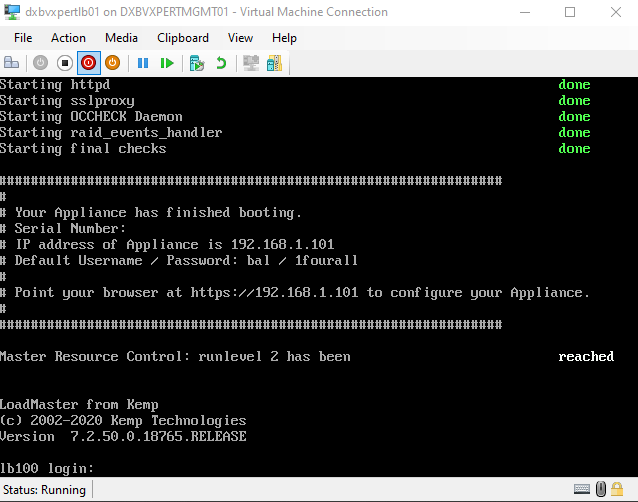
Power on the VM and it will boot from the hard disk which we downloaded. You can see below screen once booting complete.
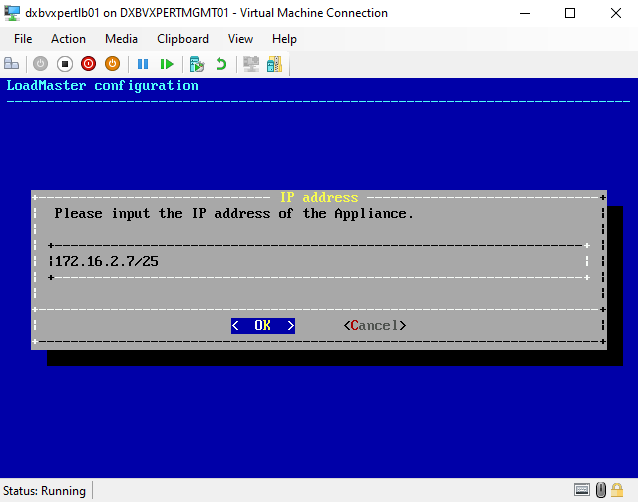
If you configured DHCP you can use provided URL in the console to access the Web UI or you can login with default credentials provided in console to change IP. Login and it will automatically prompt below screen to change IP Address and Subnet Mask.
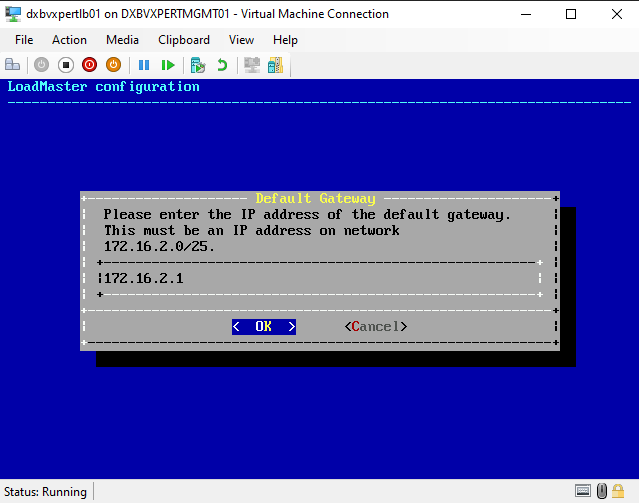
Provide Gateway details and click OK
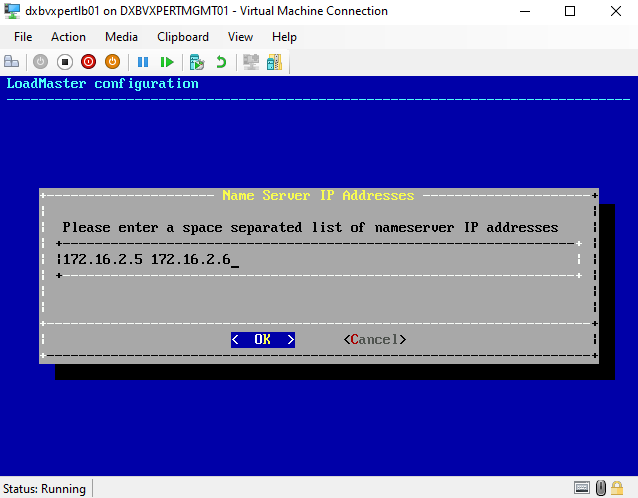
Provide DNS details and click OK
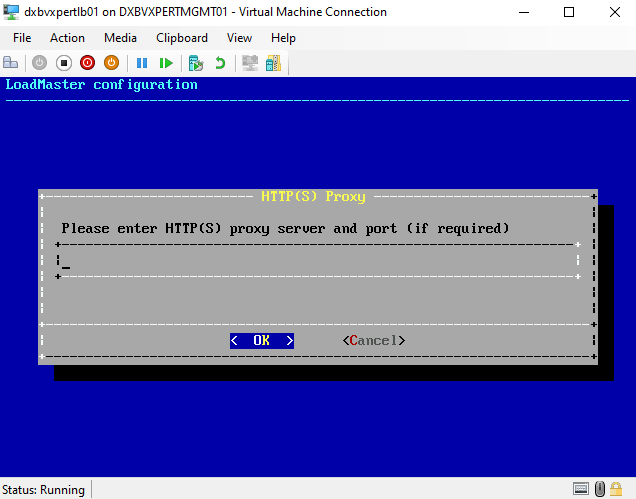
Mention HTTP(S) proxy and port details if required and click OK
Click Yes to complete the configuration

Now you can access the Web UI with https://IPAddress/FQDN configured
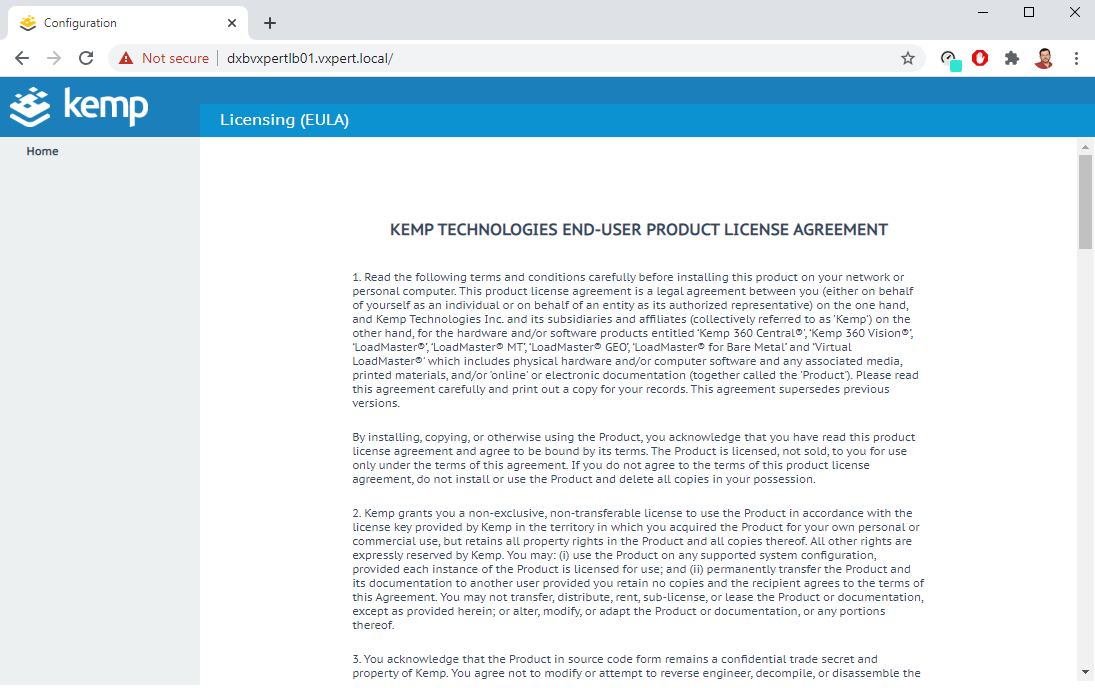
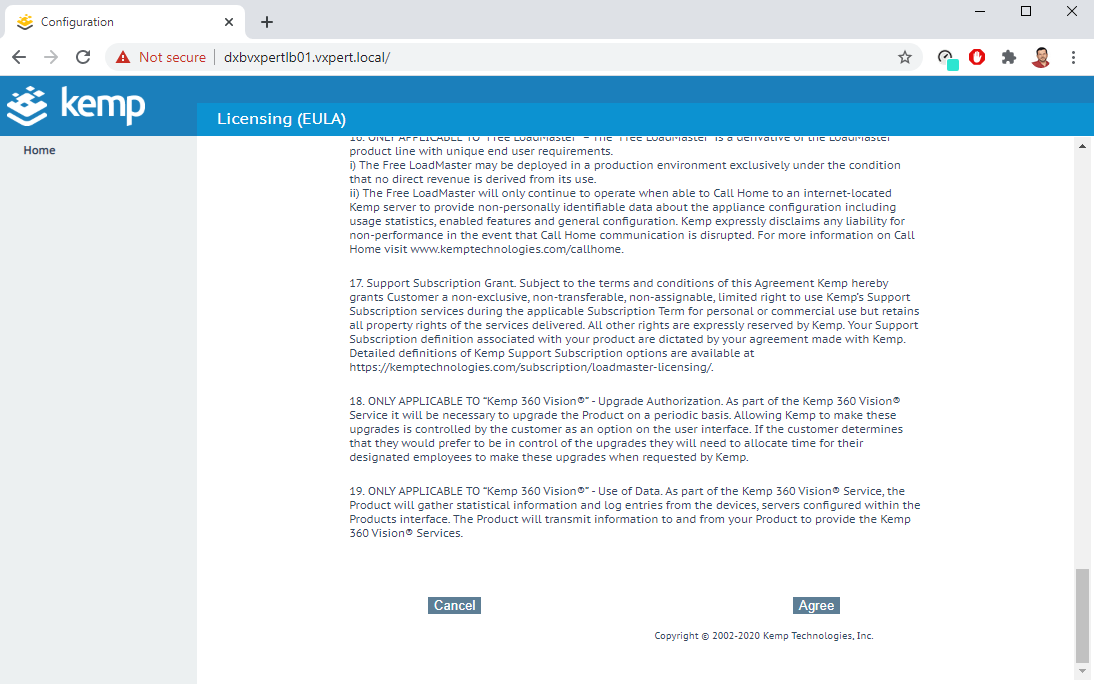
Accept the EULA and click Agree
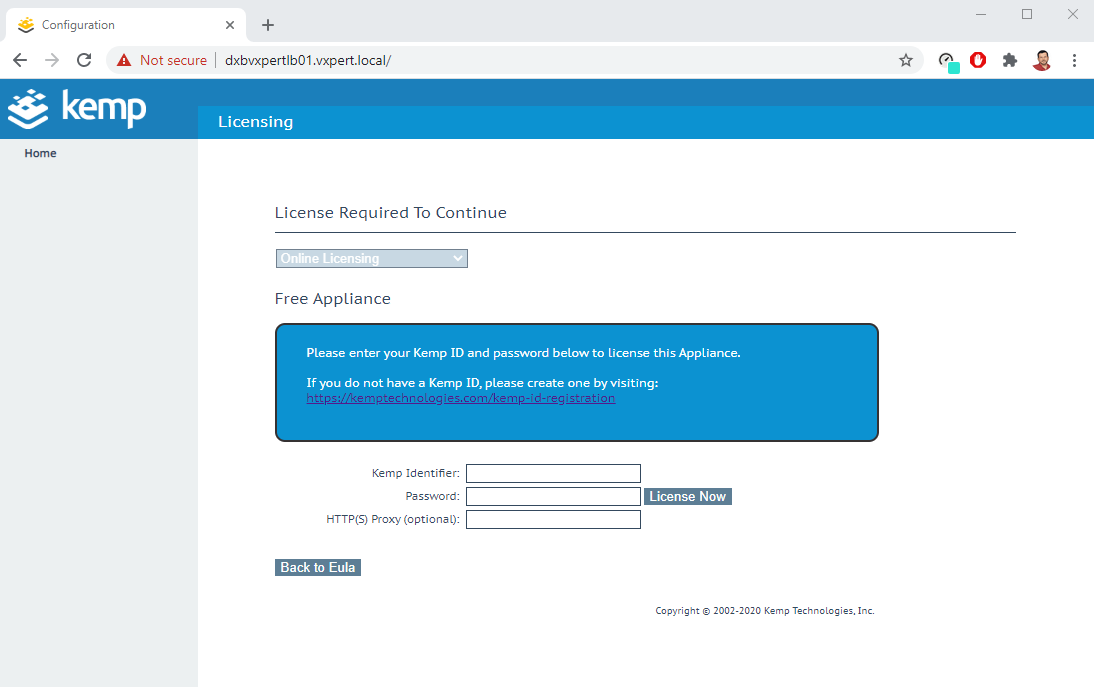
Provide your KEMP ID and password created during the appliance download and click License Now.
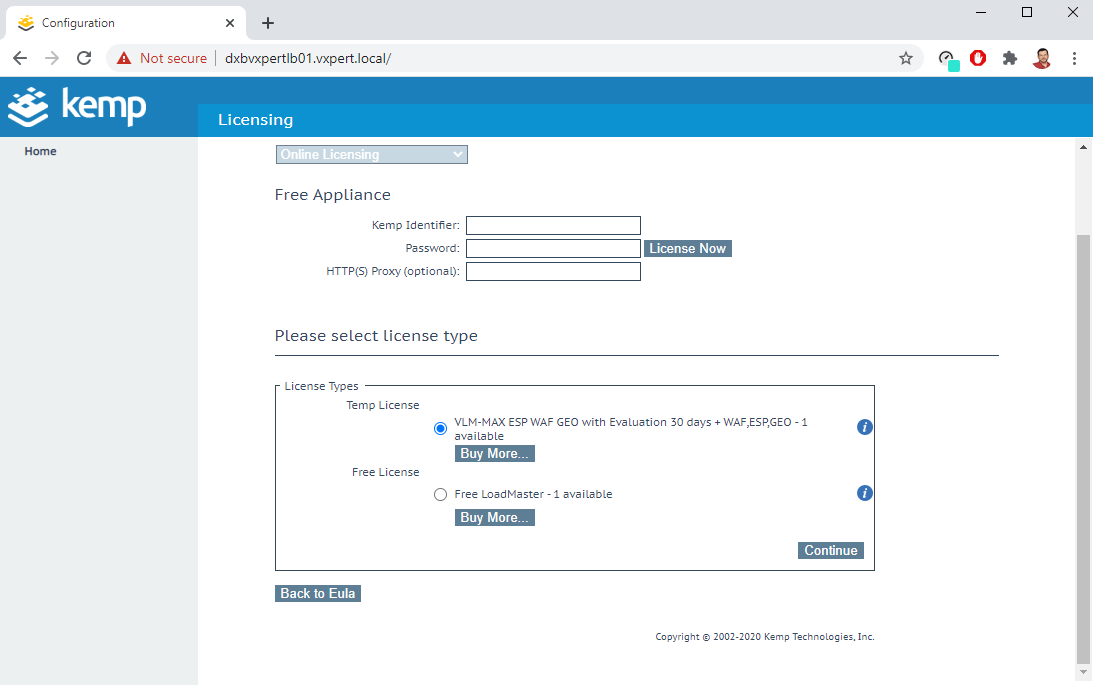
You can select Temp License for 30 days or Free License with limited features and click Continue
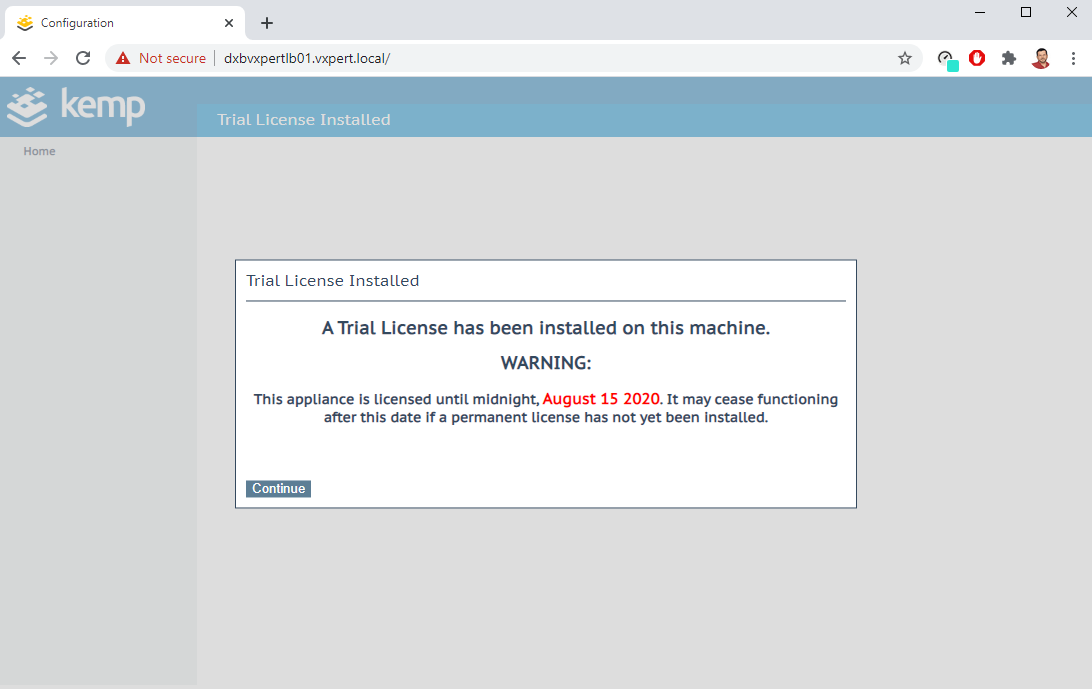
This page will warn you about the expiry date and click Continue
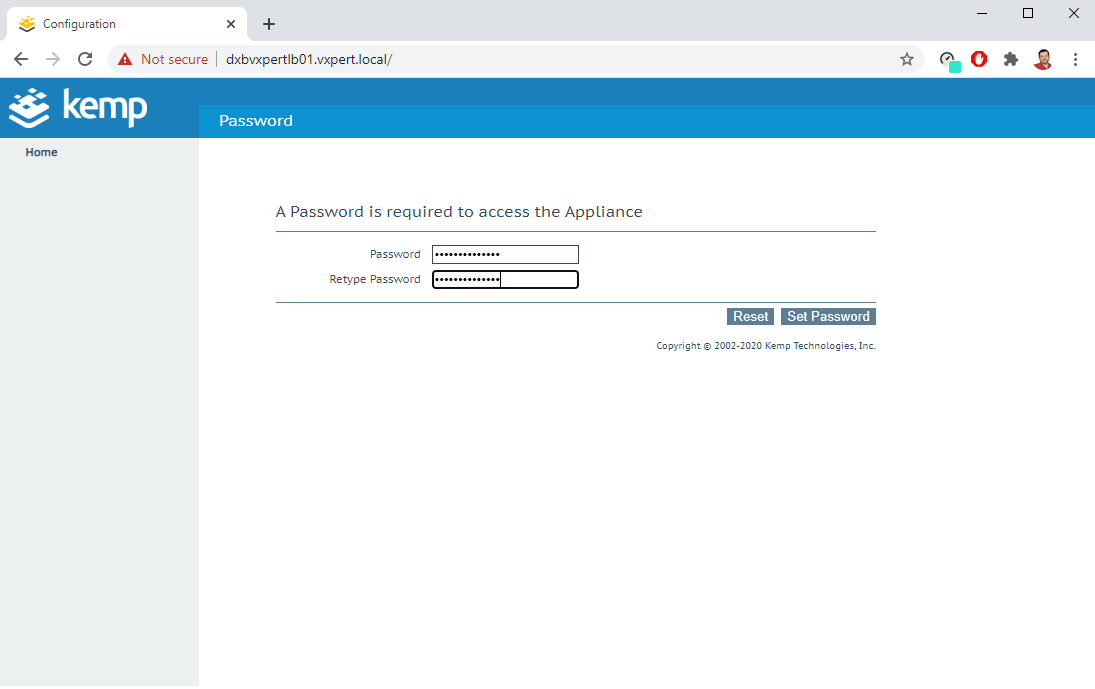
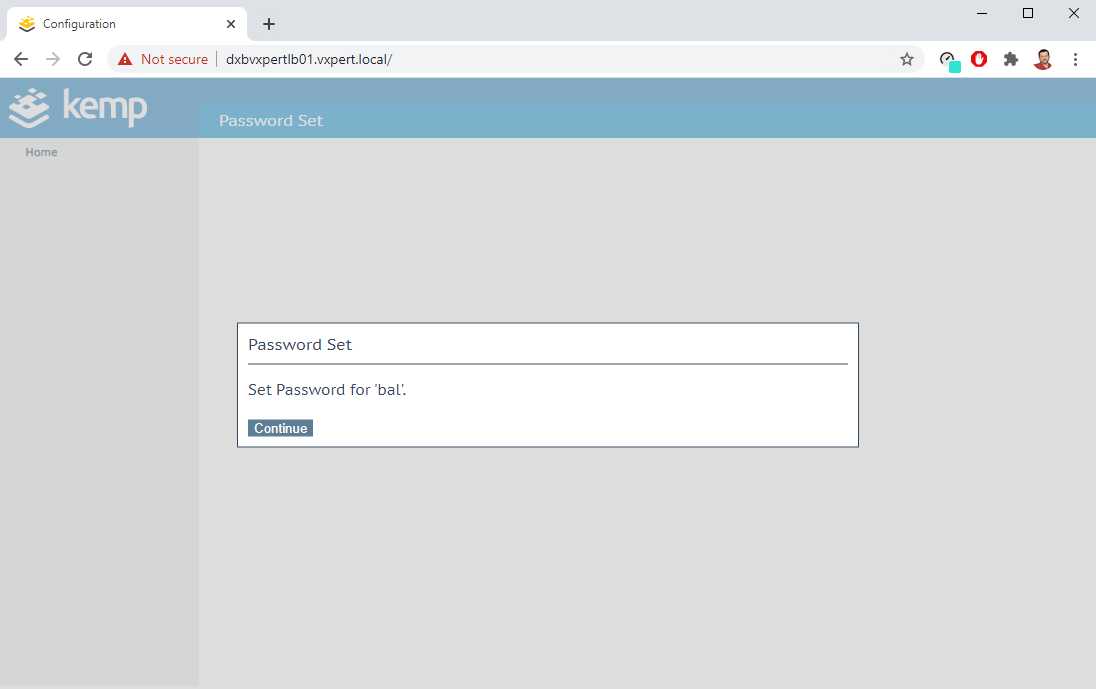
Reset the password for user ‘bal’ and click Set Password
Click Continue to complete the initial configuration
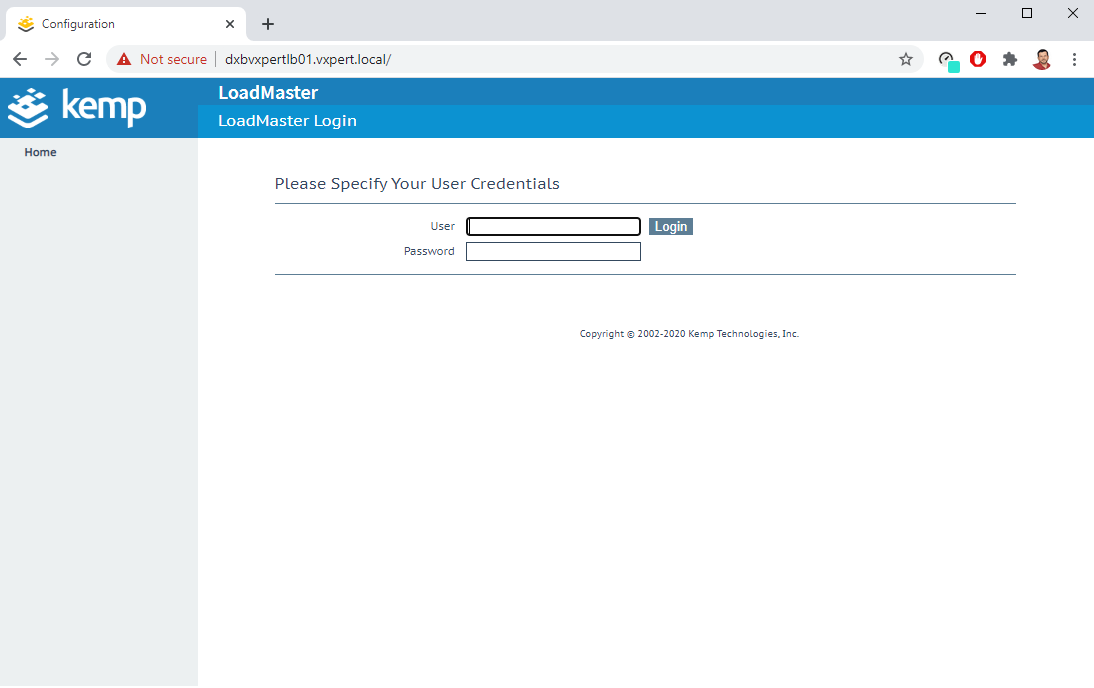
Login to the Web UI with username and changed password.
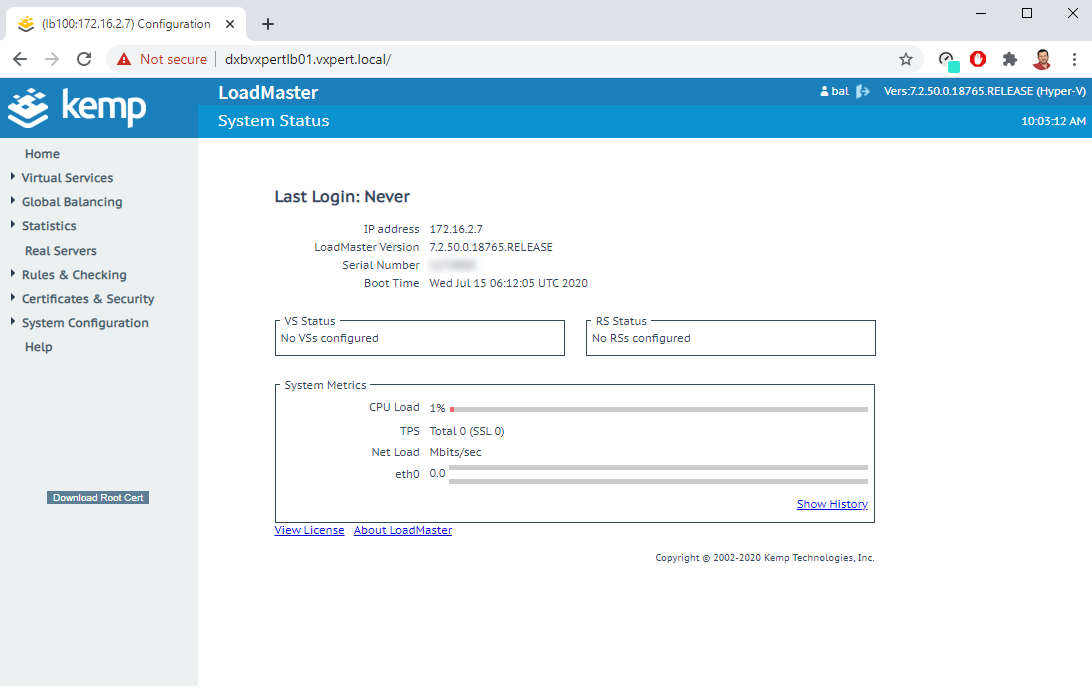
Now you have completed the deployment and you can continue with further configurations
Basic KEMP Load Master Configuration
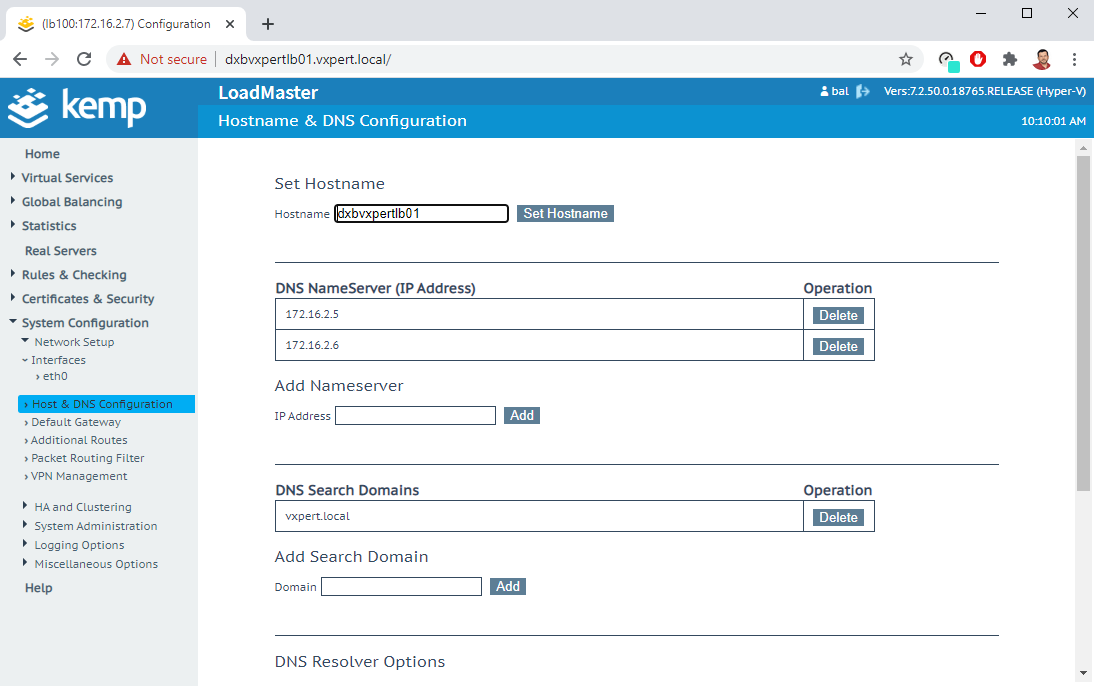
Click on System Configuration – Network Setup – Host & DNS Configuration and set the new host name and search domain.
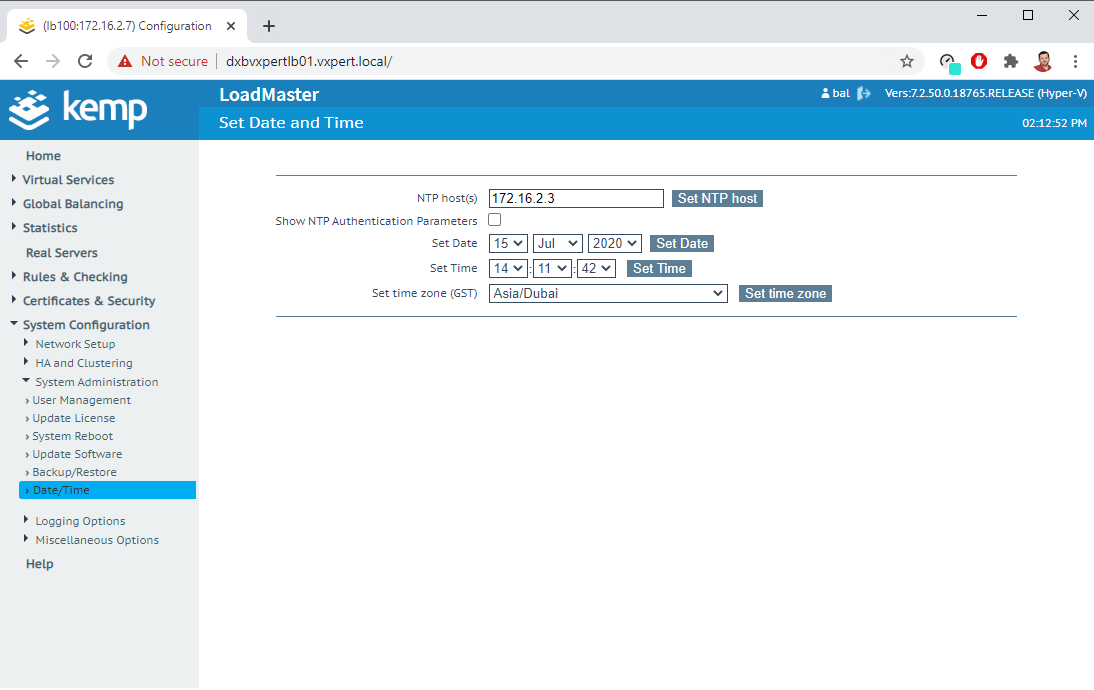
Click on System Configuration – System Administration – Date/Time and set the ntp server and time zone.
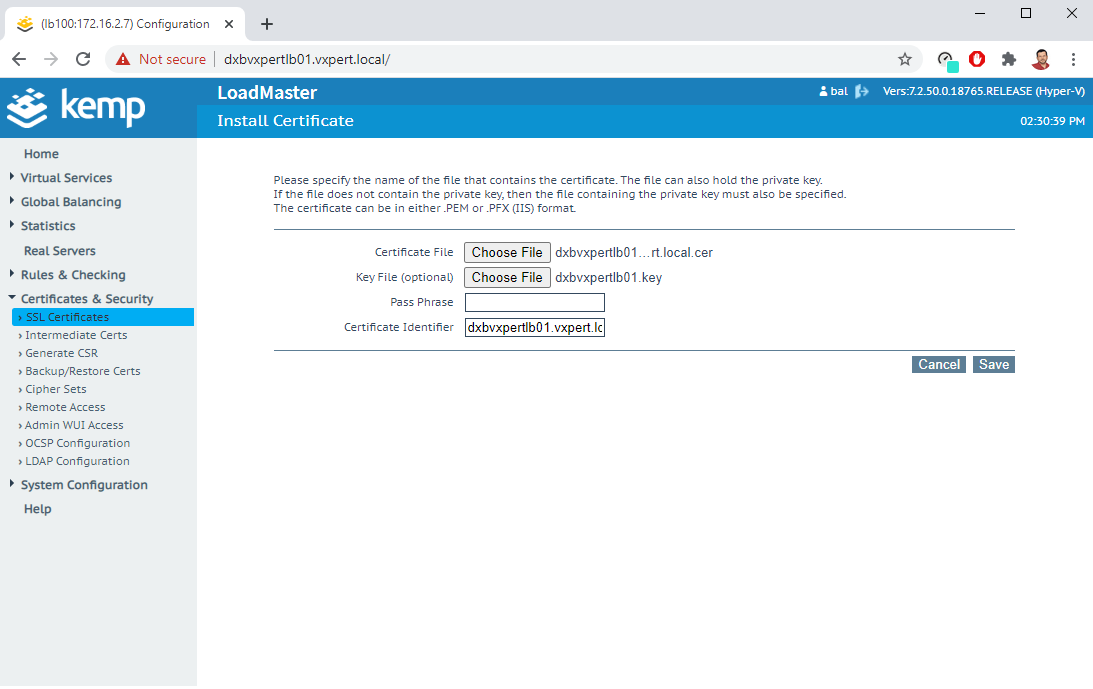
To replace the Web UI certificate, click on Certificates & Security – Generate CSR. Provide the details requested and click on Create CSR
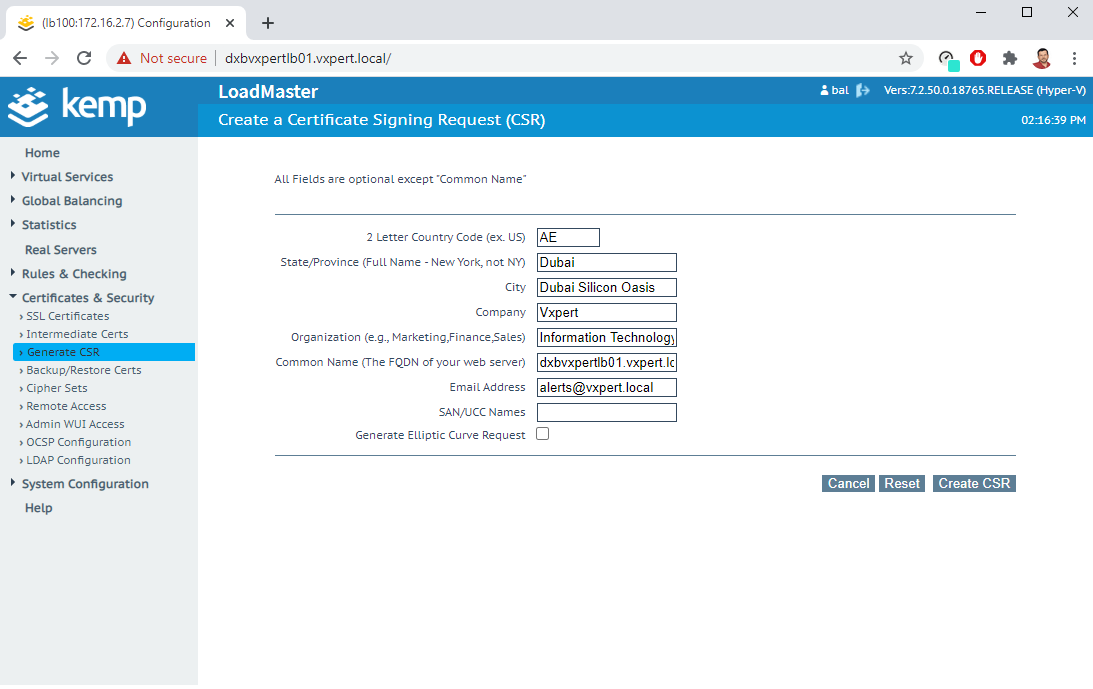
This will create your CSR and key, provide the CSR to your certificate authority, and sign it.
Once you sign the CSR provide the CER, KEY and certificate identifier then click on Save
Once import is successful you can see your new certificate details like below.
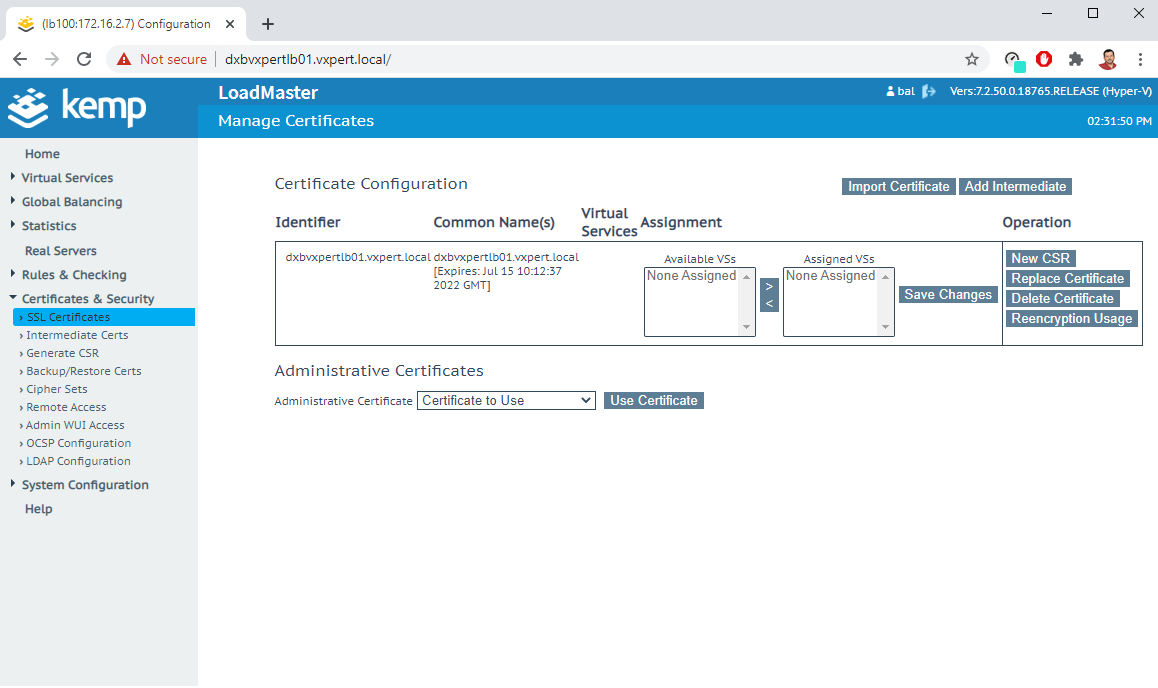
Drop down the Administrative Certificates option and select your identifier
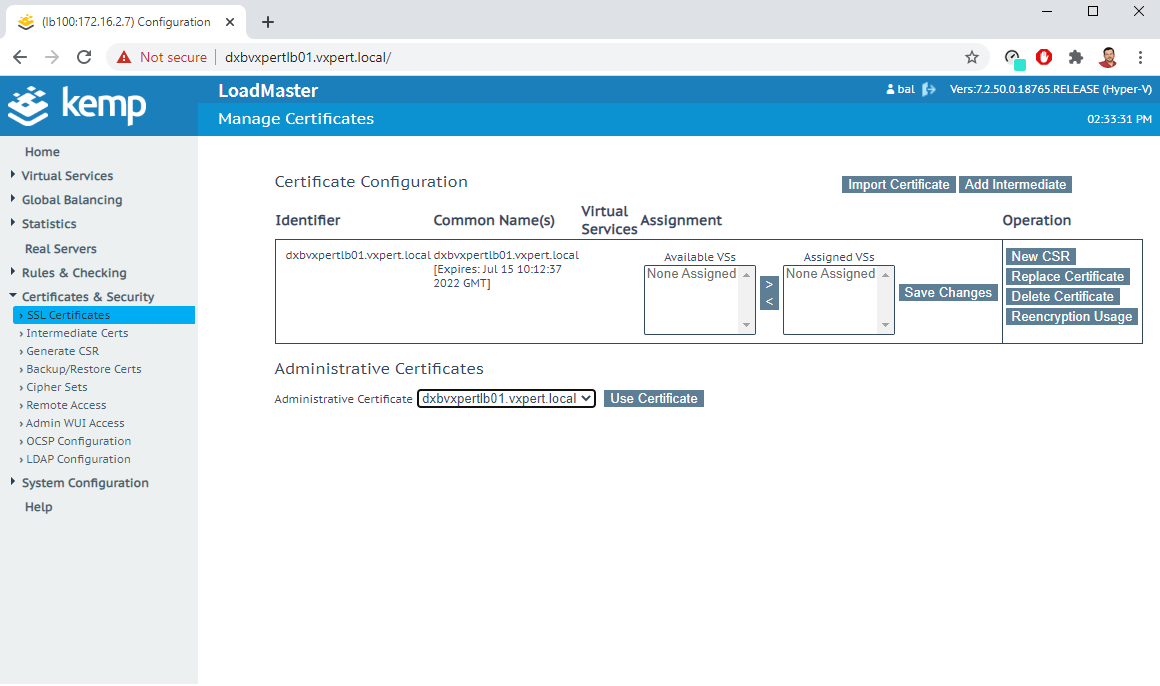
Click on Use Certificate to change the current self-signed certificate. This will replace the certificate in your Web UI

Thanks,
If you have any comments, please drop me a line.
I hope this article was informative, and don’t forget to buy me a coffee if you found this worth reading.


Leave a Reply