SSL Certificates are small data files that digitally bind a cryptographic key to an organization’s details. An organization needs to install the SSL Certificate onto its web server to initiate a secure session with browsers. Once a secure connection is established, all web traffic between the web server and the web browser will be secure.
By default, all ESXi servers has a Self-Signed certificate and it is not recommended to keep same certificate in your Production Infrastructure. In this blog I will explain how to Create, Sign and Replace the certificate of an ESXI 6.7 host with you Organization Certificate Authority Server.
Prerequisites
- To Start with we need a Microsoft Certificate Server and The Certificate Template which supports ESXI host, This link will help to Install and Configure a MSCA server and to create a certificate Template for ESXi
- Ensure that the Microsoft Visual C++ 2008 Redistributable Package (x86) is installed on the system on which you want to generate the requests. To download the package, see the Microsoft Download Center.
- Download and Install OpenSSL on any Windows machine, OpenSSL to be able to create custom certificates for vSphere environments.
Note: Ensure that you are using OpenSSL version 0.9.8 or newer. If you do not use this version, the SSL implementation will fail
Generating Certificate Request
To configure OpenSSL, follow these steps:
Take a backup of the openssl.cfg file. By default, this file is located at the c:\OpenSSL-Win32\bin directory and delete the contents of the file and replace with below content. Replace the code in Red with the details of the server that you are configuring.

[ req ]
default_bits = 2048
default_keyfile = rui.key
distinguished_name = req_distinguished_name
encrypt_key = no
prompt = no
string_mask = nombstr
req_extensions = v3_req

[ v3_req ]
basicConstraints = CA:FALSE
keyUsage = digitalSignature, keyEncipherment, dataEncipherment
extendedKeyUsage = serverAuth, clientAuth
subjectAltName = DNS:vxpertesxi02, IP:192.168.1.41, DNS:vxpertesxi02.vxpert.in

[ req_distinguished_name ]
countryName = AE
stateOrProvinceName = Dubai
localityName = Al Nahdha
0.organizationName = Vxpert
organizationalUnitName = vCenterInventoryService
commonName = vxpertesxi02.vxpert.in
Save and close the file.
Open a command prompt and navigate to the OpenSSL directory as previously configured in the Configuring OpenSSL article. By default, this is C:\OpenSSL-Win32\bin. Run the below command
openssl.exe req -new -nodes -out rui.csr -keyout rui-orig.key -config openssl.cfg
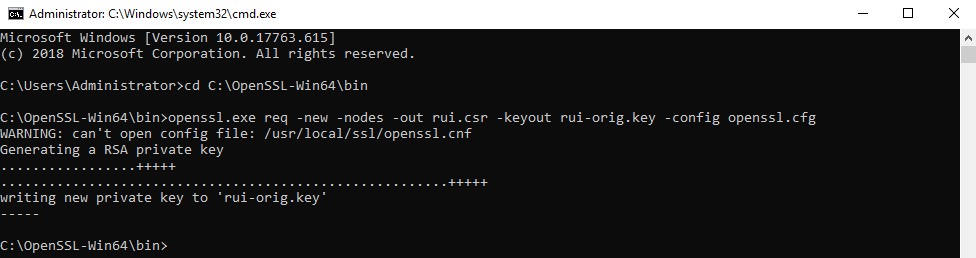
There are no prompts because all information was provided in the openssl.cfg file as configured before and this creates the certificate request rui.csr and rui.orig.key files in same directory.

Convert the Key to be in RSA format by running these command
openssl.exe rsa -in rui-orig.key -out rui.key


Sign the Certificate with CA
After the certificate request is created, the certificate must be given to the certificate authority for generation of the actual certificate. The authority presents a certificate back, as well as a copy of their root certificate, if necessary. For the certificate chain to be trusted, the root certificate must be installed on the server.
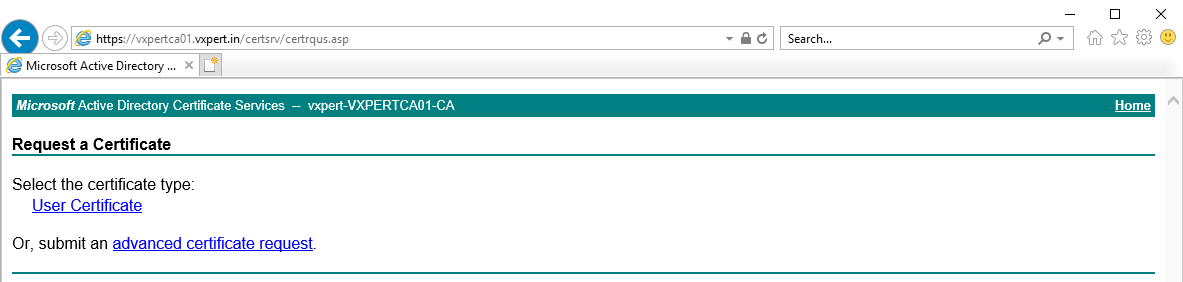
Log in to the Microsoft CA certificate authority web interface. By default, it is https://servername/CertSrv/
Click Request a certificate

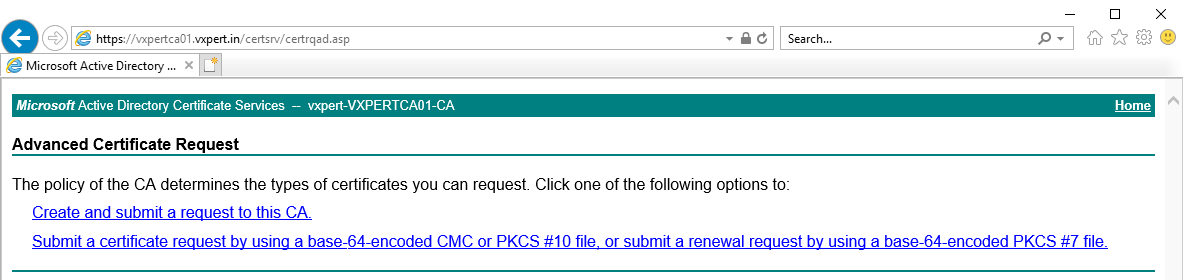
Click Advanced certificate request
Click Submit a certificate request by using a base-64-encoded CMC or PKCS #10 file, or submit a renewal request by using a base-64-encoded PKCS #7 file
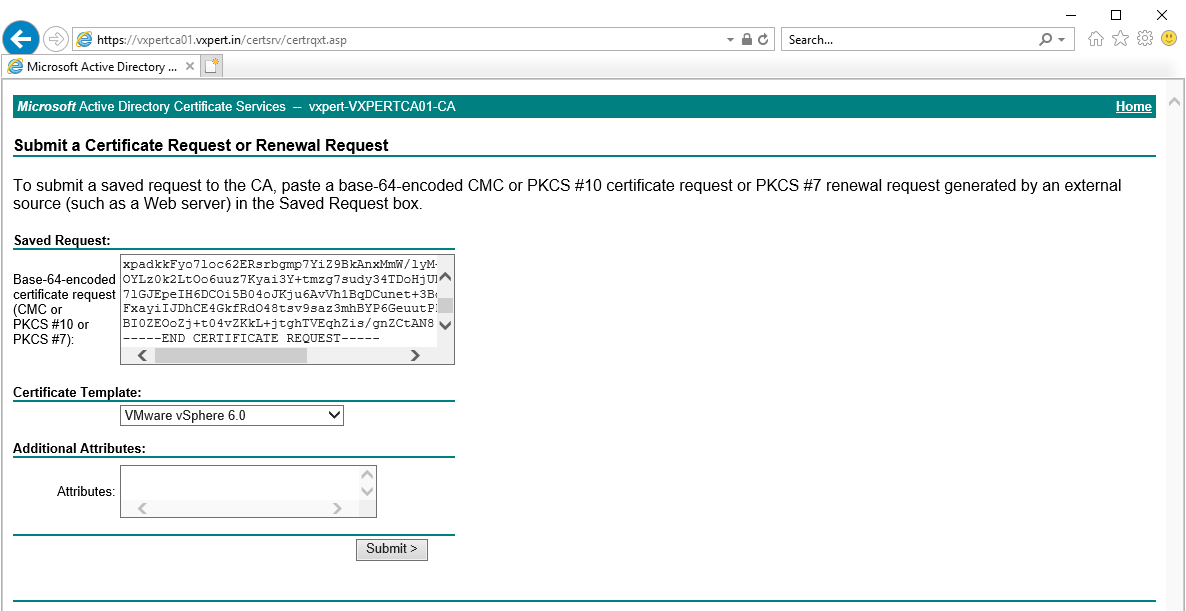
Open the certificate request(rui.csr) using a text editor, Copy the content from —–BEGIN CERTIFICATE REQUEST—– to —–END CERTIFICATE REQUEST—– into the Saved Request box. Also select the custom template created for ESXi. Click Submit.
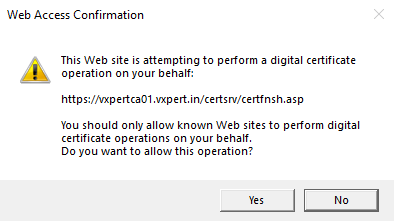
Click Yes to confirm
Once you administrator approves the request you can download the Base 64 encoded on the Certificate issued screen
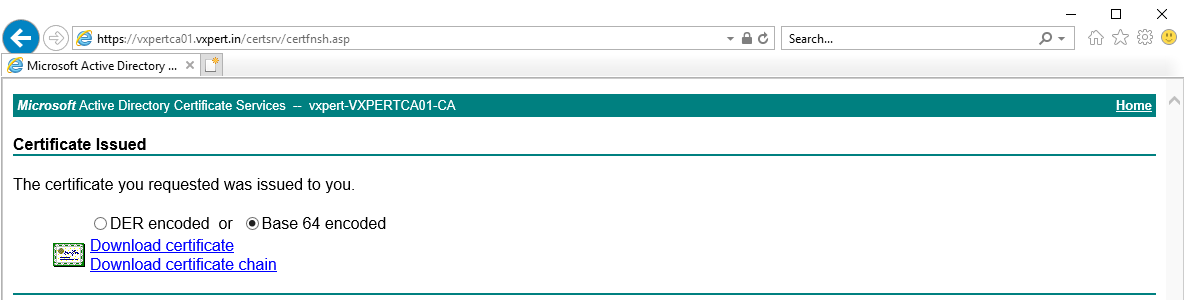
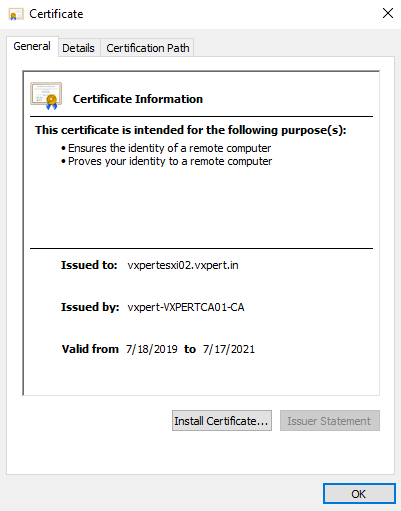
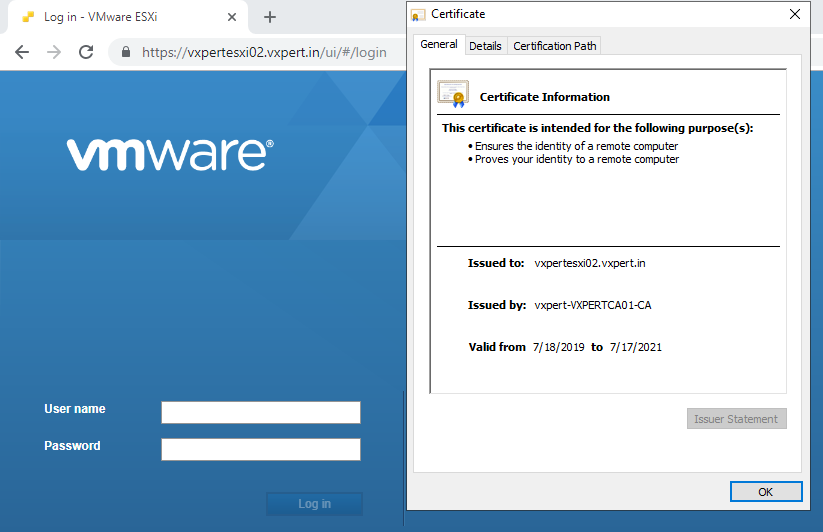
Save the certificate as rui.crt filename, Open the certificate and check the parameters you have provided is correct or on not.
Installing Certificate on ESXi
To proceed with certificate installation, log in to vCenter Server and put the host into Maintenance Mode
Enable SSH on the host and login using Putty and then navigate to /etc/vmware/ssl
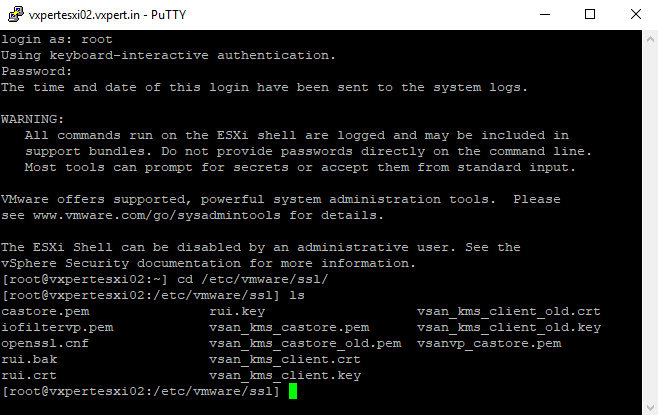
Move the rui.crt and rui.key on a backup location, such as your local PC or to a VMFS volume

Log in to the host with WinSCP and navigate to the /etc/vmware/ssl directory and copy the created rui.crt and rui.key to this location using Text Mode or ASCII mode to avoid the issue of special characters (^M) appearing in the certificate file.
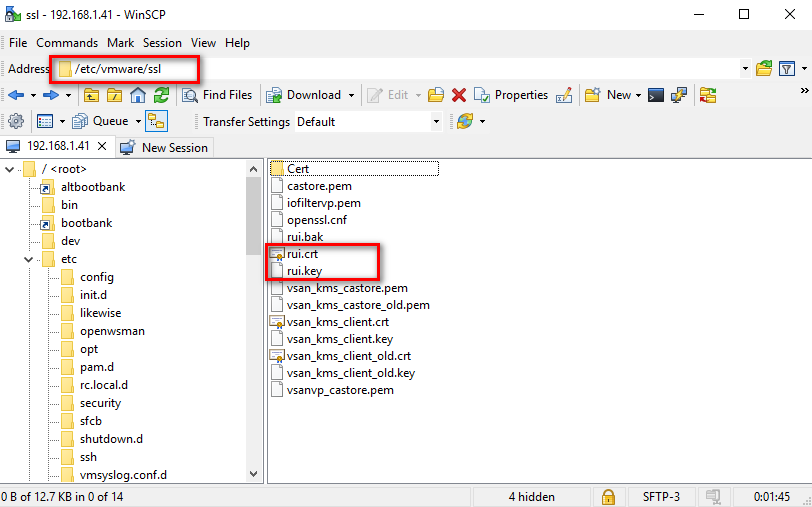
Type below command to edit and validate that there are no extra characters
#vi rui.crt
Note: There should not be any erroneous ^M characters at the end of each line
Once review save and exit by pressing Esc and !wq to save the file
Restart Management Agents by executing below commands
#services.sh restart

After restarting the services browse ESXi host Web UI and confirm its accessible and new certificate is available.
When complete try to re-connect the host by accepting the new certificate and Exit from Maintenance Mode. If the host is part of HA/DRS cluster disconnect and remove host from cluster and rejoin the cluster.
Thanks,
If you have any comments, please drop me a line.
I hope this article was informative, and don’t forget to buy me a coffee if you found this worth reading.


Leave a Reply