VMware Cloud Director (vCD) is deployment, automation, and management software for virtual infrastructure resources in multi-tenant cloud environments. VMware vCloud Director provides role-based access to a Web console that allows the members of an organization to interact with the organization’s resources to create and work with vApps and virtual machines.
In this blog we will see how to upgrade Vmware Cloud Director from 10.3.x to 10.4
Prerequisites
The upgrade procedure for a VMware Cloud Director environment can be rather complex and may require careful planning. Determining the steps of the upgrade procedure depends on several factors, mainly:
Product dependency: – Please make sure below products are compatible with the current and target versions of VMware Cloud Director using VMware interoperability Matrix
The VMware vSphere version that is currently being used.
The VMware NSX version that is currently being used.
The VMware Cloud Director Availability that is currently used
The VMware Usage Meter Cloud Director is Integrated with
The RabbitMQ for AMPQ message exchange between cells and extensibility services.
Consolidated VM Console Proxy Endpoint – VM console proxy traffic is now using the same IP and port as the VMware Cloud Director UI and API. In previous releases, the console proxy traffic used separate IP and port. The unified access point eliminates the need to manage an additional endpoint and certificate, and allows for SSL termination at the load balancer level
Back up or take a snapshot of the source VMware Cloud Director VMs that you want to upgrade.
Upgrade Path: Please make sure we have an upgrade path available to the target version or we need to go with any interim versions using VMware interoperability Matrix
Download the Upgrade binaries from VMware Download portal
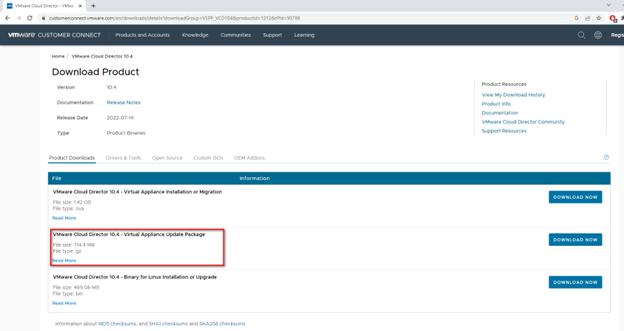
Upgrade Procedure
Review the current product version and finalize the target version and upgrade path. Currently I am running 10.3.3 version which has a direct upgrade path available to 10.4 and all my integrated solutions are compatible with 10.4.
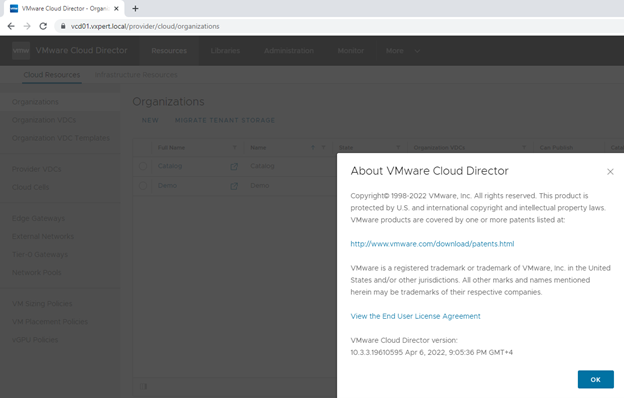
When upgrading from version 10.1 or later or when patching, if the automatic failover in case of a primary database service failure is enabled, change the failover mode to Manual during the upgrade. After the upgrade, you can set the failover mode to Automatic. See Automatic Failover of the VMware Cloud Director Appliance.
Note: – You can upgrade VMware Cloud Director software on All members of a server group, using a single command. However, we are here using a method to update the servers one-by-one
Navigate to the primary VMware Cloud Director appliance, right-click it, and click Power > Shut Down Guest OS and take Snapshot of the Primary VM
Verify that all nodes in your database high availability configuration are in a good state
Shut down the VMware Cloud Director services on each cell in the server group. You can use the cell subcommand of the cell management tool
#cd /opt/vmware/vcloud-director/bin
#./cell-management-tool -u administrator cell --shutdown

This command will ensure running tasks are completed before shutting down the VMware Cloud Director services
Next is to take a backup of the database by running below command in if your appliance is 10.3.x and newer
#/opt/vmware/appliance/bin/create-backup.sh
For older version of VMware Cloud Director use below command
# /opt/vmware/appliance/bin/create-db-backup.sh
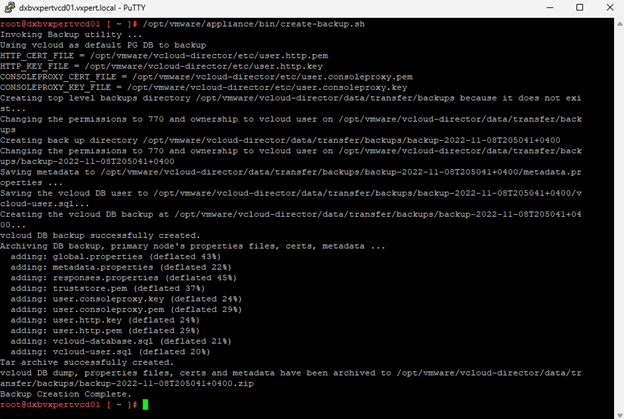
We recommend starting with one cell, upgrading the VMware Cloud Director software, then upgrade the database schema. You can then upgrade the other cells, which would require upgrading the VMware Cloud Director software only.
Run the VMware Cloud Director installation file with executable permission. If the installer detects a version of VMware Cloud Director installed on this server that is equal to or later than the version in the installation file, it displays an error message and exits. Otherwise, it prompts you to confirm that you are ready to proceed to upgrade this server.
Identify the Primary appliance by logging in the VAMI UI and upload the upgrade binaries in a local directory under /tmp.
Create the local-update-package directory in which to extract the update package
#mkdir /tmp/local-update-package
Extract the update package in the newly created directory.
#tar -zxf VMware_Cloud_Director_v.v.v.v-nnnnnnnn_update.tar.gz -C /tmp/local-update-package

Set the local-update-package directory as the update repository.
#vamicli update --repo file:///tmp/local-update-package
Check for updates to verify that you correctly established the repository.
#vamicli update --check

Create a backup using the primary or standby appliance management UI.
You cannot use the application cell to perform a backup
Apply the available upgrade
#vamicli update --install latest

Repeat upgrade bundle steps on the remaining standby and application cells
From any appliance, run the VMware Cloud Director database upgrade utility
# /opt/vmware/vcloud-director/bin/upgrade
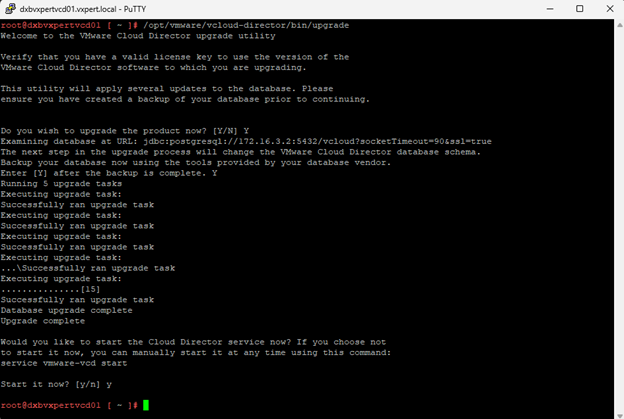
Reboot each VMware Cloud Director appliance
#shutdown -r now

If the upgrade is successful, Check the integrations and configuration and further you can delete the snapshot of the VMware Cloud Director appliance.
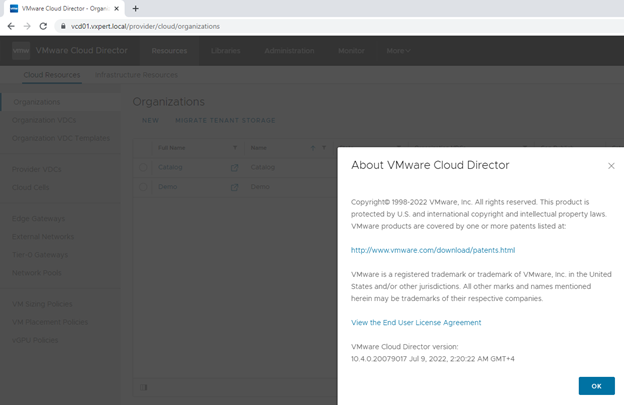
If the upgrade is not successful, you can roll back the VMware Cloud Director appliance to the snapshot that you took before the upgrade. See Roll Back a VMware Cloud Director Appliance When an Upgrade Fails.
Thanks,
If you have any comments, please drop me a line.
I hope this article was informative, and don’t forget to buy me a coffee if you found this worth reading.


Leave a Reply