VMware vCloud Director (vCD) is deployment, automation, and management software for virtual infrastructure resources in multi-tenant cloud environments. VMware vCloud Director provides role-based access to a Web console that allows the members of an organization to interact with the organization’s resources to create and work with vApps and virtual machines.
In this blog we will do learn how we can start with the basic configuration of vCloud Director
Change the vCloud Director Appliance Time zone
After you deploy successfully the vCloud Director appliance, you can change the system time zone of the appliance. All vCloud Director appliance instances in the server group must use the same settings
By using a Web Console or a Remote Console for the primary node, on the bottom left of the console window, select Set Time zone. Select a location, a country, and a time zone region. The newly selected time zone appears on the bottom left of the console window
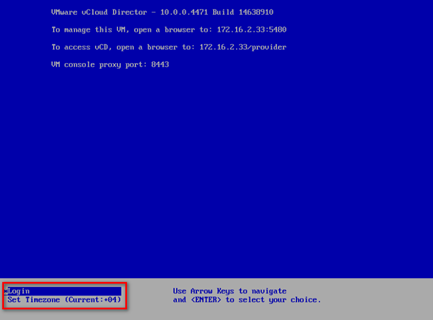
To ensure that the vCloud Director appliance uses the new time zone, restart the vmware-vcd service
Apply License
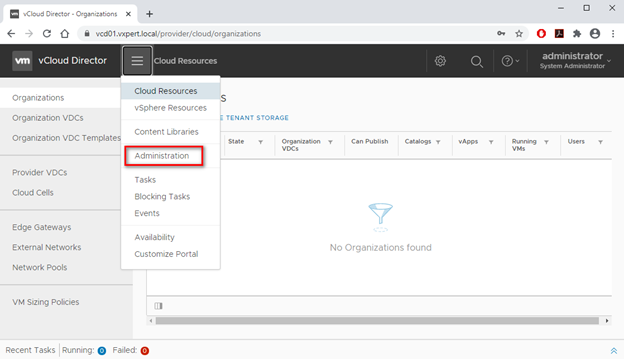
To apply license on vCloud Director, Click on Menu and select Administration
Click on License on left tab and click EDIT and provide the License Key and click Save
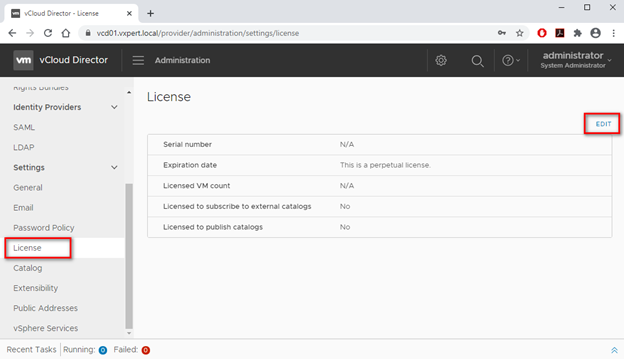
This will apply the license to your vCloud Director appliance
Configure Identity Provider
vCloud Director support SAML and LDAP authentication to authenticate provider and organization virtual datacenter users. To integrate with LDAP on vCloud Director, Click on Menu and select Administration, click on Identity Providers on left tab then select LDAP and click EDIT
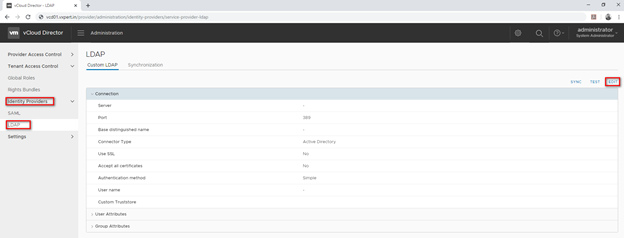
Provide LDAP Parameters like Server, Port, Base distinguished name, and Credentials and click Save.
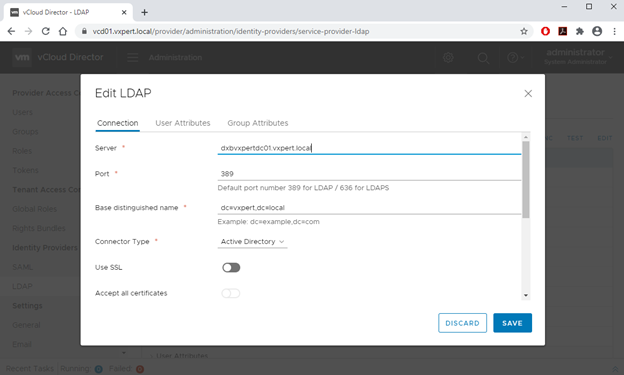
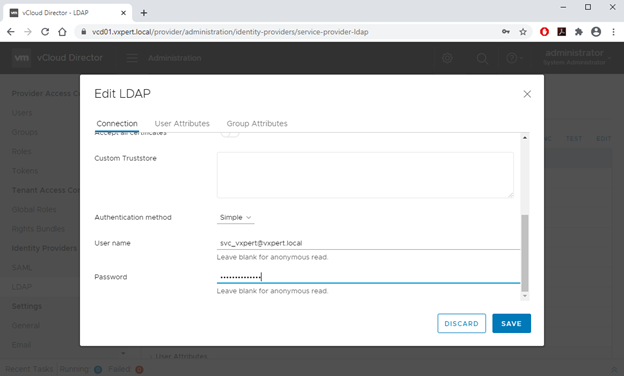
Click on TEST to check the configuration details provided
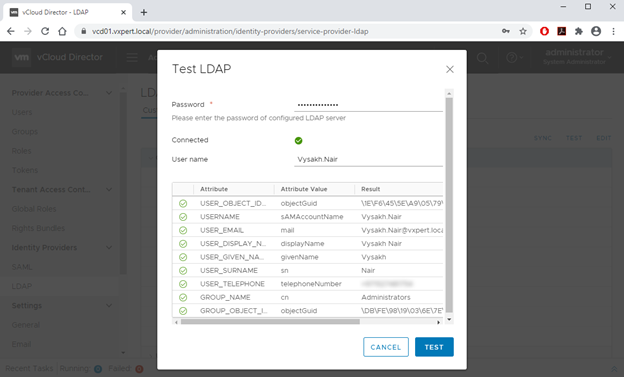
Click on Sync to initiate the LDAP Synchronization

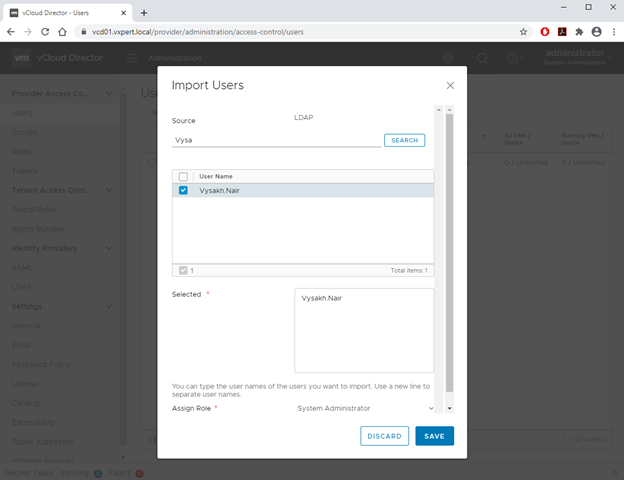
To import Users from Active Directory, click on Users on Left tab and click Import Users
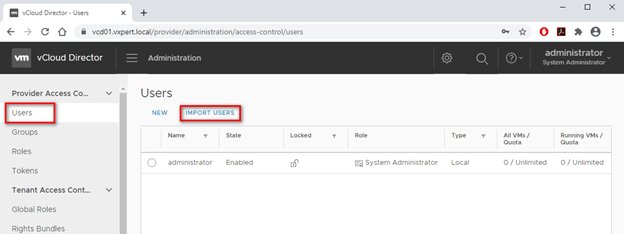
Search and select the Username and provide the respective permissions and Save

Customize Public Addresses
To fulfill load balancer or proxy requirements, you can change the default endpoint Web addresses for the vCloud Director Web Portal, vCloud API, and console proxy.
If you deployed the vCloud Director appliance, you must configure the vCloud Director public console proxy address, because the appliance uses a single IP address with custom port 8443 for the console proxy service.
We have already explained how to configure this on load balancer configuration, please refer this link
VM Sizing Policies
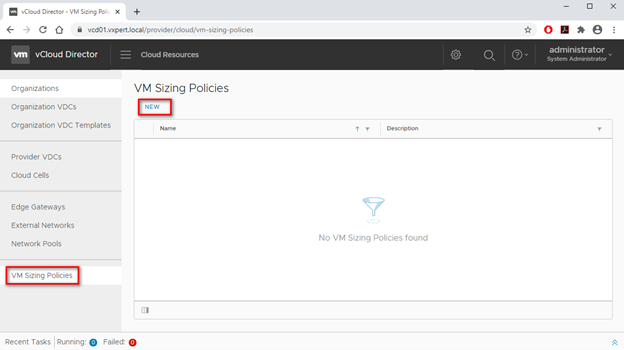
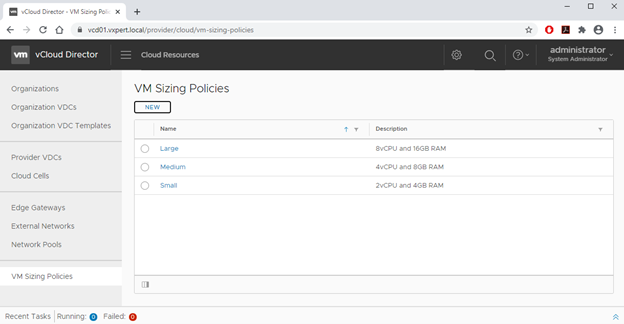
vCloud Director system administrators create and manage VM sizing policies at a global level and can publish individual policies to one or more organization vDCs. He we will be creating Small, Medium, and Large VM sizing policies
Click on VM Sizing policies and New
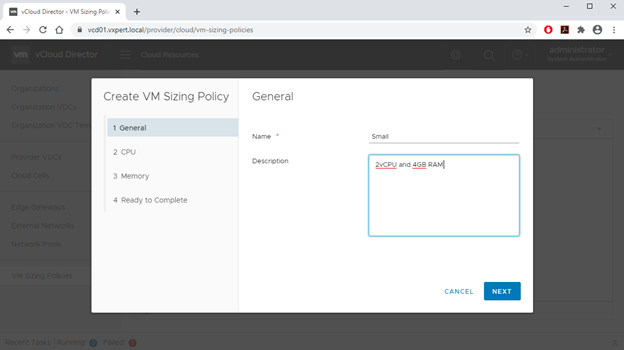
Provide Name and Description
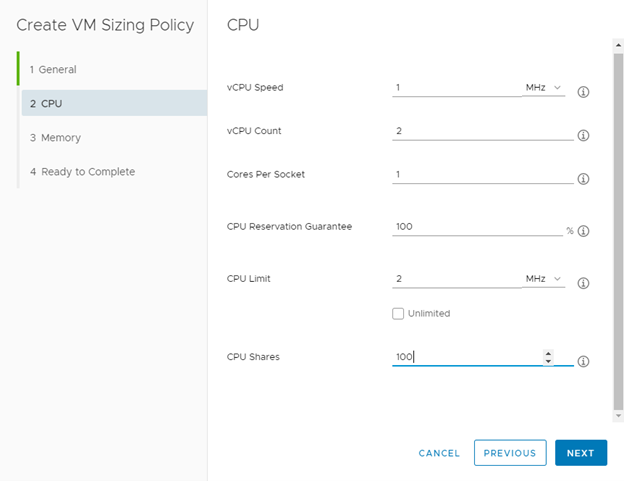
Provide vCPU speed, Count, Socket and reservation details
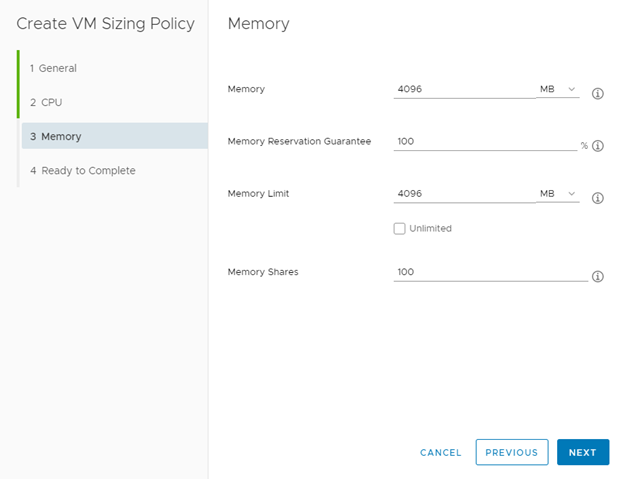
Provide Memory and Memory reservation details
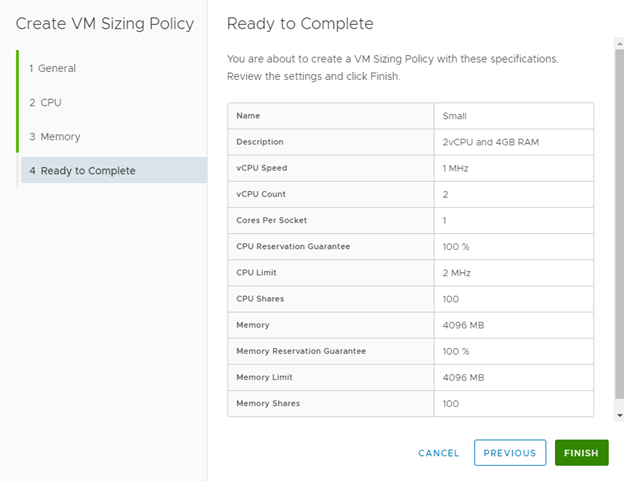
Review the details provided and click Finish
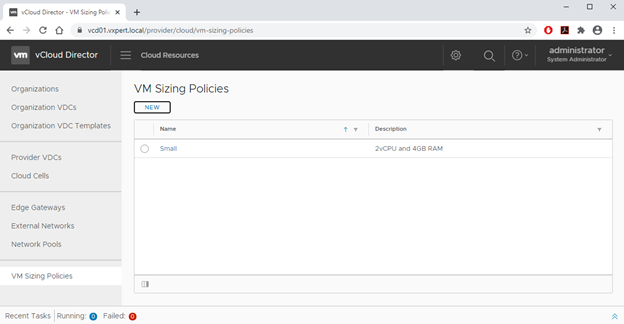
Same way I have created other sizing policies also
Integrate with vSphere and NSX-v
Before integrating vCloud Director with vSphere with NSX-v we must prepare the vCenter compute and storage with respective tags. IN my environment I am planning to have two workload clusters and one edge clusters.
For both workload cluster and edge clusters and edge cluster I am creating three resource pools in each cluster like below.
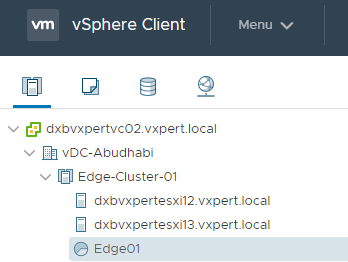
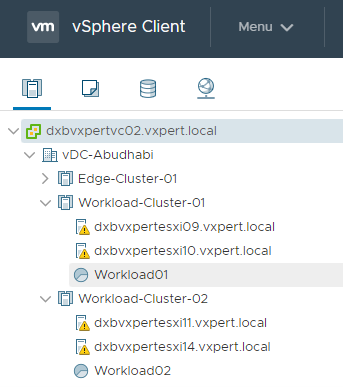
Same way I have created three storage tags and mapped with each cluster datastores.
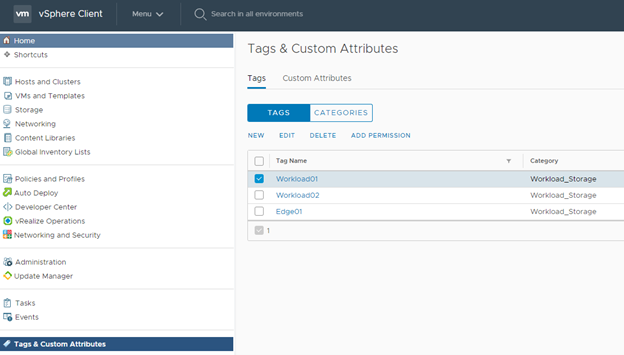
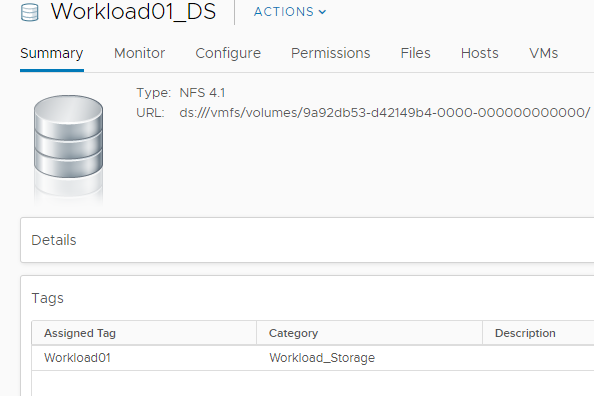
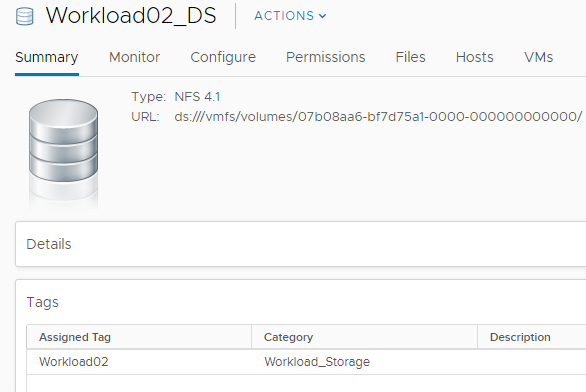
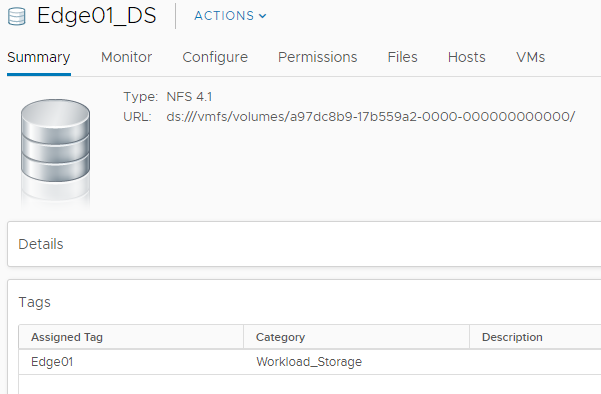
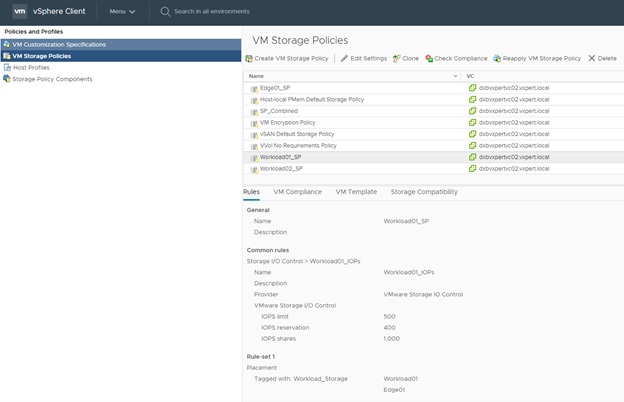
Also create three storage policies and components with respect your storage IOPs shares and encryption and tag mapping
Note: – You can create customer based policies to map agreed storage policies

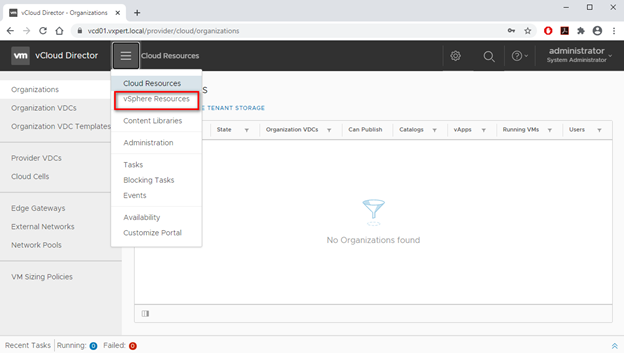
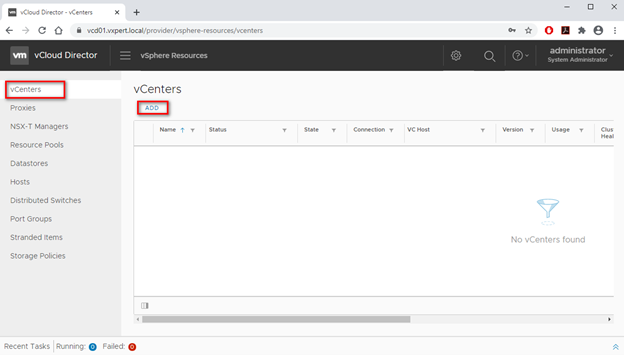
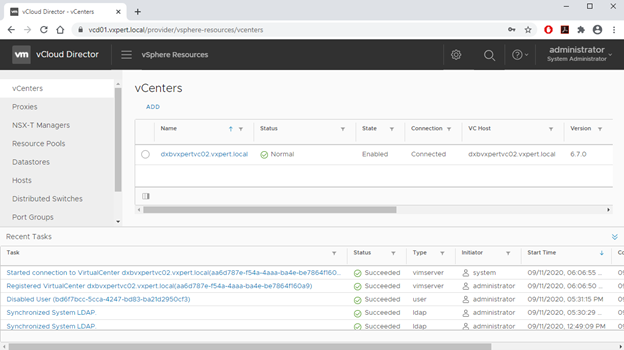
To integrate vsphere and NSX with vCloud Director, Click on Menu and select vSphere Resources
Click on the ADD button
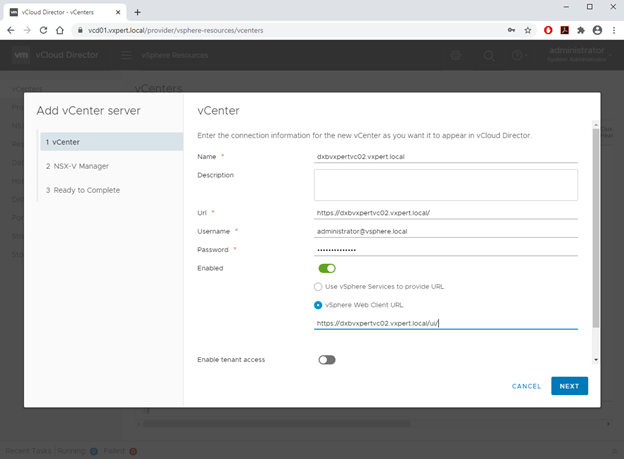
Provide Name, vCenter Server URL, Username and Password and click Next
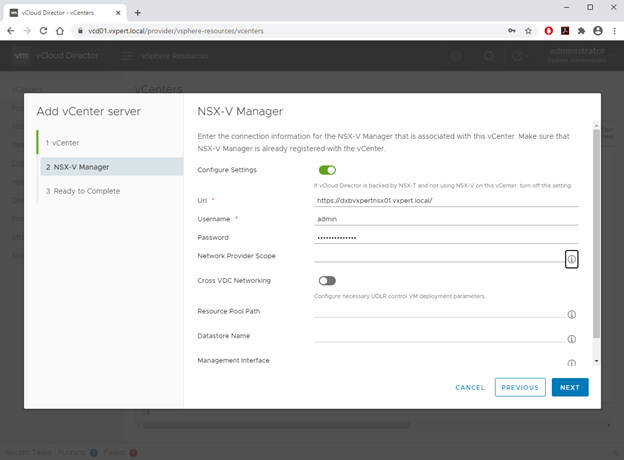
Provide NSX-V Manager Server URL, Username and Password and click Next
Review the configuration and click Finish
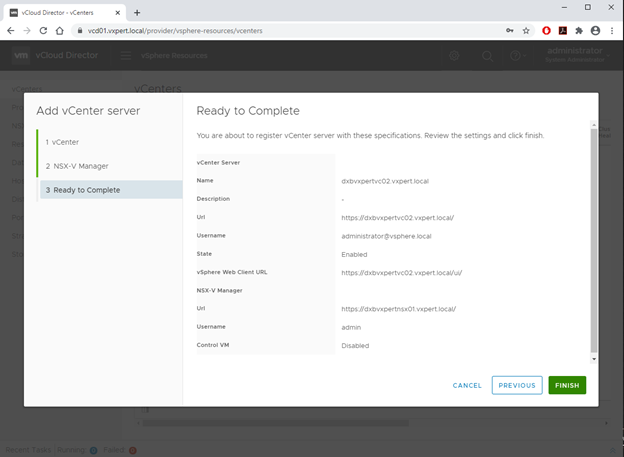
You can see the vCenter and NSX-V Details on the console and it will populate the vCeter and NSX-V inventories automatically to vCloud Director
Create Provider vDC
Provider VDC (PVDC) combines the CPU, memory, and storage of one or more datastores available for that resource pool.
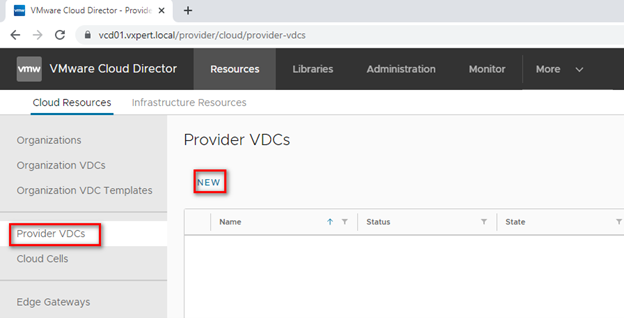
To create provider vDC Click on Provider VDCs and New
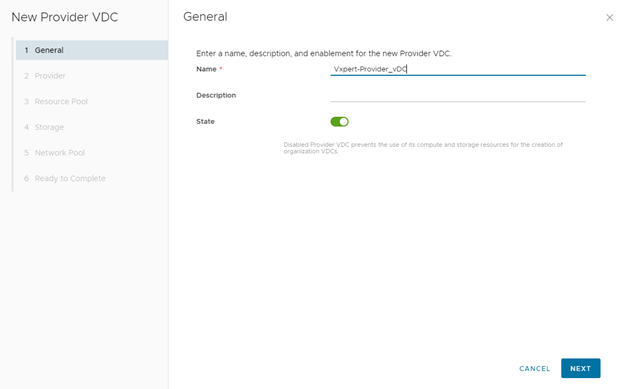
Mention the name of provider vDC and click Next
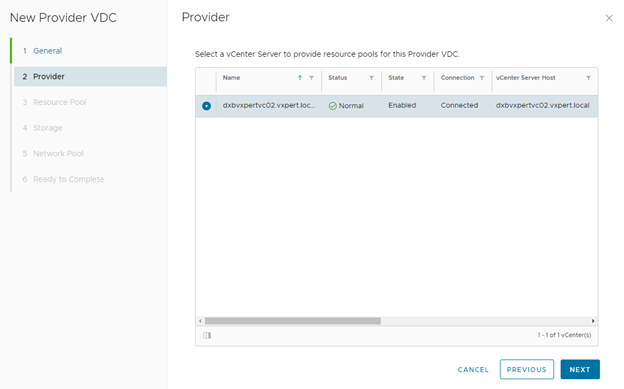
Select the vCenter where your compute workloads you will be provisioning and click Next
Select the resource pool and the Vmware Hardware version your vDC will support and click Next, we can select the other resources pool once we complete the configuration
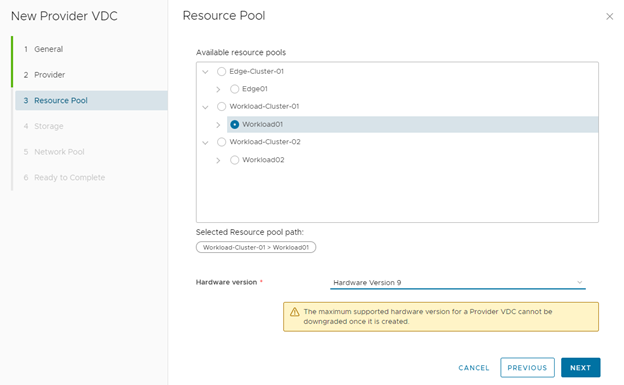
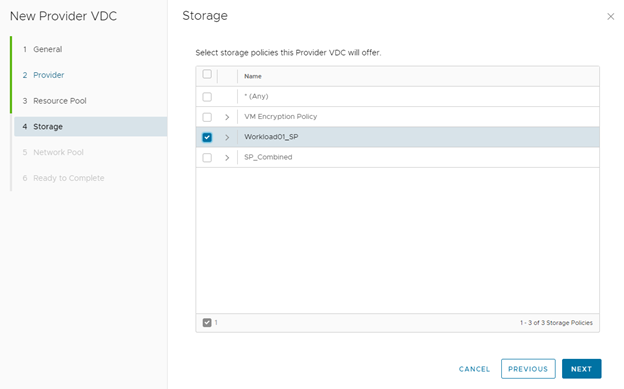
Select the respective storage policies and you can select multiple which is compatible and click Next
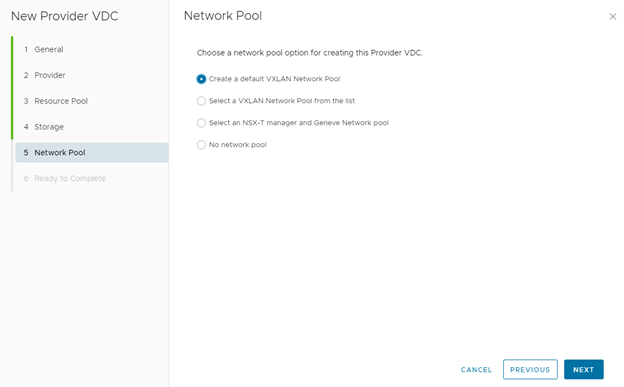
Create or select the network pool for the provider vDC, this will create or select the Transport zones of your provider vDC and click Next
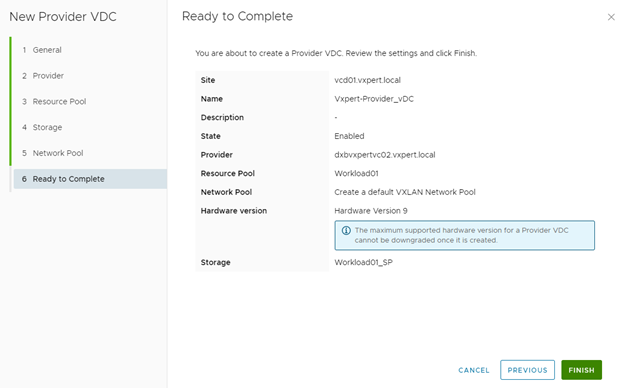
Click Finish to complete the Provider vDC creation

Open the Provider vDC and Click on the Resource Pool to add the second Workload cluster and the Edge cluster as well
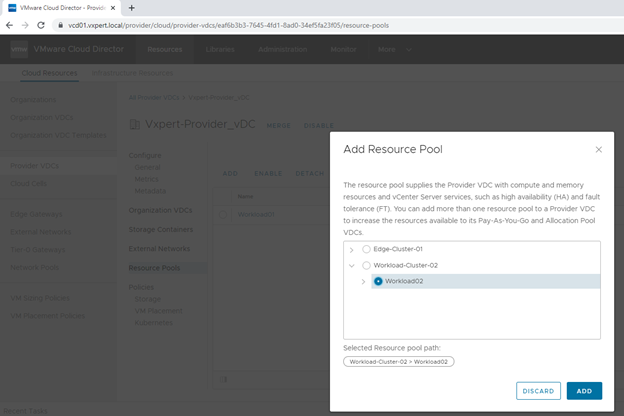
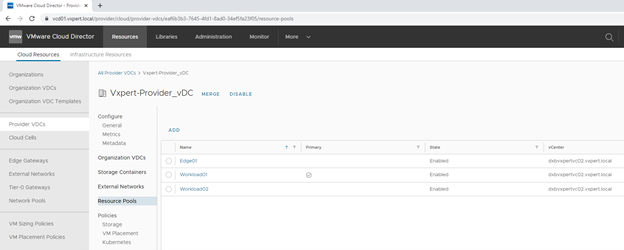
Now you can see two workload cluster and one edge cluster is added to your Provider vDC
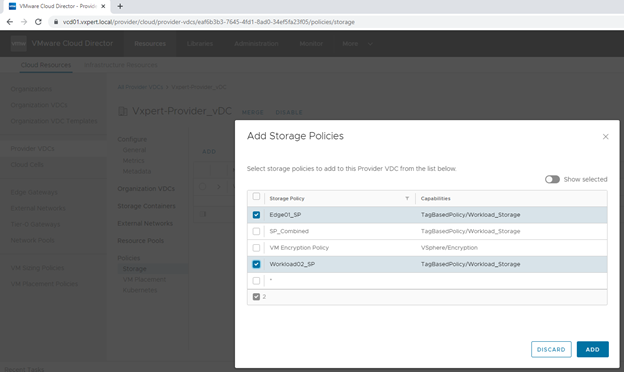
Same way adds the respective storage policies as well to the provider vDC
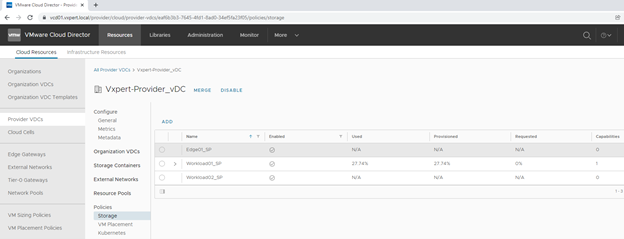
Once finish you can see two workload cluster and one edge cluster storage policy is added to your Provider vDC
Also, in NSX-V Transport Zone you can see new transport zone is added and all three cluster is part of same Transport Zone
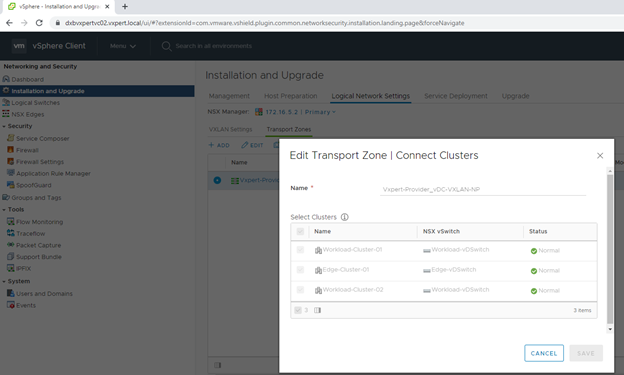

vCloud Director networking performance can benefit from having NSX Edge Gateways placed in specially configured edge clusters, designed to host Edge Gateways that provide connectivity between physical (VLAN) and virtual (VXLAN) networks. By default, organization VDC Edge Gateways are placed in the organization VDC’s System resource pool. This arrangement makes it difficult to create a VDC that provides the optimal environment for both vApp workloads and the Edge Gateways that connect those workloads to external networks.
To restrict the edge Gateway deployment in Edge Cluster we need to add the below Metadata in Provider vDC
placement.resourcepool.edge = resource-pool-Managed-Object-ID
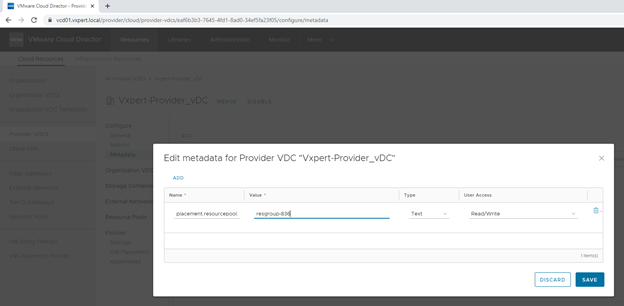

Note: – Resource Pool Object id can get from the vCenter URL by clicking the Edge Resource Pool

Note: – With this metadata in place, new Edge Gateways will always be created in that resource pool, and no other vApps will be placed there. Edge Gateways that were present in the organization VDC before the resource pool was added can be redeployed to place them in the resource pool
Now your Provider vDC is ready to Onboard Organization vDCs and there workloads
In upcoming blogs, we will discuss more on VMware vCloud Director. To make this vCD series more understandable, I am splitting this into multiple blogs
Part 1 – What is VMware vCloud Director
Part 2 – VMware vCloud Director Standalone Installation
Part 3 – VMware vCloud Director Installation with High Availability
Part 4 – VMware vCloud Director – Install and Configure RabbitMQ Cluster
Part 5 – VMware vCloud Director Cell Certificates & Load Balancing
Part 6 – VMware vCloud Director Cell Role Switchover
Part 7 – VMware vCloud Director Basic Configuration
Part 8 – VMware vCloud Director Org vDC Configuration
Part 9 – VMware vCloud Director Virtual Data Center
Part 10 – VMware vCloud Director Branding
Thanks,
If you have any comments, please drop me a line.
I hope this article was informative, and don’t forget to buy me a coffee if you found this worth reading.


Leave a Reply