To match your corporate branding standards and to create a fully custom cloud experience, you can set the logo and the theme for your VMware Cloud Director Service Provider Admin Portal and for the VMware Cloud Director Tenant Portal of each organization. In addition, you can modify and add custom links to the two upper right menus in the VMware Cloud Director portals.
Portal Branding
As part of the installation, VMware Cloud Director contains two themes – default and dark. You can create, manage, and apply custom themes. In addition, you can change the portal name, the logo, and the browser icon. In addition, the browser title adopts the portal name that you set.
You set the branding attributes at a system level, so that you customize the VMware Cloud Director Service Provider Admin Portal. The VMware Cloud Director Tenant Portal for each organization adopts the system branding attributes unless you configured branding attributes for the tenant.
For a particular tenant, you can selectively override any combination of the portal name, background color, logo, icon, theme, and custom links. Any value that you do not set uses the corresponding system default value
By default, the individual tenant branding is not shown outside of a logged in session. The individual tenant branding does not appear on login and logout pages, so that tenants cannot discover the existence of other tenants. You can enable branding outside of logged in sessions by using the cell management tool:
manage-config -n backend.branding.requireAuthForBranding -v false
Compared to the vCloud Director earlier version the HTML5 has more customization options like Logo, Icon and Theme. In this blog I am explaining how to customize the Logo, Icon and themes using API calls.
Access Token Authentication
GET API Version
Run the below API GET call using any API tool to get the supported API versions.
https://vcd-host/api/versions

identify the latest supported versions from the output. I am using vCloud cell with API version 34.0

POST API Sessions
Create a POST request with below URL and add below API version value in Header section
Also mention vCD admin login credentials in Authorization with Basic Auth type
https://vcd-host/api/sessions
Accept header: application/*;version=34.0


Note: – Make sure you are getting 200 OK Status in each API call, else please correct those.

Save Token
Note down the below values from previous POST call and using this token we can execute the future API calls.
x-vcloud-authorization
X-VMWARE-VCLOUD-ACCESS-TOKEN
Portal Name Branding
Run the below GET call to get the current portal branding configuration with the above saved Bearer Token values.
https://vcd-host/cloudapi/branding
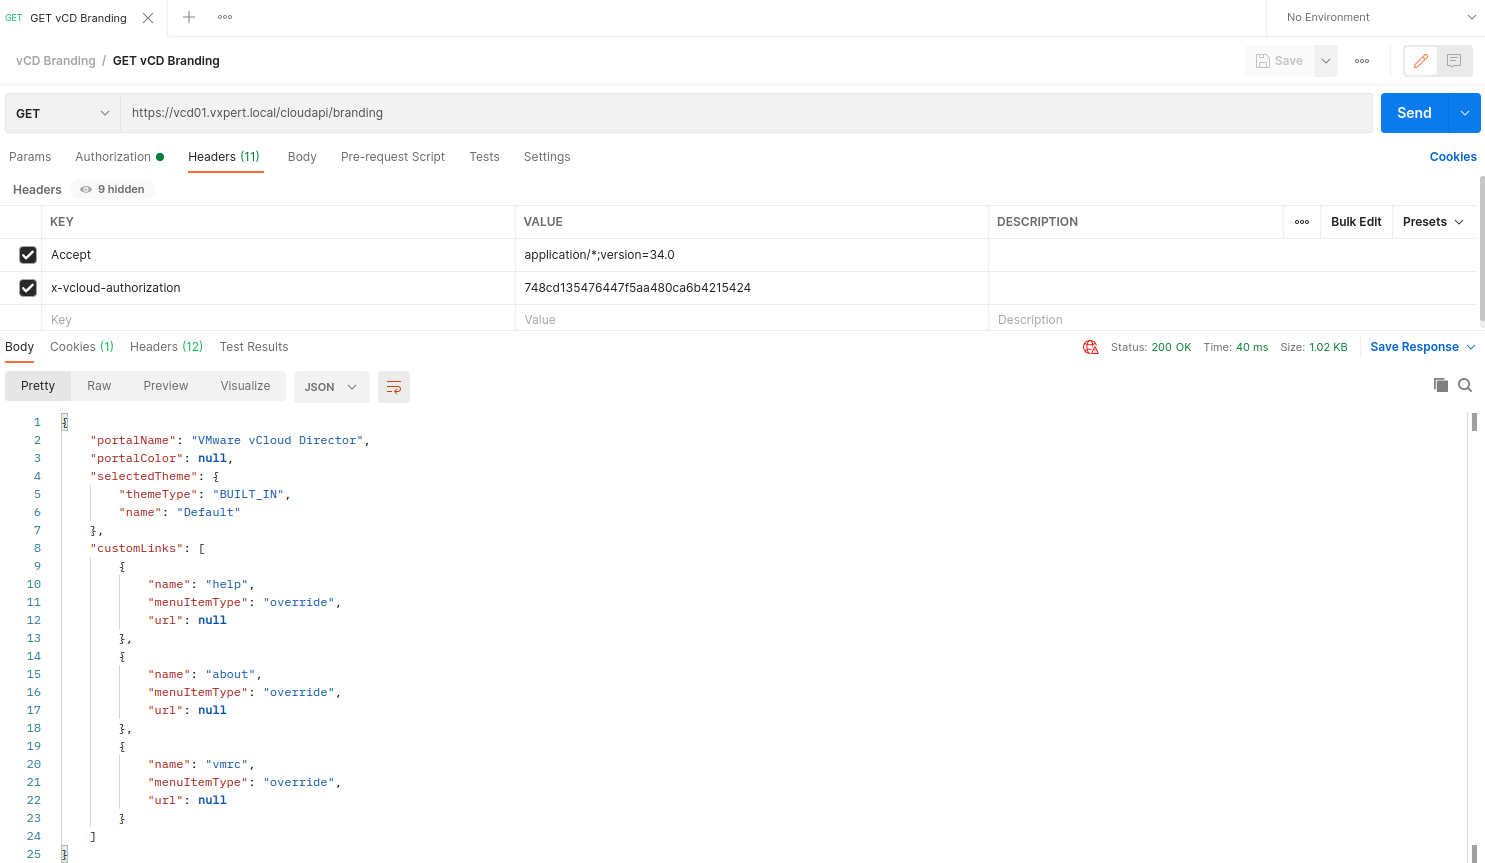

Copy output Body values and initiate a new PUT call to change the Name and update/create new custom links. Also please make sure you have same header values and bearer token in new API call as well. The Body values will be in raw – JSON format.
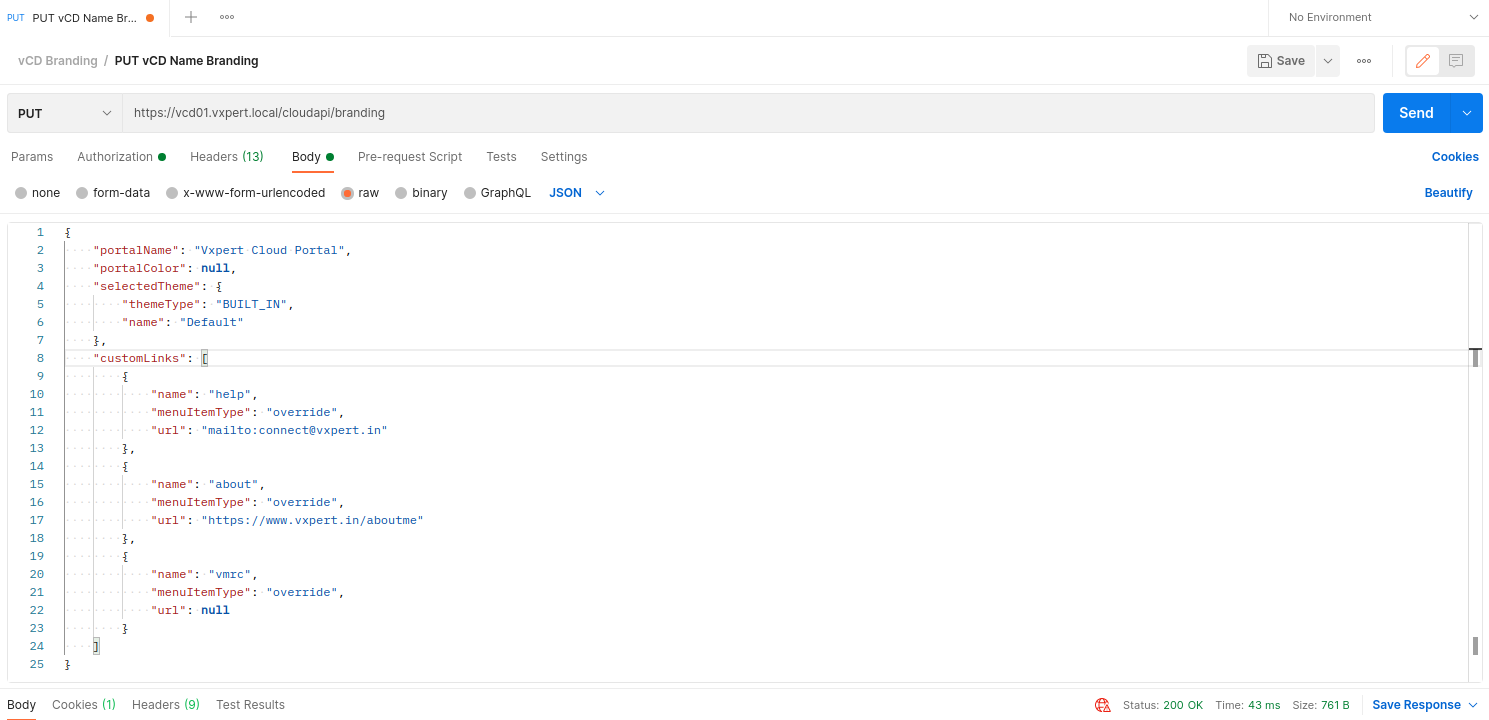
I have updated the body values for Portal Name, help & about custom link parameters. After successfully executing this call you can see your vCD provider and tenant login Portal Name and the updated custom links are changed.
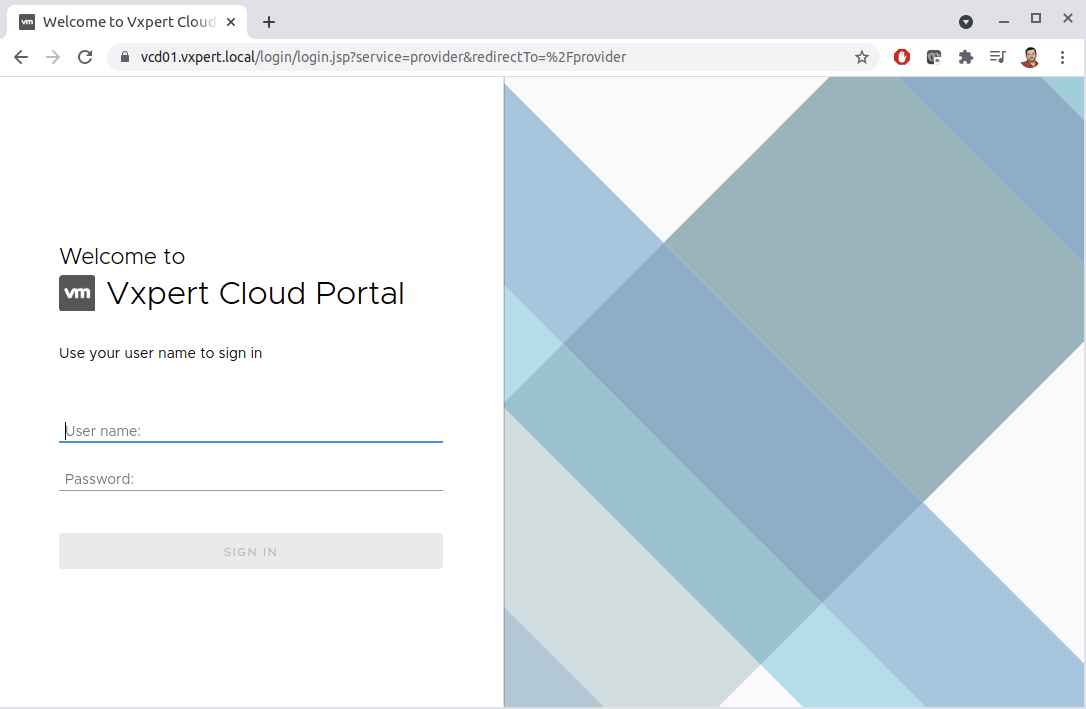
Portal Logo Branding
Run the below PUT call to update current portal system level logo with new one. Please provide the new logo file in Body by selecting binary option.
https://vcd-host/cloudapi/branding/logo

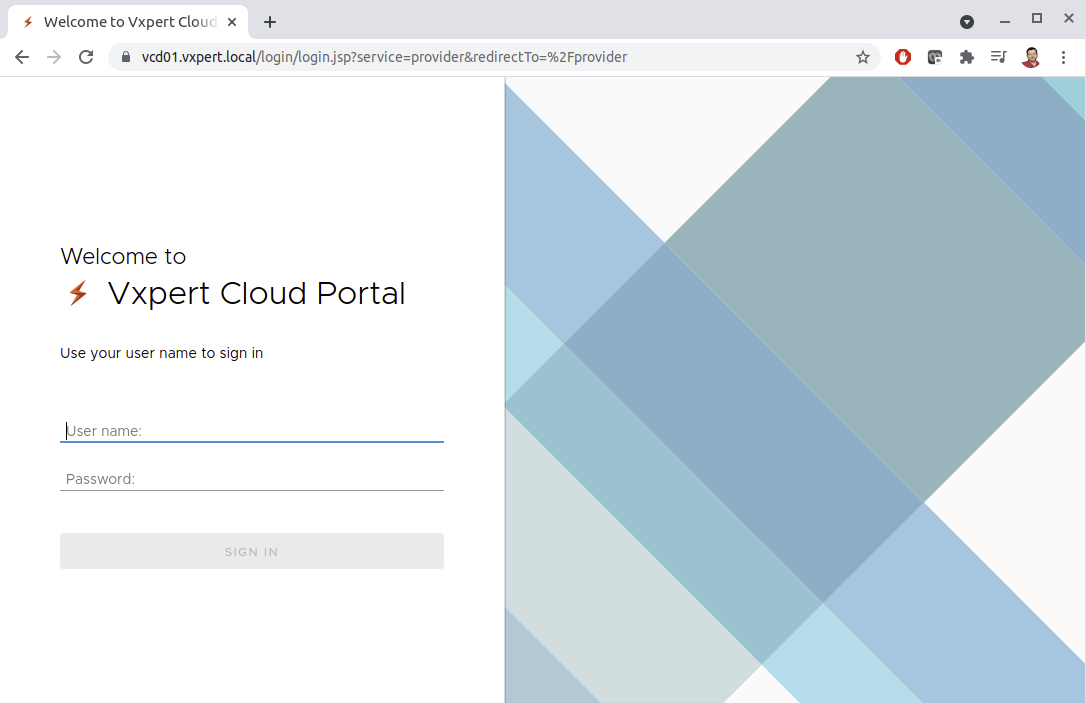

Portal Icon Branding
Run the below PUT call to update current portal system level browser icon with new one. Please provide the new icon file in Body by selecting binary option.
https://vcd-host/cloudapi/branding/icon


Portal Branding Themes
By default, vCloud Director has below two themes available inbuilt. To know the current themes available, you can run below GET call.
https://vcd-host/cloudapi/branding/themes
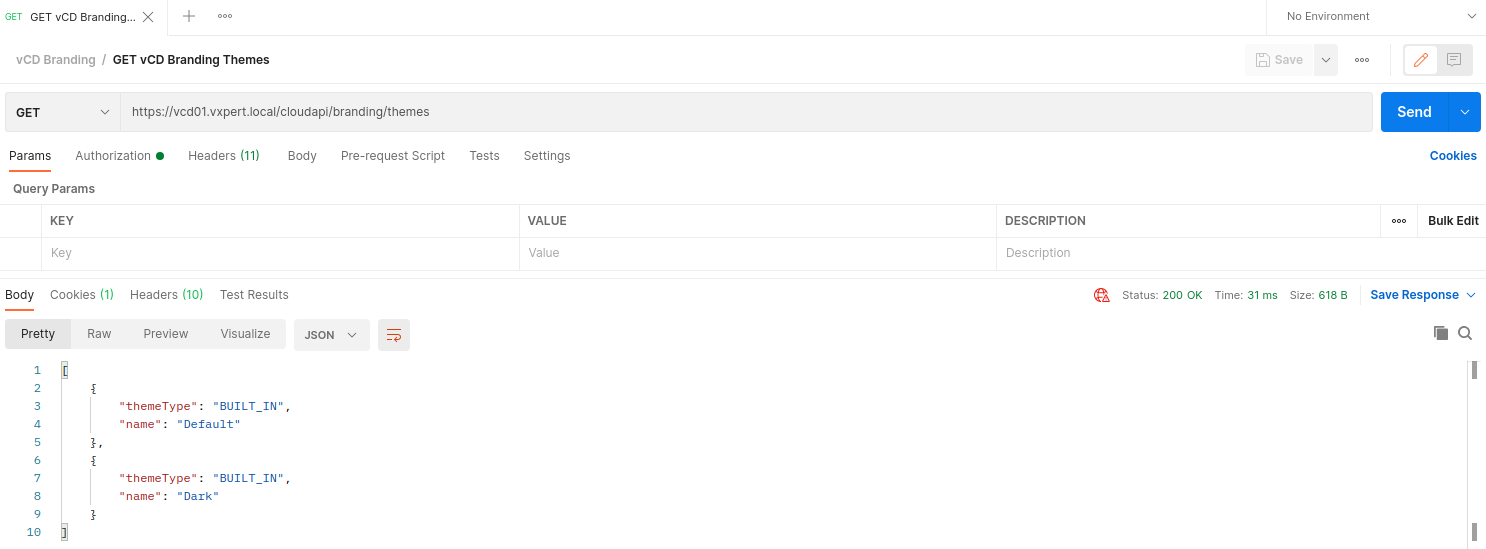
We can also enable the Dark theme as default by mentioning the theme name in Portal Name Branding Body which we executed before.
Also you can create new themes which respect your customization values. I will be explaining how to create a new theme and upload the contents by creating a CSS file.
Create New Theme
Run below POST call with the theme type and name parameters to create new theme.
https://vcd-host/cloudapi/branding/themes

After creating the theme, you can run a GET call with below to list the current themes details
https://vcd-host/cloudapi/branding/themes
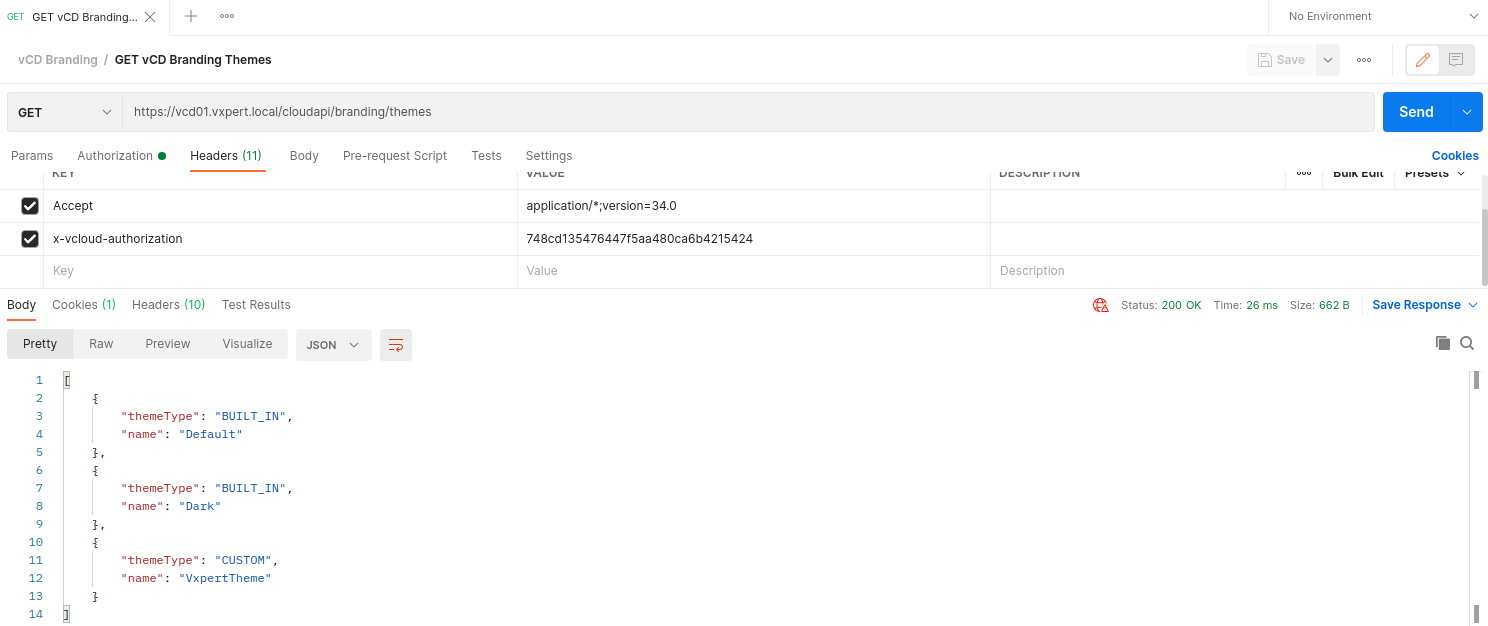
Now you have to create the contents for the theme that is basically the CSS file. I am not a guy from development background so what I did, o downloaded the existing theme-default.css or clarity-theme.css file from vCloud cell. My requirement was only to change the image hence it was easy for me to update the CSS file.

Open the CSS file and search for the login-wrapper section background URL field as below.

Now you have to convert your new image base64 format and replace the above URL contents and Save it. Also I have commented the background-position parameter to fix my image. This is something simple what I can do but if you want you can have lot more customization on your themes. Now your theme is ready with new image and ready to upload.
To initiate the content upload run the below API POST call with file name and actual size as body parameters.
https://vcd-host/cloudapi/branding/themes/VxpertTheme/contents
Once you execute above command you will get a link in the output to upload the CSS file.
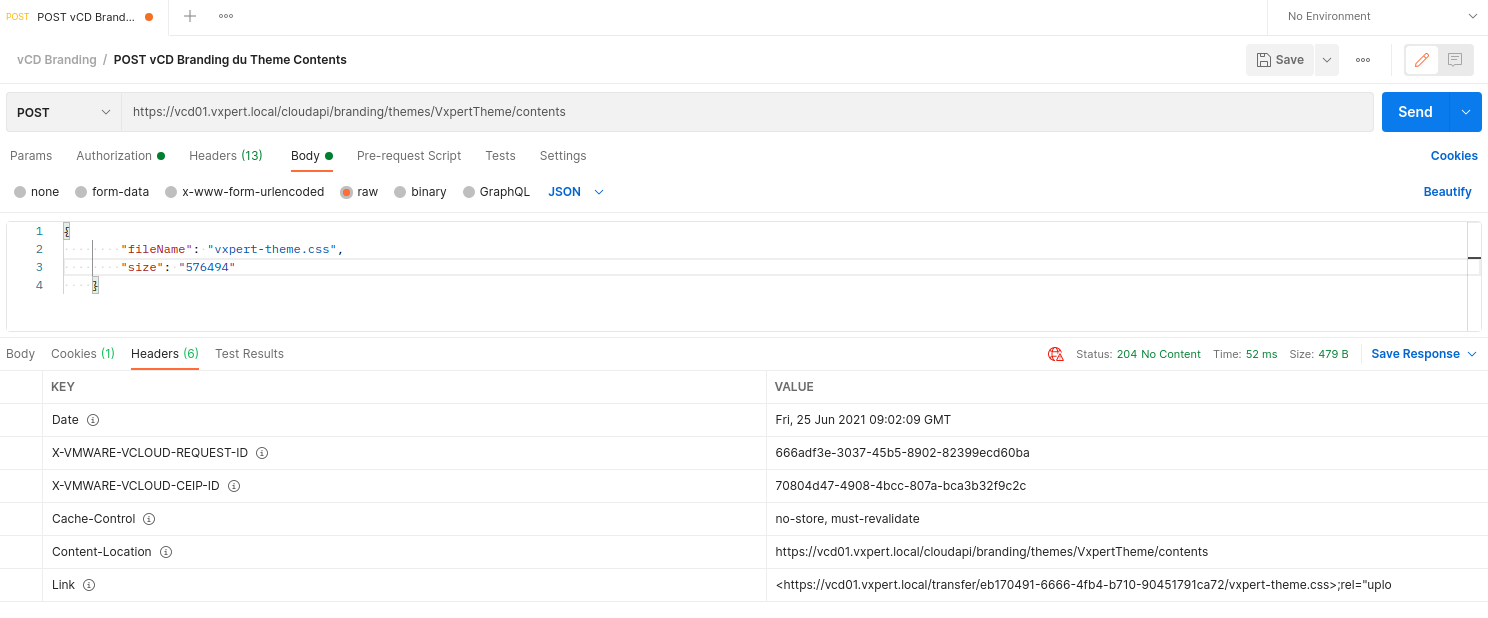
Initiate a PUT call with the above provided link and CSS file in Binary field. If you receive a 200 OK Status your CSS file is successfully uploaded.

Activate New Theme
To activate the uploaded theme run the below PUT call with newly created theme type and name
https://vcd-host/cloudapi/branding
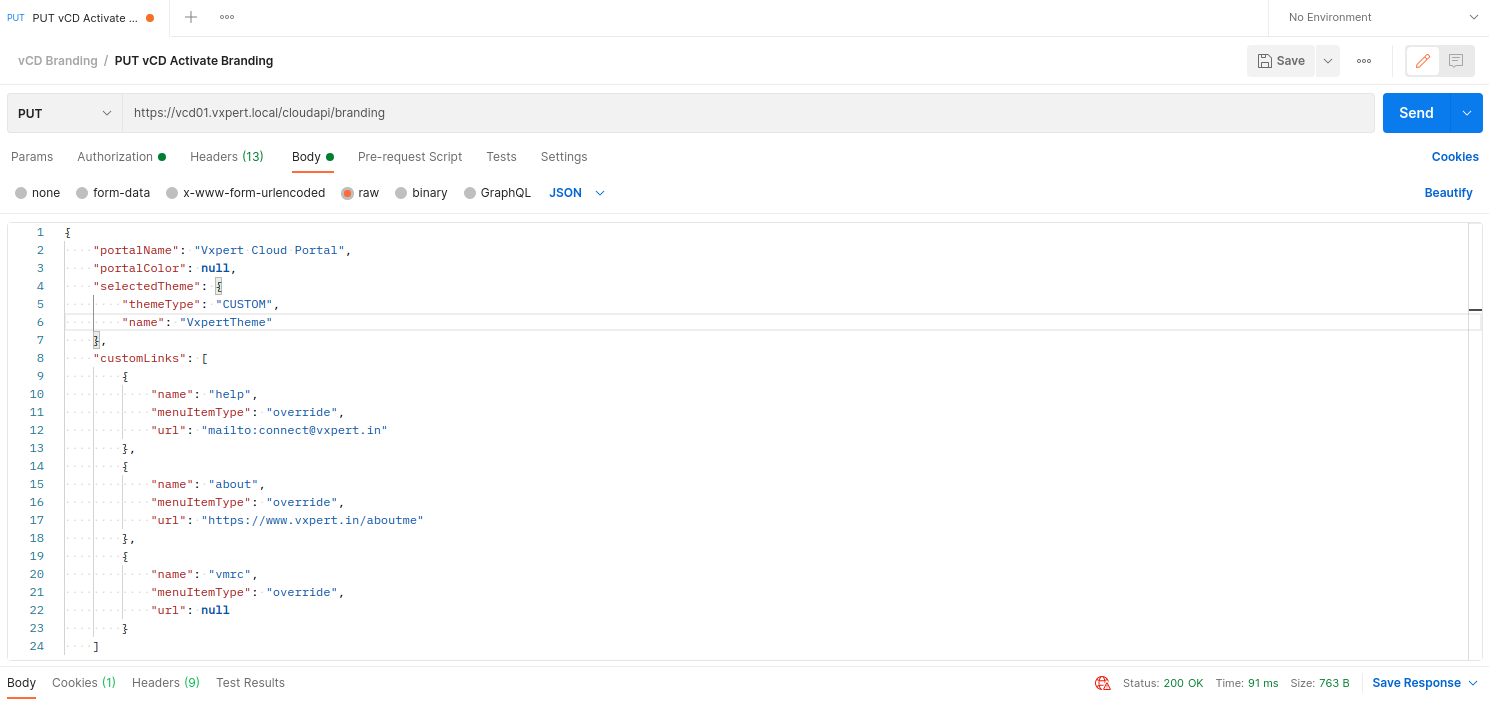
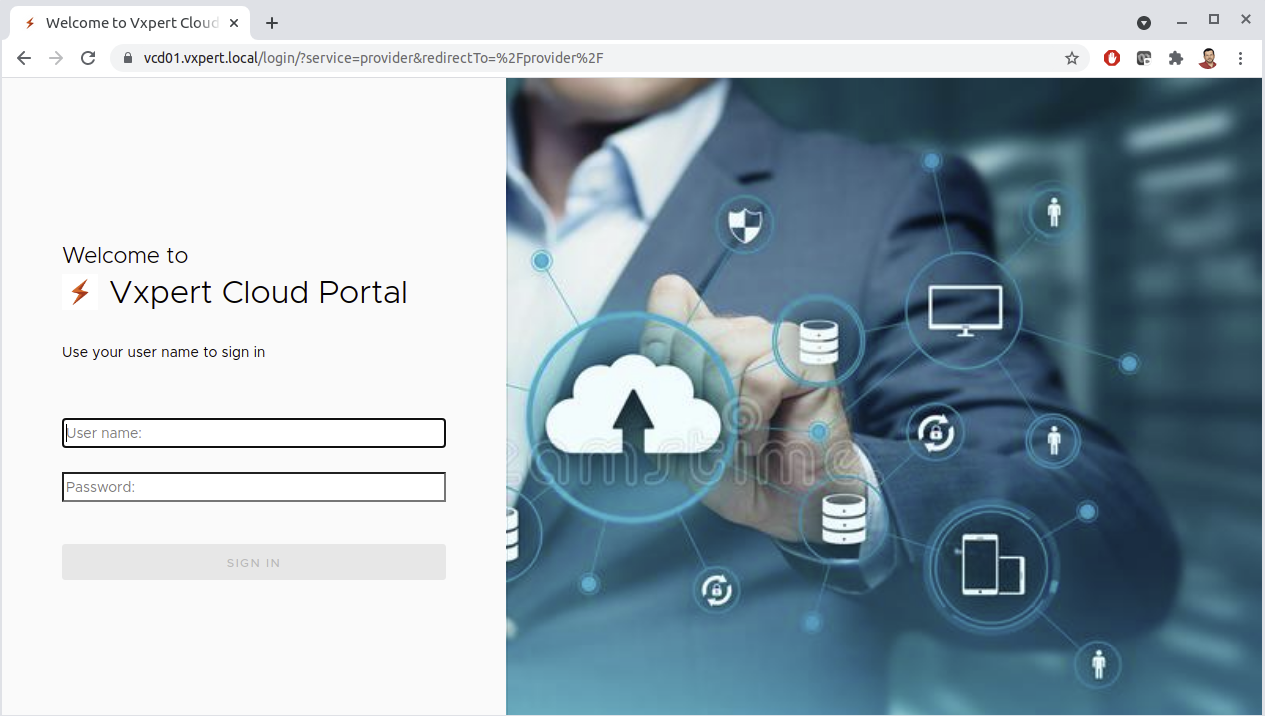
Once activated you can see the image in the provider and tenant login page.
Also please refer the below links for more documentation on vCloud Director branding
https://{vcd fqdn}/docs
With this blog I am concluding this vCloud Director series and hope this is helpful to you to understand, deploy and configure this solution.
Part 1 – What is VMware vCloud Director
Part 2 – VMware vCloud Director Standalone Installation
Part 3 – VMware vCloud Director Installation with High Availability
Part 4 – VMware vCloud Director – Install and Configure RabbitMQ Cluster
Part 5 – VMware vCloud Director Cell Certificates & Load Balancing
Part 6 – VMware vCloud Director Cell Role Switchover
Part 7 – VMware vCloud Director Basic Configuration
Part 8 – VMware vCloud Director Virtual Data Center
Part 9 – VMware vCloud Director Org vDC Configuration
Part 10 – VMware vCloud Director Branding
Thanks,
If you have any comments, please drop me a line.
I hope this article was informative, and don’t forget to buy me a coffee if you found this worth reading.


Leave a Reply