VMware vCloud Director (vCD) is deployment, automation, and management software for virtual infrastructure resources in multi-tenant cloud environments. VMware vCloud Director provides role-based access to a Web console that allows the members of an organization to interact with the organization’s resources to create and work with vApps and virtual machines.
In this blog we will do learn how to replace vCloud Director Cell self signed certificates to CA signed and How to configure vCloud Director Cell behind load balancer. I have already created a blog on vCloud Director deployment with Database high availability and please refer this before you start with clustered deployment.
vCloud Director Cell Certificates
Creating and importing certificates signed by a certificate authority (CA) provides the highest level of trust for SSL communications and helps you secure the connections within your cloud. Each vCloud Director server requires two SSL certificates to secure communications between clients and servers. Each vCloud Director server must support two different SSL endpoints – for HTTPS and for console proxy communications.
In the vCloud Director appliance, these two endpoints share the same IP address or hostname but use two distinct ports – 443 for HTTPS and 8443 for console proxy communications. Each endpoint must have its own SSL certificate. You can use the same certificate for both endpoints, for example, by using a wildcard certificate. Certificates for both endpoints must include an X.500 distinguished name and X.509 Subject Alternative Name extension
Prerequisites
- Create DNS entries for vCloud Director Load Balancer URL /Public URL

- Familiarize yourself with the keytool command. You use keytool to import CA-signed SSL certificates to the vCloud Director appliance. vCloud Director places a copy of keytool at /opt/vmware/vcloud-director/jre/bin/keytool.
Certificate Request & Replacement
You must create certificate request from each appliance for cell as well as console, please use below steps to create CSRs
Log in directly or SSH to the vCloud Director appliance console as root

Run the command to back up the existing certificates.ks file
#cp -v /opt/vmware/vcloud-director/certofocates.ks /root/

Run the command to create public and private key pairs for the HTTPS service and for the console proxy service
#/opt/vmware/vcloud-director/bin/cell-management-tool generate-certs -j -p -o /opt/vmware/vcloud-director/certificates.ks -w root_passwd

Create certificate signing requests (CSR) for the HTTPS service and for the console proxy service
Note: – The vCloud Director appliance shares the same IP address and hostname for both the HTTPS service and the console proxy service. Because of that, the CSR creation commands must have the same DNS and IPs for the Subject Alternative Name (SAN) extension argument.
Create a certificate signing request in the http.csr file
#cd /opt/vmware/vcloud-director/jre/bin/
#./keytool -keystore /opt/vmware/vcloud-director/certificates.ks -storetype JCEKS -storepass root_password -genkey -keyalg RSA -keysize 2048 -validity 1460 -certreq -alias http -file http.csr -ext "san=dns:dxbvxpertvcd01.vxpert.local,dns:dxbvxpertvcd01,ip:172.16.2.31"
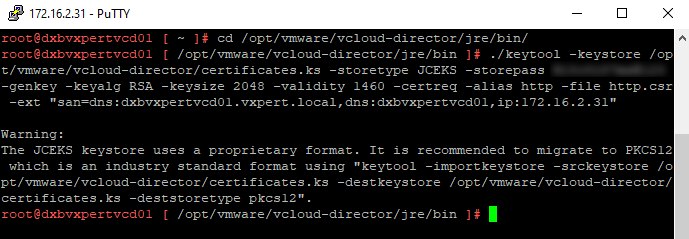
Create a certificate signing request in the consoleproxy.csr file
#./keytool -keystore /opt/vmware/vcloud-director/certificates.ks -storetype JCEKS -storepass root_password -genkey -keyalg RSA -keysize 2048 -validity 1460 -certreq -alias consoleproxy -file consoleproxy.csr -ext "san=dns:dxbvxpertvcd01.vxpert.local,dns:dxbvxpertvcd01,ip:172.16.2.31"
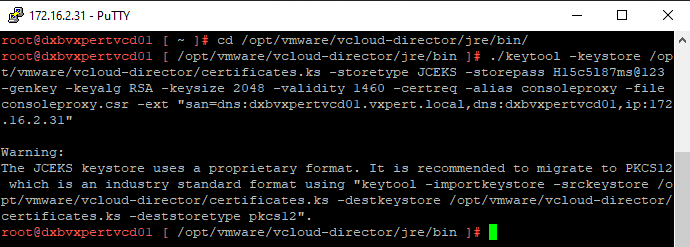
Send the certificate signing requests to your Certificate Authority. If your certification authority requires you to specify a Web server type, use Jakarta Tomcat.
Copy the CA-signed certificates, the CA root certificate, and any intermediate certificates to the vCloud Director appliance
Import the Certificate Authority’s root certificate from the root.cer file into the certificates.ks keystore file
#./keytool -import -storetype JCEKS -storepass root_password -keystore /opt/vmware/vcloud-director/certificates.ks -alias root -file root_certificate_file

This will ask you to trust the Root certificate, Type Yes and continue.

If you received intermediate certificates, import them from the intermediate.cer file to the certificates.ks keystore file.
#./keytool -import -storetype JCEKS -storepass root_password -keystore /opt/vmware/vcloud-director/certificates.ks -alias intermediate -file intermediate_certificate_file
Note: – As I do not have any intermediate CA skipping this part.
Import the HTTPS service certificate
#./keytool -import -storetype JCEKS -storepass root_password -keystore /opt/vmware/vcloud-director/certificates.ks -alias http -file http_certificate_file
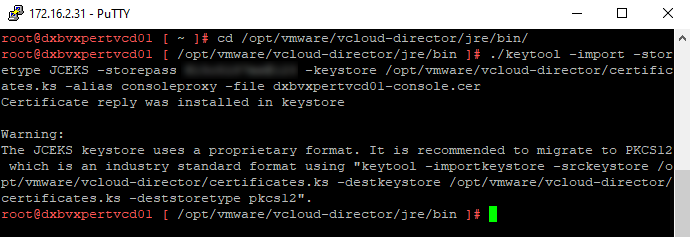
Import the console proxy service certificate
#./keytool -import -storetype JCEKS -storepass root_password -keystore /opt/vmware/vcloud-director/certificates.ks -alias consoleproxy -file console_proxy_certificate_file
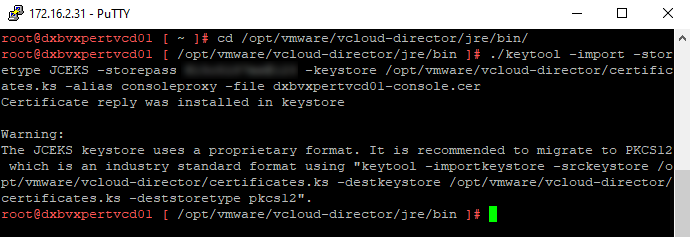
These commands overwrite the certificates.ks file with the newly acquired CA-signed versions of the certificates
To check if the certificates are imported, run the command to list the contents of the keystore file and review the fingerprints.
#./keytool -storetype JCEKS -storepass root_password -keystore /opt/vmware/vcloud-director/certificates.ks -list
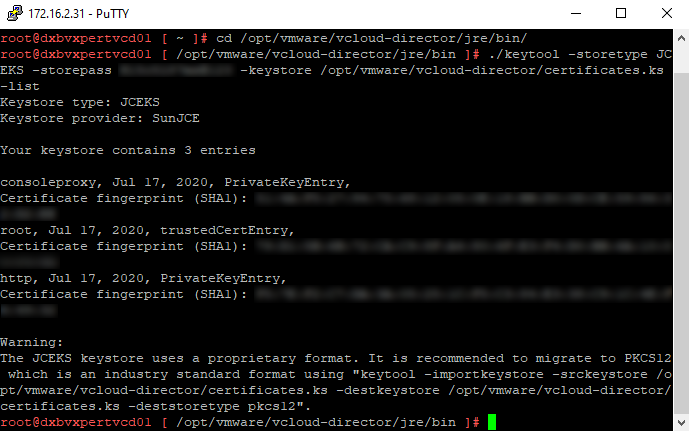
Run the command to import the certificates into the vCloud Director instance
#/opt/vmware/vcloud-director/bin/cell-management-tool certificates -j -p --keystore /opt/vmware/vcloud-director/certificates.ks --keystore-password root_password

Stop the vCD cell services by executing below command
#service vmware-vcd stop

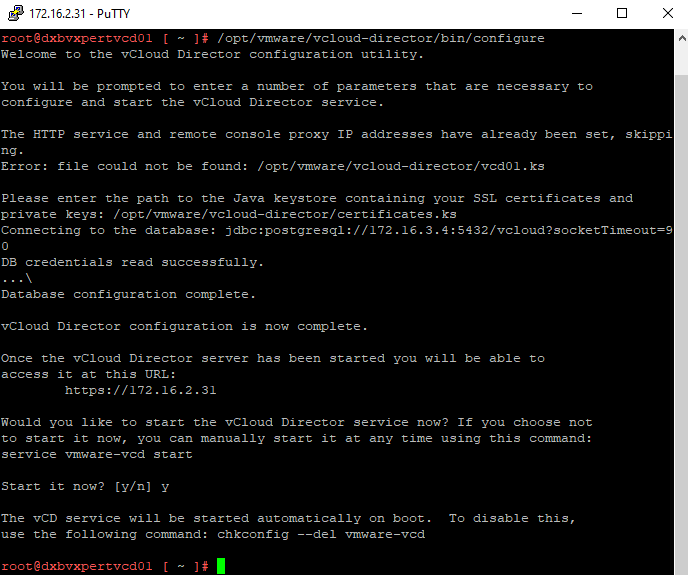
To reconfigure the vCD cell execute the below command and this will start the service also.
#/opt/vmware/vcloud-director/bin/configure
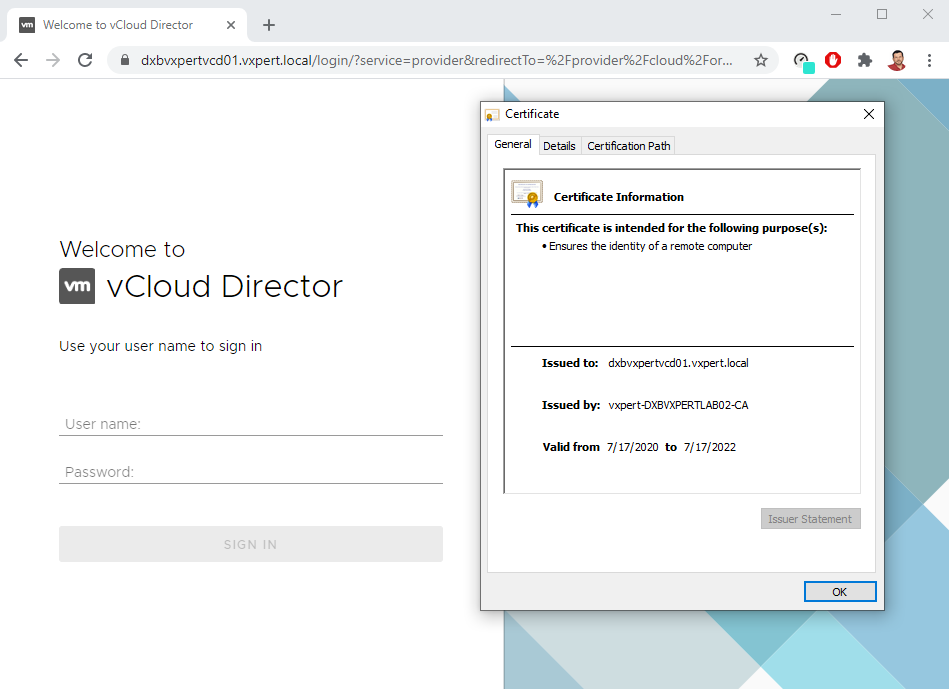
You can see the new signed certificate in vCD cell appliance URL also
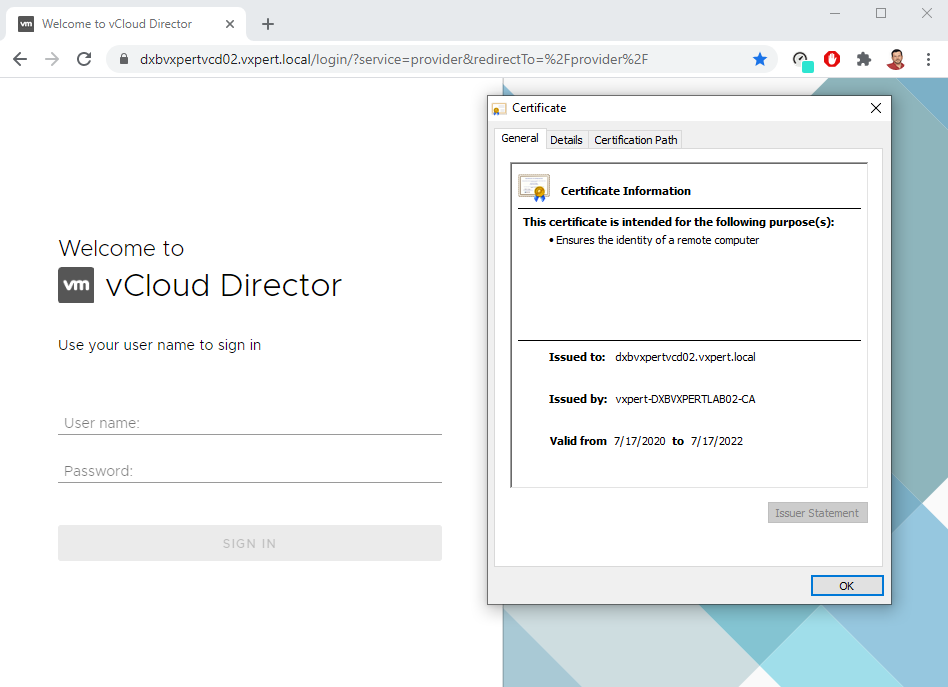
Now you have completed the first cell, so same way you must repeat in other vCD cell also except the last reconfigure command.
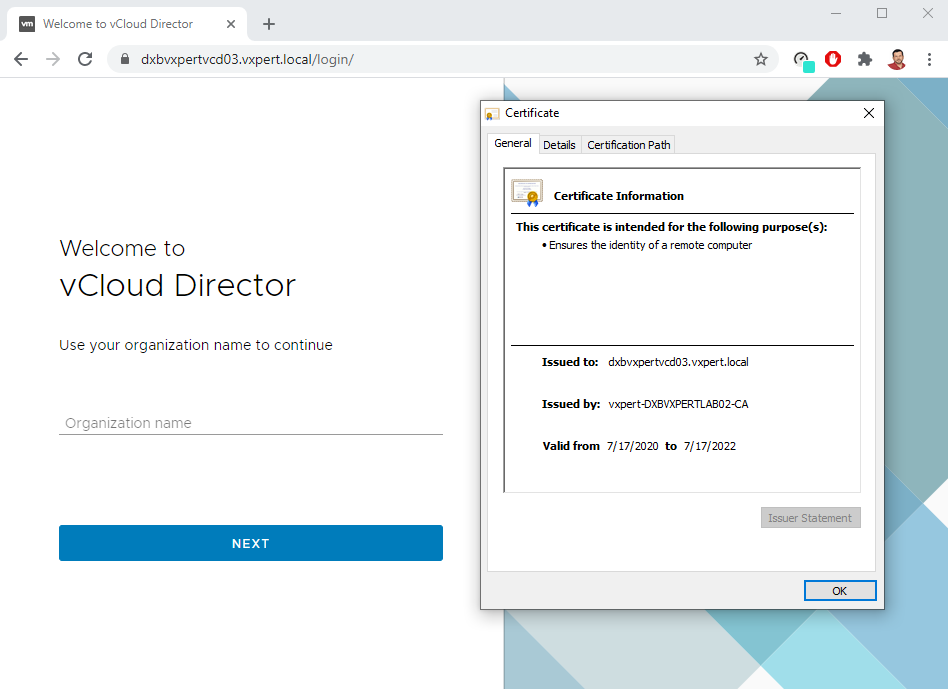
vCloud Director Public Address & Load Balancer Configuration
The load balancer distributes incoming service requests among multiple servers in such a way that the load distribution is transparent to users. Load balancing helps achieve optimal resource utilization, maximizing throughput, minimizing response time, and avoiding overload. Mostly NSX load balancer is used to load balance vCloud Director and it supports two load balancing engines. The layer 4 load balancer is packet-based and provides fast-path processing. The layer 7 load balancer is socket-based and supports advanced traffic management strategies and DDOS mitigation for back-end services. In this blog we will use KEMP load balancer to achieve the same.
To fulfill load balancer or proxy requirements, you can change the default endpoint Web addresses for the vCloud Director Web Portal, vCloud API, and console proxy. If you deployed the vCloud Director appliance, you must configure the vCloud Director public console proxy address, because the appliance uses a single IP address with custom port 8443 for the console proxy service
Before starting vCD configuration we will create a certificate request from Load Balancer for the vCD cells and get it signed from our CA. Provide the required details and click on Create CSR.
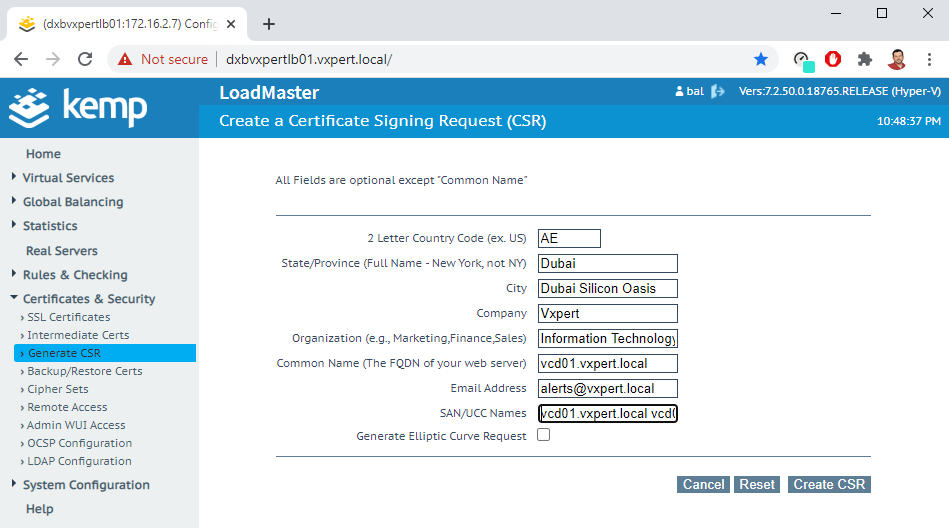
Sign the CSR created with your Certificate Authority and import it Load Balancer for configuration.
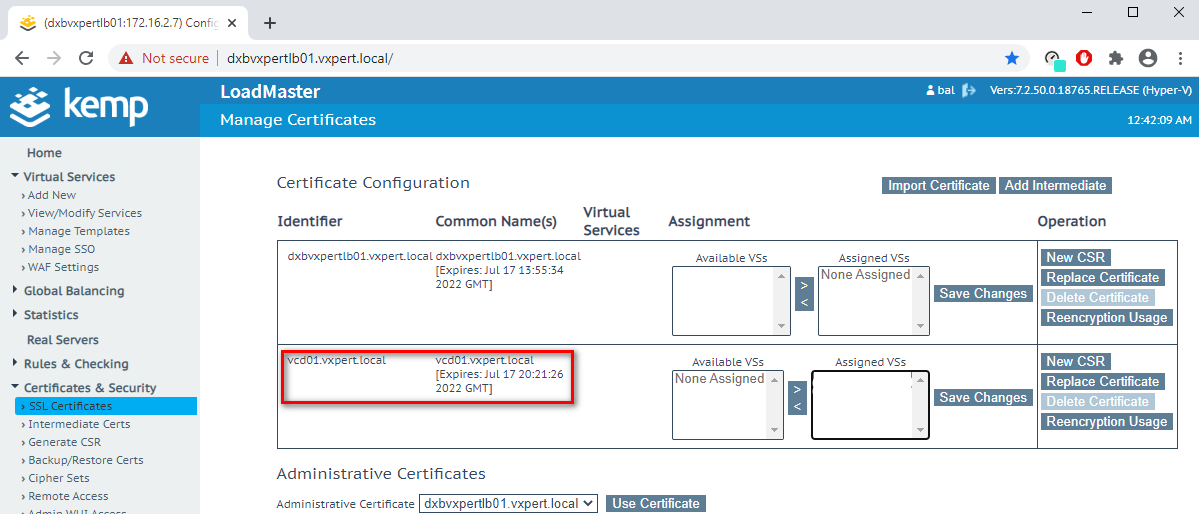
Note: – Concatenate all CA certificates (Signed + Intermediate CA + Root CA) to create the whole chain, and we will use this as PEM format in VCD GUI configuration
From the main menu, select Administration
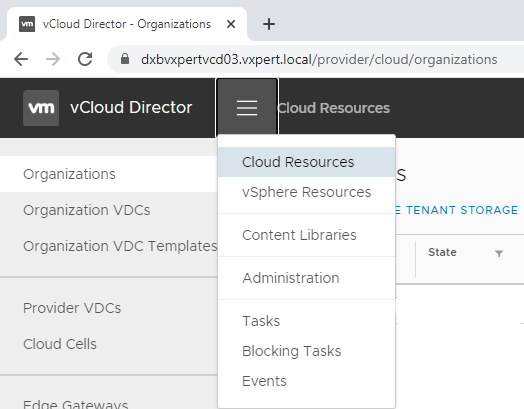
In the left panel, under Settings, click Public Addresses. Click Edit to customize the public endpoints.
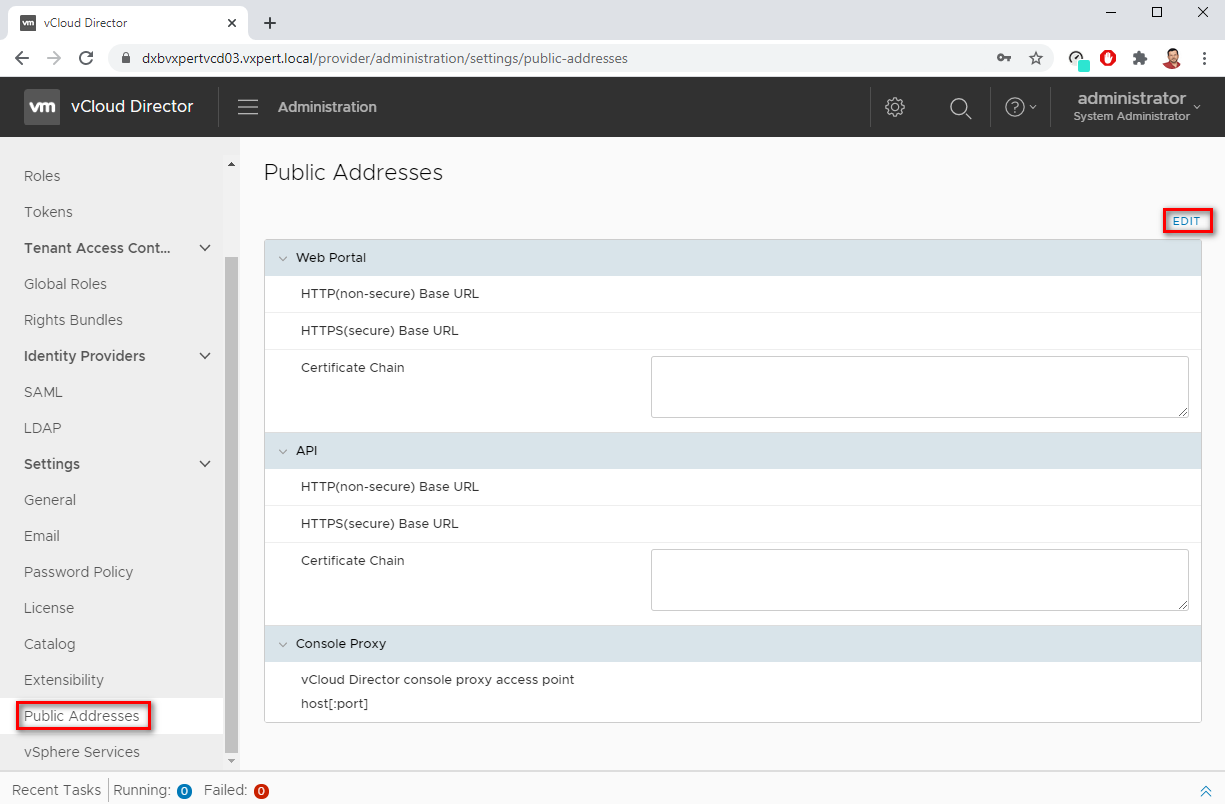
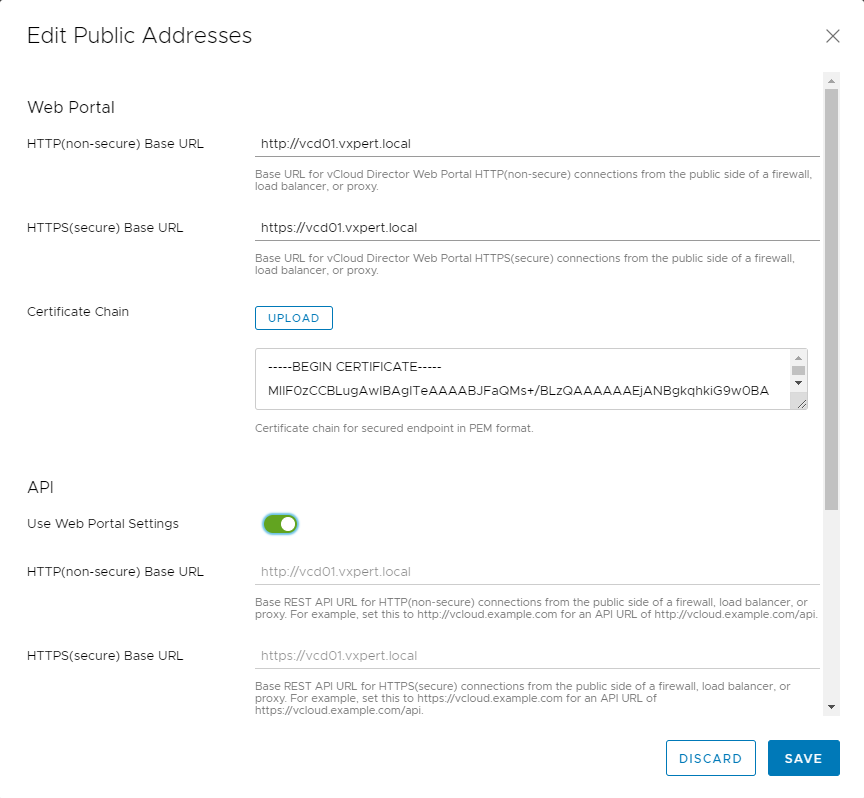
- Enter a custom vCloud Director public URL for HTTP (non-secure) connections.
- Enter a custom vCloud Director public URL for HTTPS (secure) connections and click Upload to upload the certificates that establish the trust chain for that endpoint, which we created before.
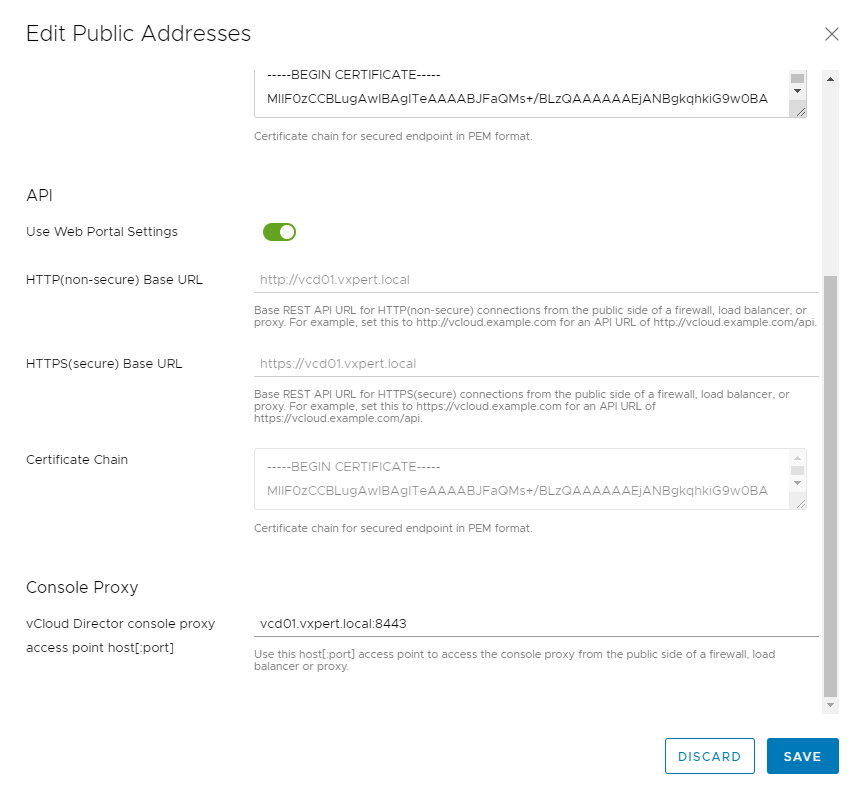
- To customize the vCloud REST API and OpenAPI URLs, turn off the Use Web Portal Settings toggle (Optional)
- Enter a custom vCloud Director public console proxy address. This address is the fully qualified domain name (FQDN) of the vCloud Director server or load-balancer with the port number. The default port is 443.
Note: – The vCloud Director appliance uses its eth0 NIC with custom port 8443 for the console proxy service
- To save your changes, click Save
Now you can see the vCD Public Address configuration as below
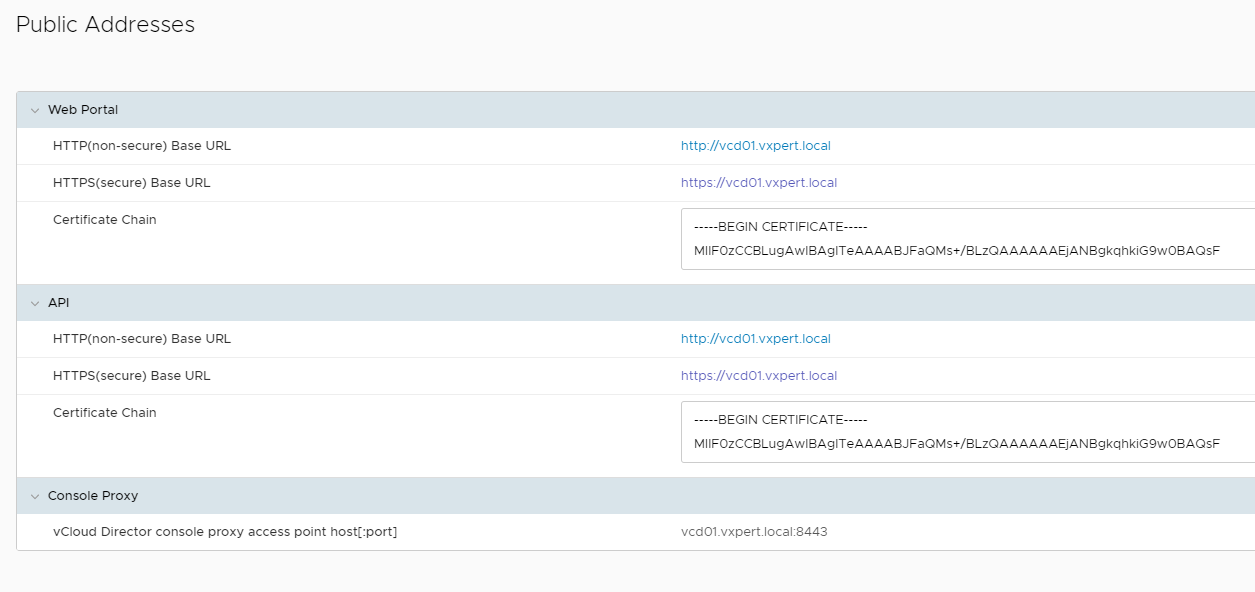
Once you complete vCD configuration, Add a Virtual Server in Load Balancer with VIP and respective port
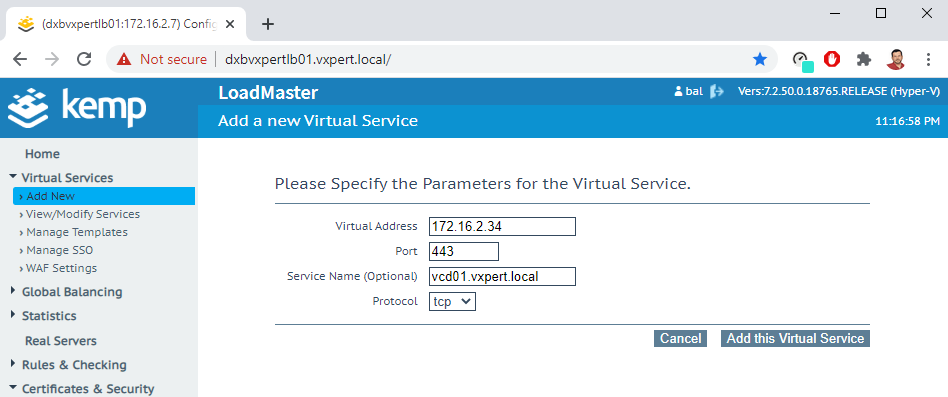
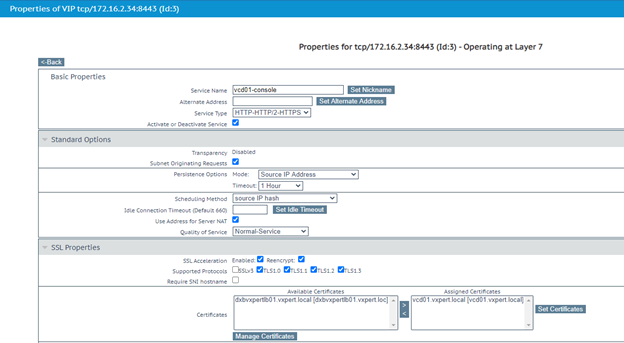
Configure the Virtual Server service name and service type
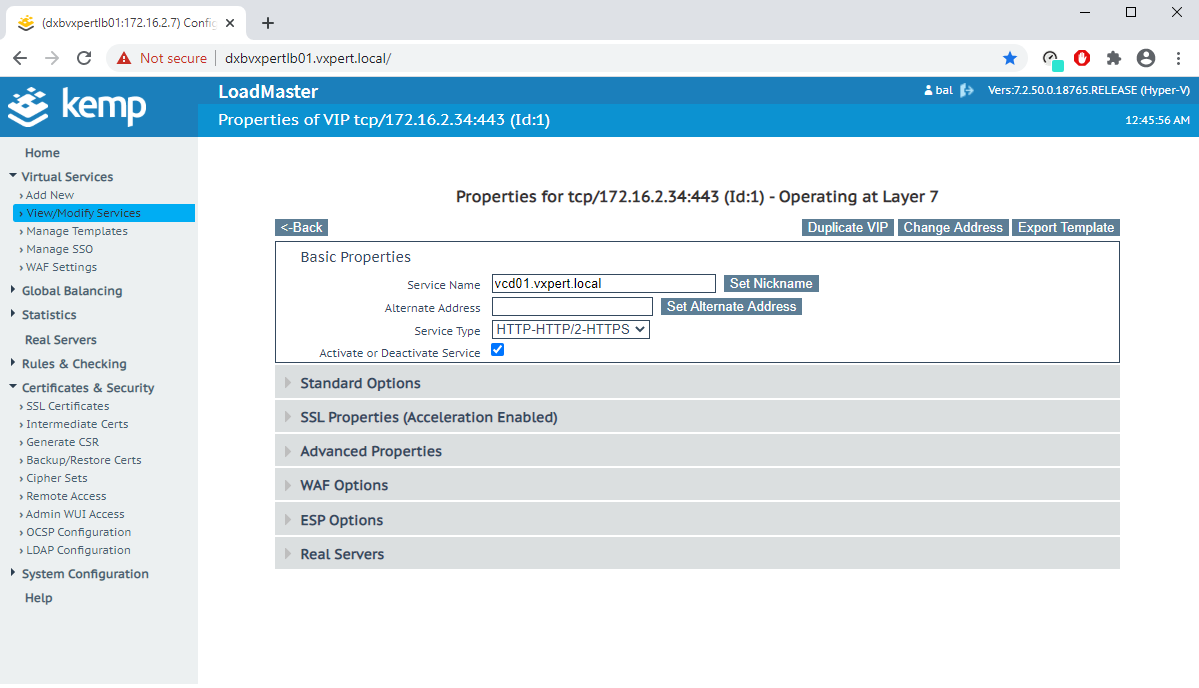
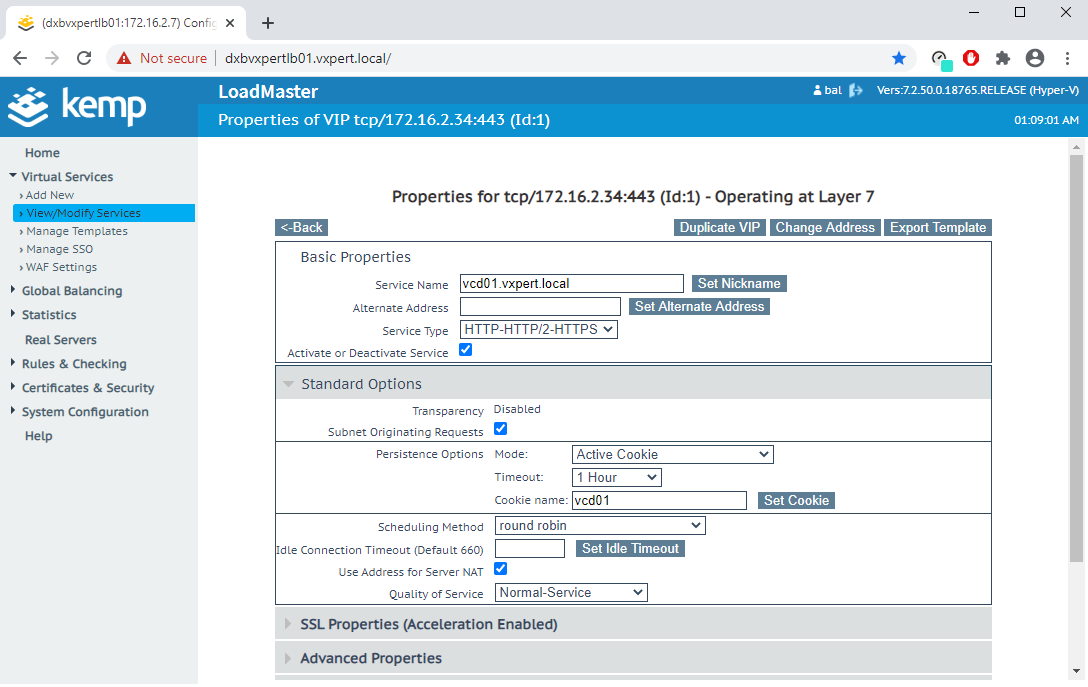
Configure Persistence and Scheduling options
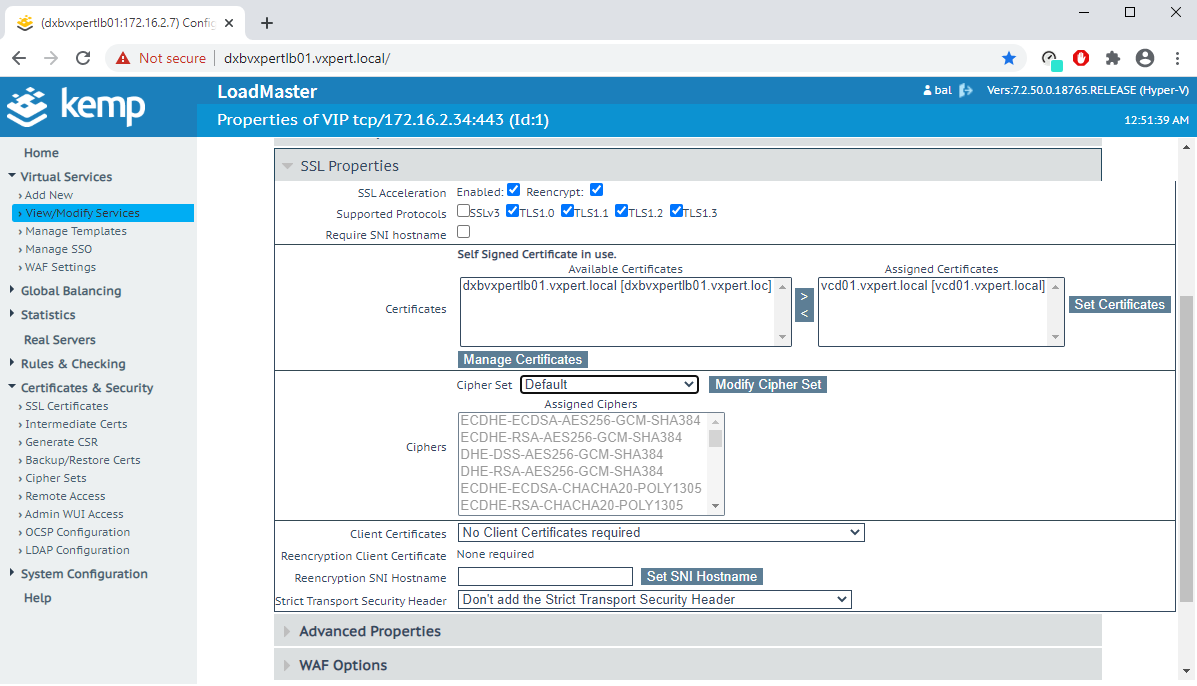
Configure SSL properties with Protocol, imported signed certificate, Cipher set etc
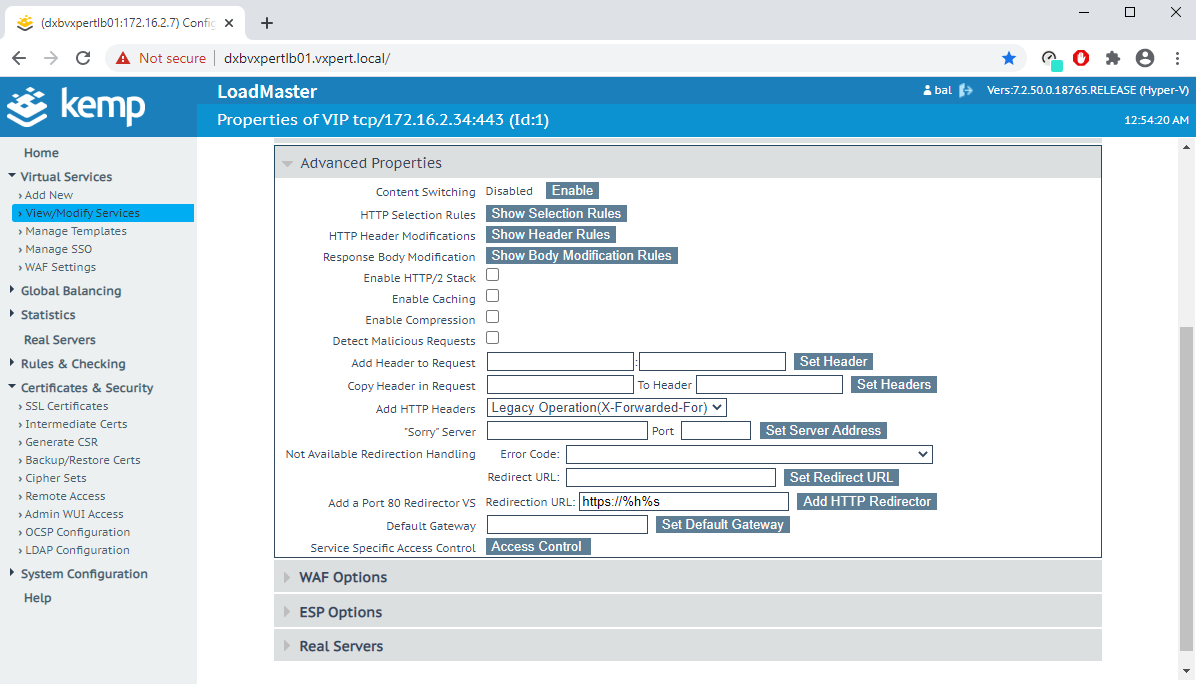
Add HTTP redirection in Advanced Properties
Add Real Server check details like URL, HTTP Method, FQDN or IP Address and Port etc.
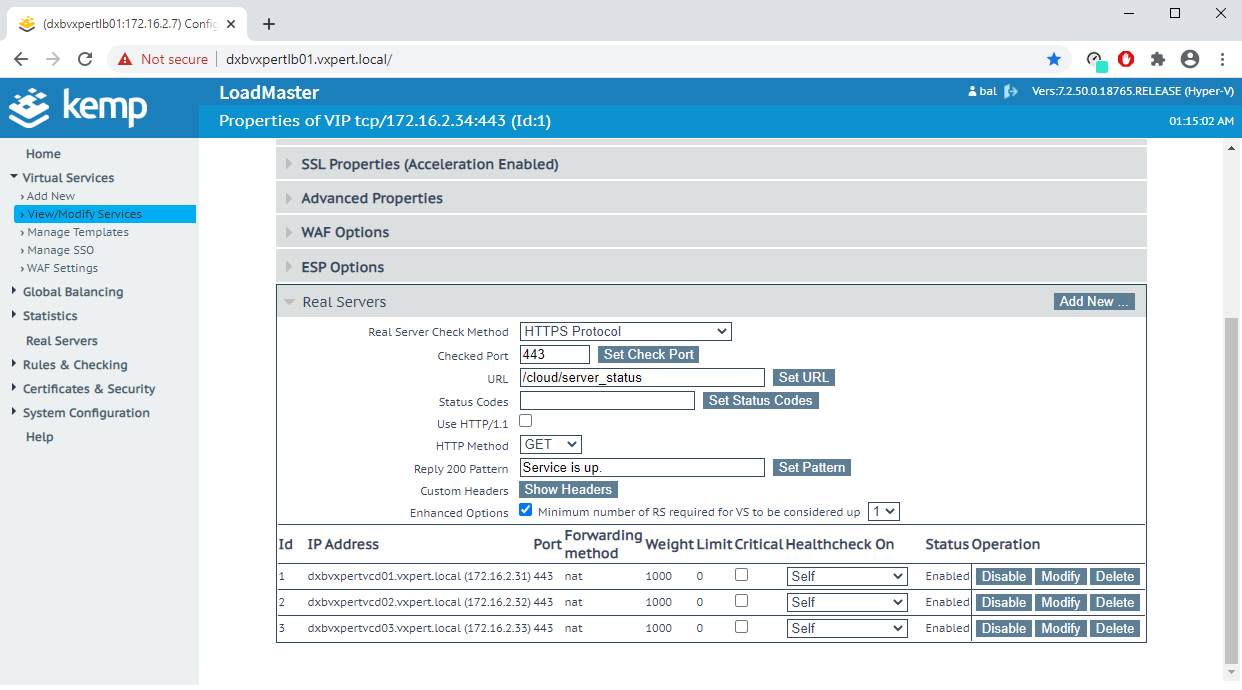
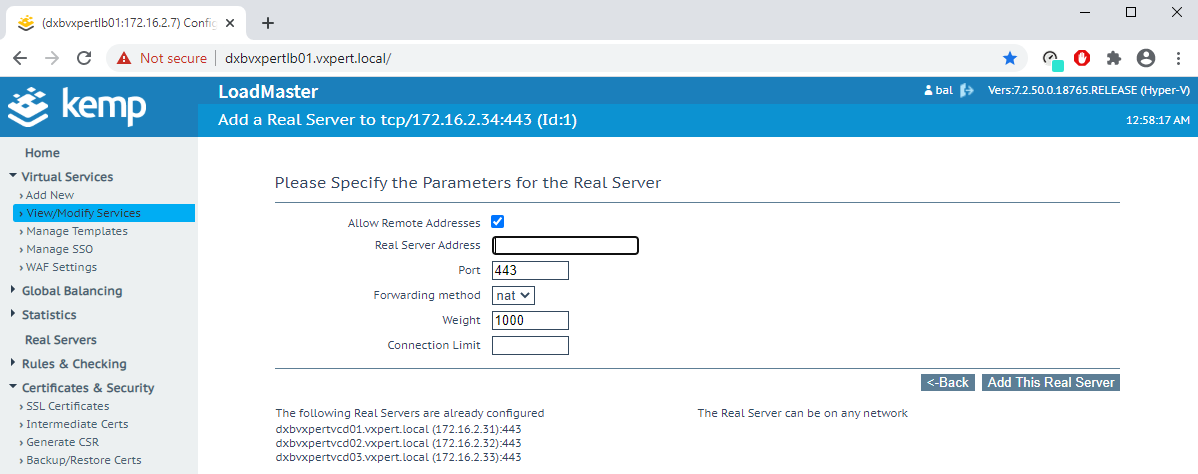
You can Add/Remove backend server details in modify Virtual server option or Add New in above screenshot.
We can also Enable/Disable backend Servers during maintenance windows or troubleshooting.

Once you complete the virtual server configuration you can see the status like below in Dashboard.

Same way creates one more profile for the console proxy URL with default 8443 port to open the Virtual machine console from vCloud Director

Now if you browse the Load Balancer Virtual Server URL, we can see the URL with certificate we provided, and request is serving from one of the backend servers. Also if you browse with HTTP, the request will be automatically redirected to HTTPS
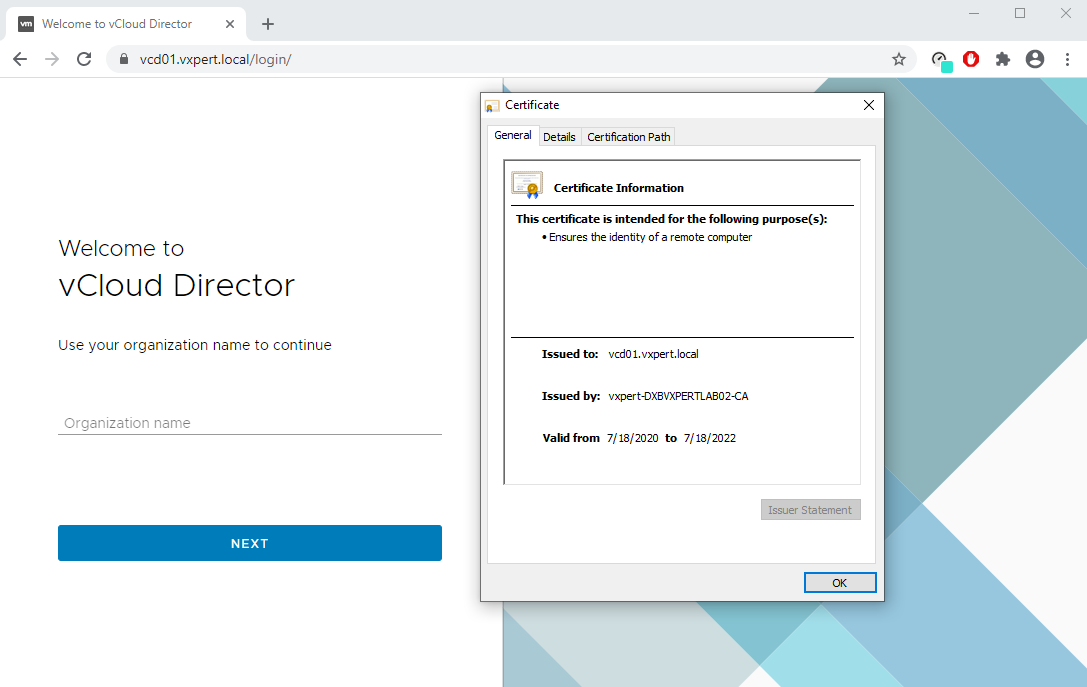
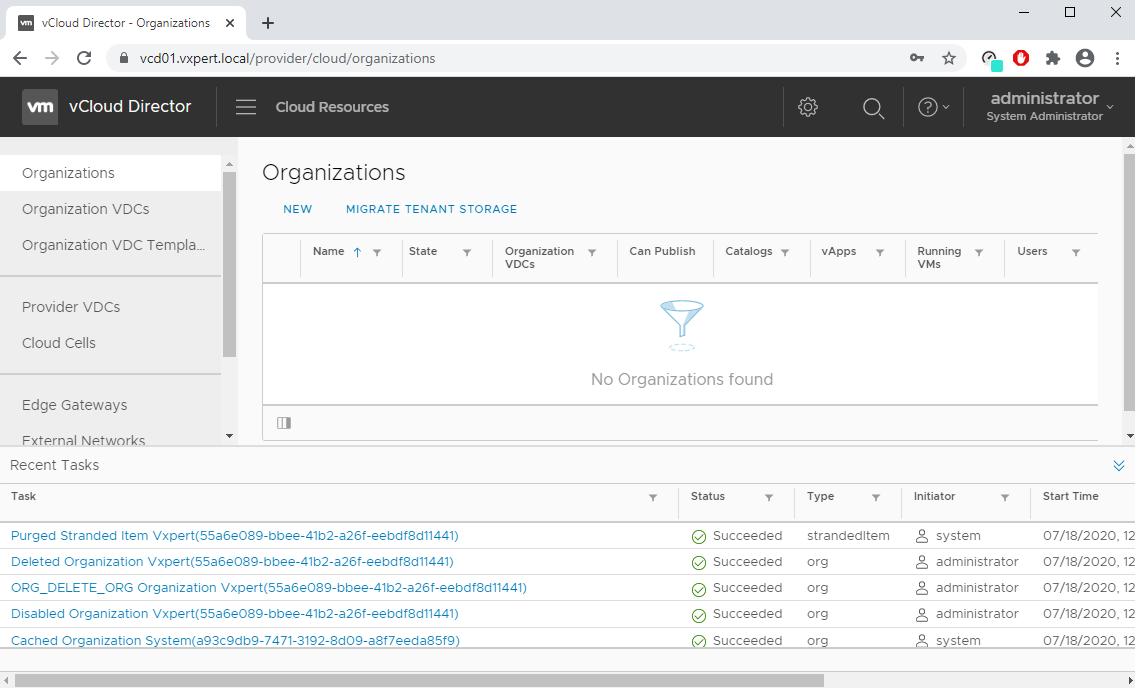
Note: – After configuring public URL, vCD cell URL was not working and I resolved same with VMware KB
In upcoming blogs, we will discuss more on VMware vCloud Director. To make this vCD series more understandable, I am splitting this into multiple blogs
Part 1 – What is VMware vCloud Director
Part 2 – VMware vCloud Director Standalone Installation
Part 3 – VMware vCloud Director Installation with High Availability
Part 4 – VMware vCloud Director – Install and Configure RabbitMQ Cluster
Part 5 – VMware vCloud Director Cell Certificates & Load Balancing
Part 6 – VMware vCloud Director Cell Role Switchover
Part 7 – VMware vCloud Director Basic Configuration
Part 8 – VMware vCloud Director Org vDC Configuration
Part 9 – VMware vCloud Director Virtual Data Center
Part 10 – VMware vCloud Director Branding
Thanks,
If you have any comments, please drop me a line.
I hope this article was informative, and don’t forget to buy me a coffee if you found this worth reading.


Leave a Reply